AWS Cloud Monitoring connector
Use the AWS Cloud Monitoring connector to collect metrics from single AWS account or from multiple linked AWS accounts. After setting up the AWS Cloud Monitoring connector, you can monitor Amazon CloudWatch metrics for your AWS services in a single account or across multiple linked accounts.
The AWS Cloud Monitoring connector collects CloudWatch metrics for commonly used AWS services and infrastructure resources.
Services: EC2, EBS, Lambda, S3, ECS, and DynamoDB
Common metrics: CPU utilization, network utilization, and EBS Storage I/O
The metrics available depend on your configured AWS permissions and the services running in the connected accounts.
Before you begin
Virtana Service Observability uses either an AWS Identity and Access Management (IAM) role or an AWS access key to gain access to your AWS account. To enable access with an IAM role, first create the role in AWS and have its Amazon Resource Name (ARN) ready. You can create the role from the AWS Configurations section of the ADD CONNECTOR dialog box.
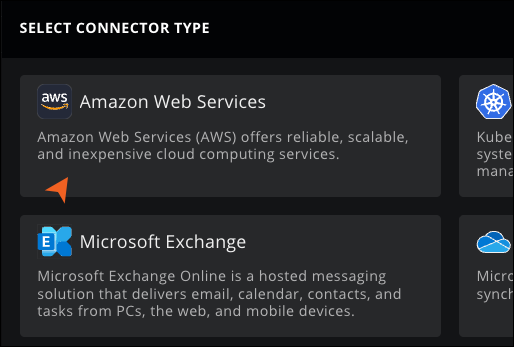
The connector-aws feature must be enabled in your environment before you can add an AWS Cloud Monitoring connector. If the Amazon Web Services card doesn't appear on the SELECT CONNECTOR TYPE dialog box, contact Virtana support.
Configure authentication
Configure authentication to permit Virtana to read AWS monitoring data (for example, CloudWatch metrics) from your AWS account. Without authentication, Virtana can’t connect to AWS or collect metrics. Choose IAM Role for secure, role-based access or an Access Key to authenticate using credentials stored in Virtana’s Credential Store.
Use IAM role authentication when you want role-based access to AWS without storing long-lived access keys directly in the connector.
Perform the following steps to update the Add Connector if you select IAM role for authentication:
In the Add Connector window, select IAM Role under the AWS Authentication Parameters section.
Enter the IAM Role ARN from the AWS console.
Copy the pre-filled Virtana Account ID and Role Name if you need them during AWS setup.
(Optional) If required by your organization, use the recommended CloudFormation-based setup in AWS to create or validate the role and trust relationship.
Test and save the connector.
Tip
IAM role-based authentication is the recommended option for secure, role-based access and easier administration across multiple AWS accounts.
Use access key authentication when you want the connector to use an AWS credential saved in the Credential Store.
Perform the following steps to update the Add Connector if you select Access Key for authentication:
In the Add Connector window, select Access Key under the AWS Authentication Parameters section.
Choose an existing AWS credential from the Credential Store, or create a new one.
When creating a new credential, provide the required AWS values for clientKey, clientSecret, and accountId.
Save the credential, then select it for the connector.
Test and save the connector.
Note
AWS access key authentication does not require you to enter the raw key values directly in the connector each time. Instead, the connector uses the selected AWS credential from the Credential Store.
Set up an AWS Cloud Monitoring connector
Add the AWS Cloud Monitoring connector to connect Virtana Service Observability can connect to your AWS account and collect CloudWatch-based metrics for AWS services, especially in single-account or multi-account AWS environments.
Perform the following steps to add the connector:
Log in to Virtana Service Observability as a user with the Manager role, and then open the Admin > Connectors page.
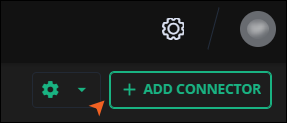
Click Add Connector.
On the SELECT CONNECTOR TYPE dialog box, click the Amazon Web Services card.
The ADD CONNECTOR dialog box opens.
Enter the basic connector details requested by the dialog.
(Optional) If you authenticate with an IAM role and haven't created that role in AWS, use the AWS Configurations section to create or validate it. Click to run the CloudFormation script.
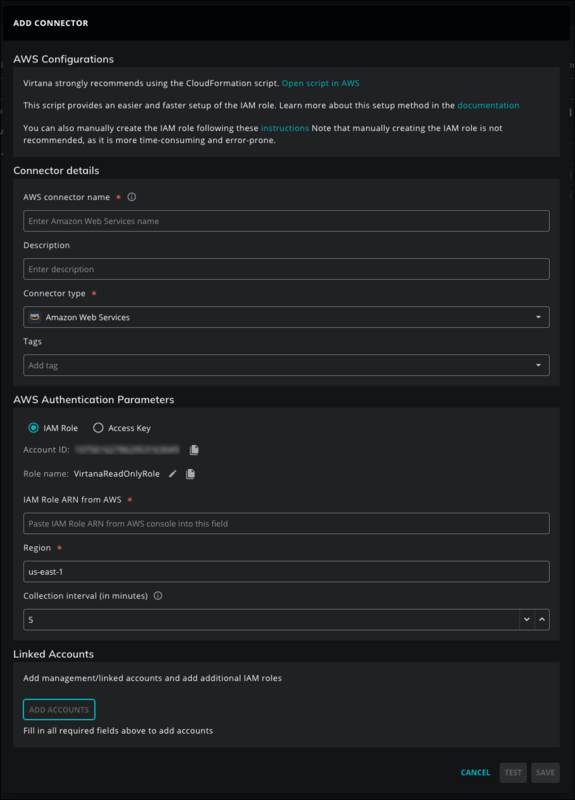
In the Connector details section, add the following information about your AWS account:
In the AWS connector name field, enter a unique name for your AWS connector.
(Optional) In the Description field, enter text to associate with your AWS connector.
Keep the Connector type as Amazon Web Services.
(Optional) In the Tags field, enter one or more terms to associate with your AWS connector.
In the AWS Authentication Parameters section, add the connection information:
Select IAM Role or Access Key, and then complete the fields for the method you select.
In the Region field, enter the AWS region to collect metrics from.
Set the Collection interval (in minutes).
(Optional) To monitor more than one AWS account with this connector, click in the Linked Accounts section. If you selected Access Key authentication, this section is labeled Accounts. For more information, see Add linked AWS account.
Click to test your configuration before saving. A success or error message appears.
Click .
You can create a dashboard from an AWS template after configuring authentication and saving a successful connection, Creating dashboards.
Add linked AWS accounts
You can extend the connector to monitor additional AWS accounts. This is useful for organizations that use AWS Organizations or separate accounts for business units, environments, or regions.
To add linked accounts, click in the Linked Accounts section of the ADD CONNECTOR dialog box. If the connector uses Access Key authentication, this section is labeled Accounts. The ADD AWS ACCOUNT dialog box opens, where you select Bulk or Manual mode. The Account Details section at the top of the dialog box shows the Account ID and Role Name values.
Note
The authentication method you select for the connector determines which modes are available in the ADD AWS ACCOUNT dialog box. Bulk mode, which uses AWS StackSets, appears only when the connector uses IAM Role authentication. If the connector uses Access Key authentication, only Manual mode is available.
Bulk mode adds many linked accounts at once through a guided AWS StackSets workflow. Bulk mode is available only when the connector uses IAM Role authentication. Use bulk mode when you manage accounts through AWS Organizations and want Virtana Service Observability to discover them for you.
Perform the following steps:
On the ADD AWS ACCOUNT dialog box, select Bulk.
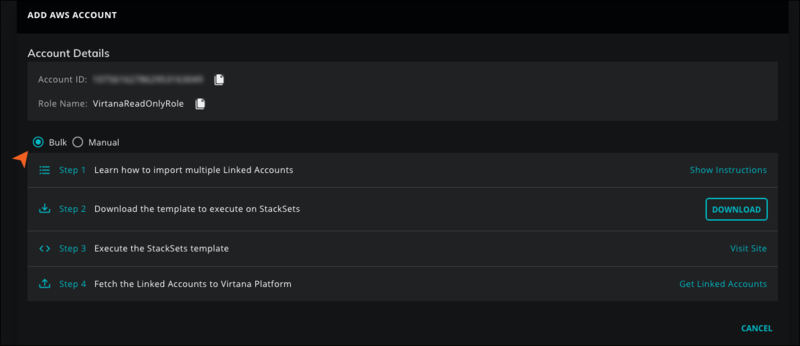
Follow the four-step StackSets wizard:
Review the instructions.
Download the template.
Execute the StackSets deployment in AWS.
Fetch the linked accounts into the connector.
After the accounts are fetched, review the discovered entries and save your changes.
Use manual mode when you want to add accounts one by one. Manual mode is available with both IAM Role and Access Key authentication.
Perform the following steps:
On the ADD AWS ACCOUNT dialog box, select Manual.
A Linked account panel opens.
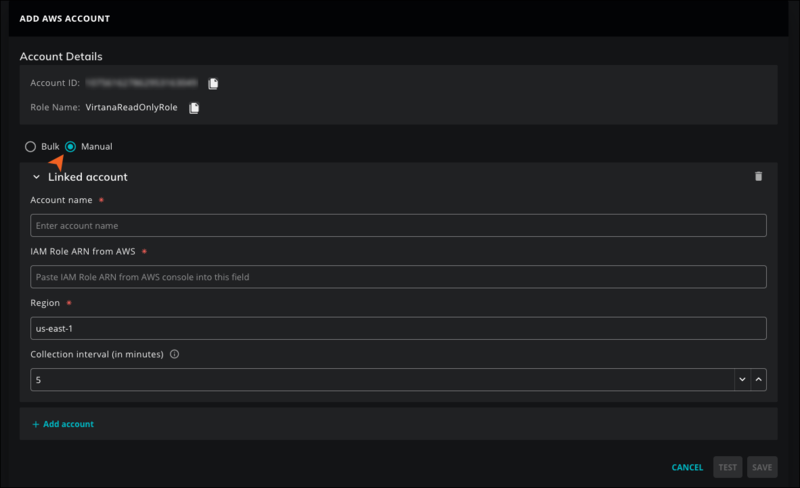
For each linked account, enter the required values:
Account Name
IAM Role ARN or AWS credential
Region
Collection interval
To add another account, click , and then repeat step 2. To remove an account, click the delete icon on its Linked account panel.
(Optional) Click to test your configuration before saving.
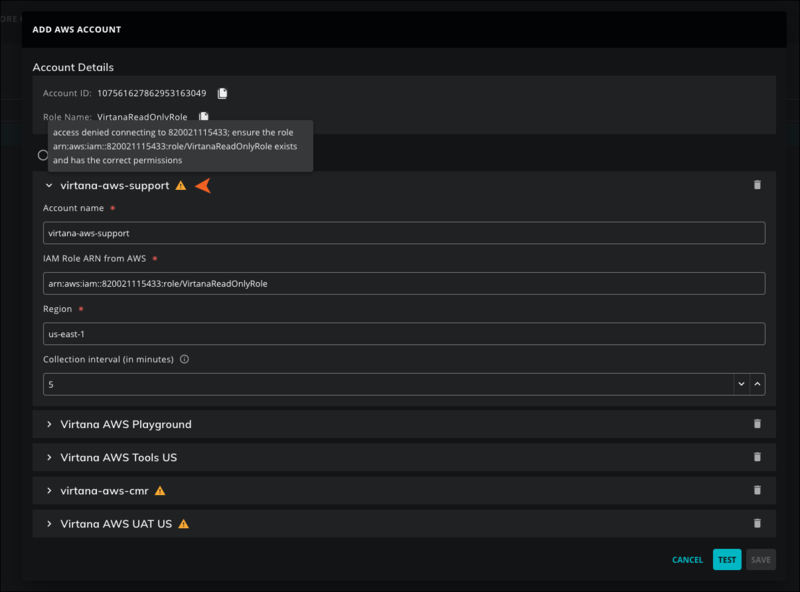
A warning icon next to a linked account means that Virtana Service Observability found a validation error or couldn't connect to that account. The warning most often points to an incorrect role Amazon Resource Name (ARN), an unavailable region, or a credential that lacks the required permissions.
A warning icon on a linked account doesn't always prevent you from saving the connector, so review the IAM Role ARN from AWS, Region, and credential values for each flagged account. Accounts that keep failing validation collect no metrics.
Click to save the connector.