Alerts
The Alerts section in the Global View gives you a centralized workspace to review and manage alerts across all observability domains. From here, you can see the current alert load, filter by source, and drill into individual alerts for investigation.
Alerts are meant to make you aware of and watch out for potential issues in your environment. They act like early warning signs, helping you to notice and fix problems before they become serious incidents.
To open the Alerts page, navigate to Global View > Alerts.
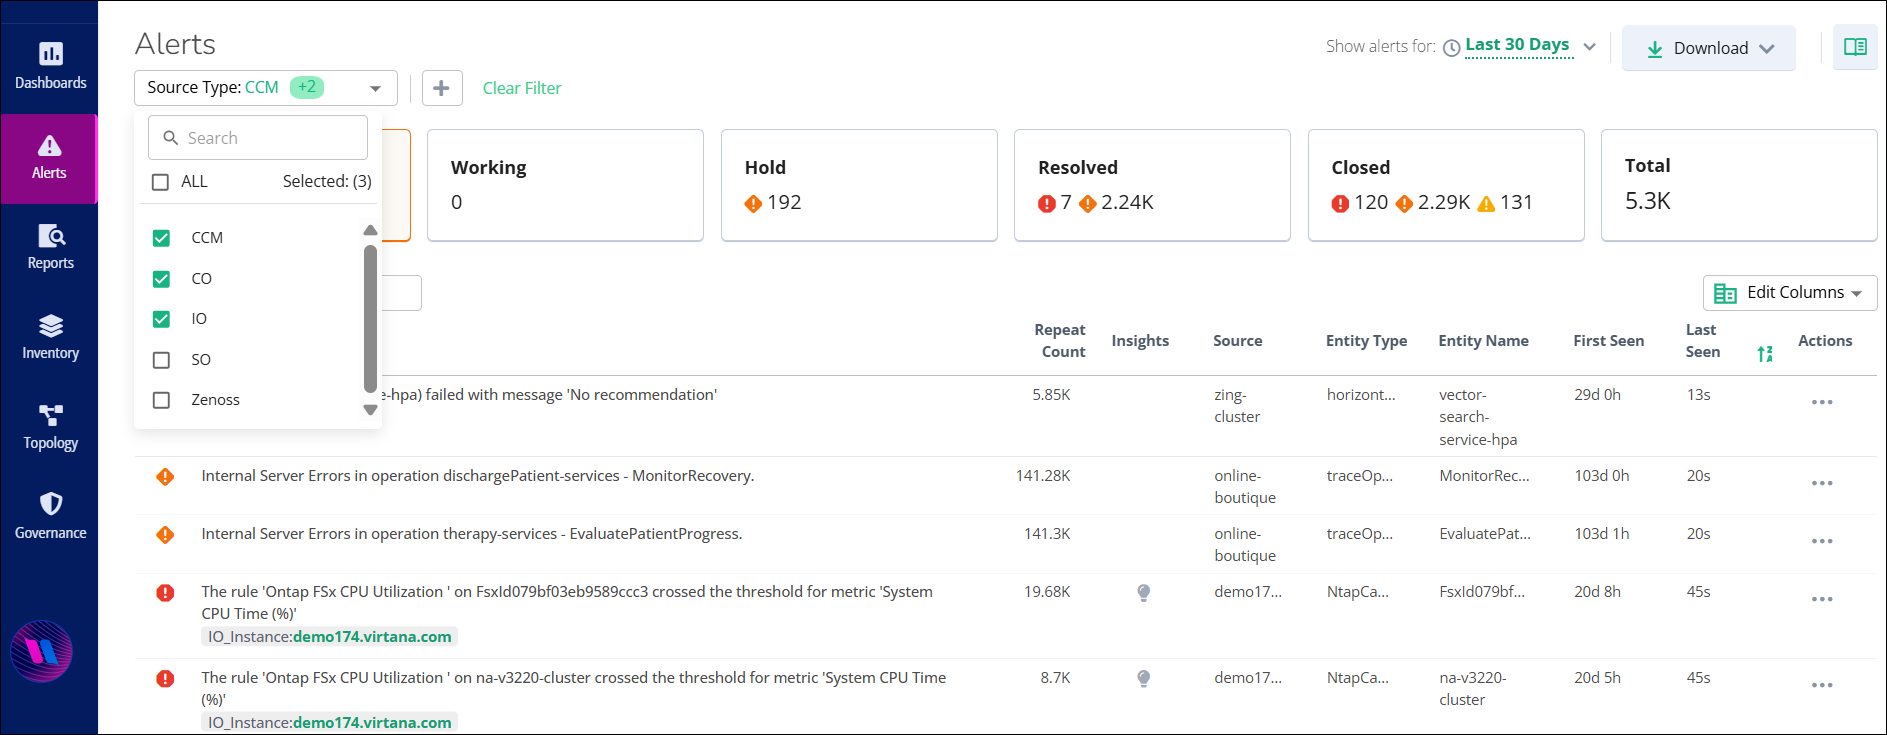
Interface layout and components
The Alerts page displays the alert summary, the alert trend, and the full alert list together on one screen. Summary cards across the top show how many alerts you have by severity and by status. Below the cards, the Daily Alert Creation Trend chart plots the number of alerts created on each day of the selected time range, and the Total Alerts donut shows the total for the same period. The alert table lists the individual alerts, with a filter control in every column header and a search bar above the table. This page allows you to have granular control for custom filtering and managing alerts.
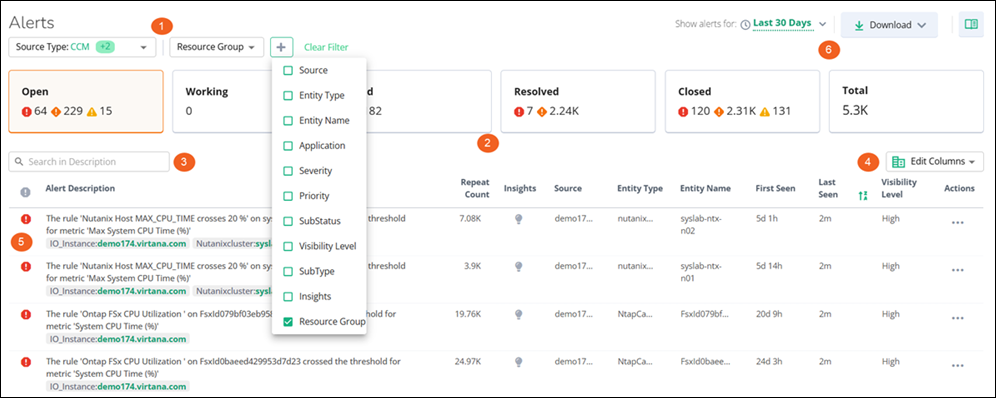
The following table describes the numbered components on the Alerts page.
Number | Options | Description |
|---|---|---|
1 | Alert severity summary cards | A row of colored status cards showing the count of alerts grouped by severity. Each card displays an icon and count: critical (red circle), major (orange diamond), minor (blue down-arrow), info (blue circle), warning (yellow shield), and unknown (gray circle). Click any severity card to filter the grid to that severity level. |
2 | Alert status summary cards | A second group of status cards showing alert counts by their status: open, working, hold, resolved, and closed. These cards let you quickly see how many alerts are in each state and click to filter accordingly. |
3 | Application and Resource Group | A filter bar below the page header with dropdown selectors for Application and Resource Group. Use these filters to narrow down the alerts displayed in the grid by a specific application or resource group. |
4 | Alerts per day chart | A bar chart that visualizes the daily alert volume over the selected time range. Each bar represents the alert count for a single day with color coding by severity. To the right of the chart, a Total Alerts donut chart displays the overall alert count for the selected period. |
5 | Search bar | You can quickly find and filter alerts using the smart, case-insensitive search bar. You can enter keywords or full sentences for filtering. It searches across alert description, entity name, application, tags, and related entities. This ensures the system returns all relevant matching alerts, not just those that match the main description. |
6 | Result Contains and Alert Actions | Displays the total number of matching alerts (for example, Result Contains 145.16K alerts). The Alert Actions dropdown button provides bulk actions, such as Close, Add Note, Acknowledge, and Unacknowledge. This option is enabled when you select one or more alerts using the checkboxes. A gear (⚙) icon next to it offers Adjust Columns, Restore Default Columns, and Clear all filters options. |
7 | Alert data table | A customizable table listing individual alerts. Each column header includes a filter control (dropdown or text input) for inline filtering. The default columns are: Severity/Icon, Alert Description, Repeat Count, Insights, Source Type, Source, Entity Type, Entity Name, First Seen, Status, Last Seen (with sort arrows), and Sub Status. |
8 | More Actions |
|
9 | Time range selector | Located at the top right, this control lets you select a time range for displaying alert data (for example, Past 30 days). Use the left (<) and right (>) navigation arrows to view the past alerts according to the time range selected in Quick select, and the refresh icon to reload the data. |
Note
The search bar does not support the # character or double quotation marks ("). If your search term includes these characters, the search may fail or return incomplete results.
Note
You can view the alert data on the dashboard according to the selected timeframe.
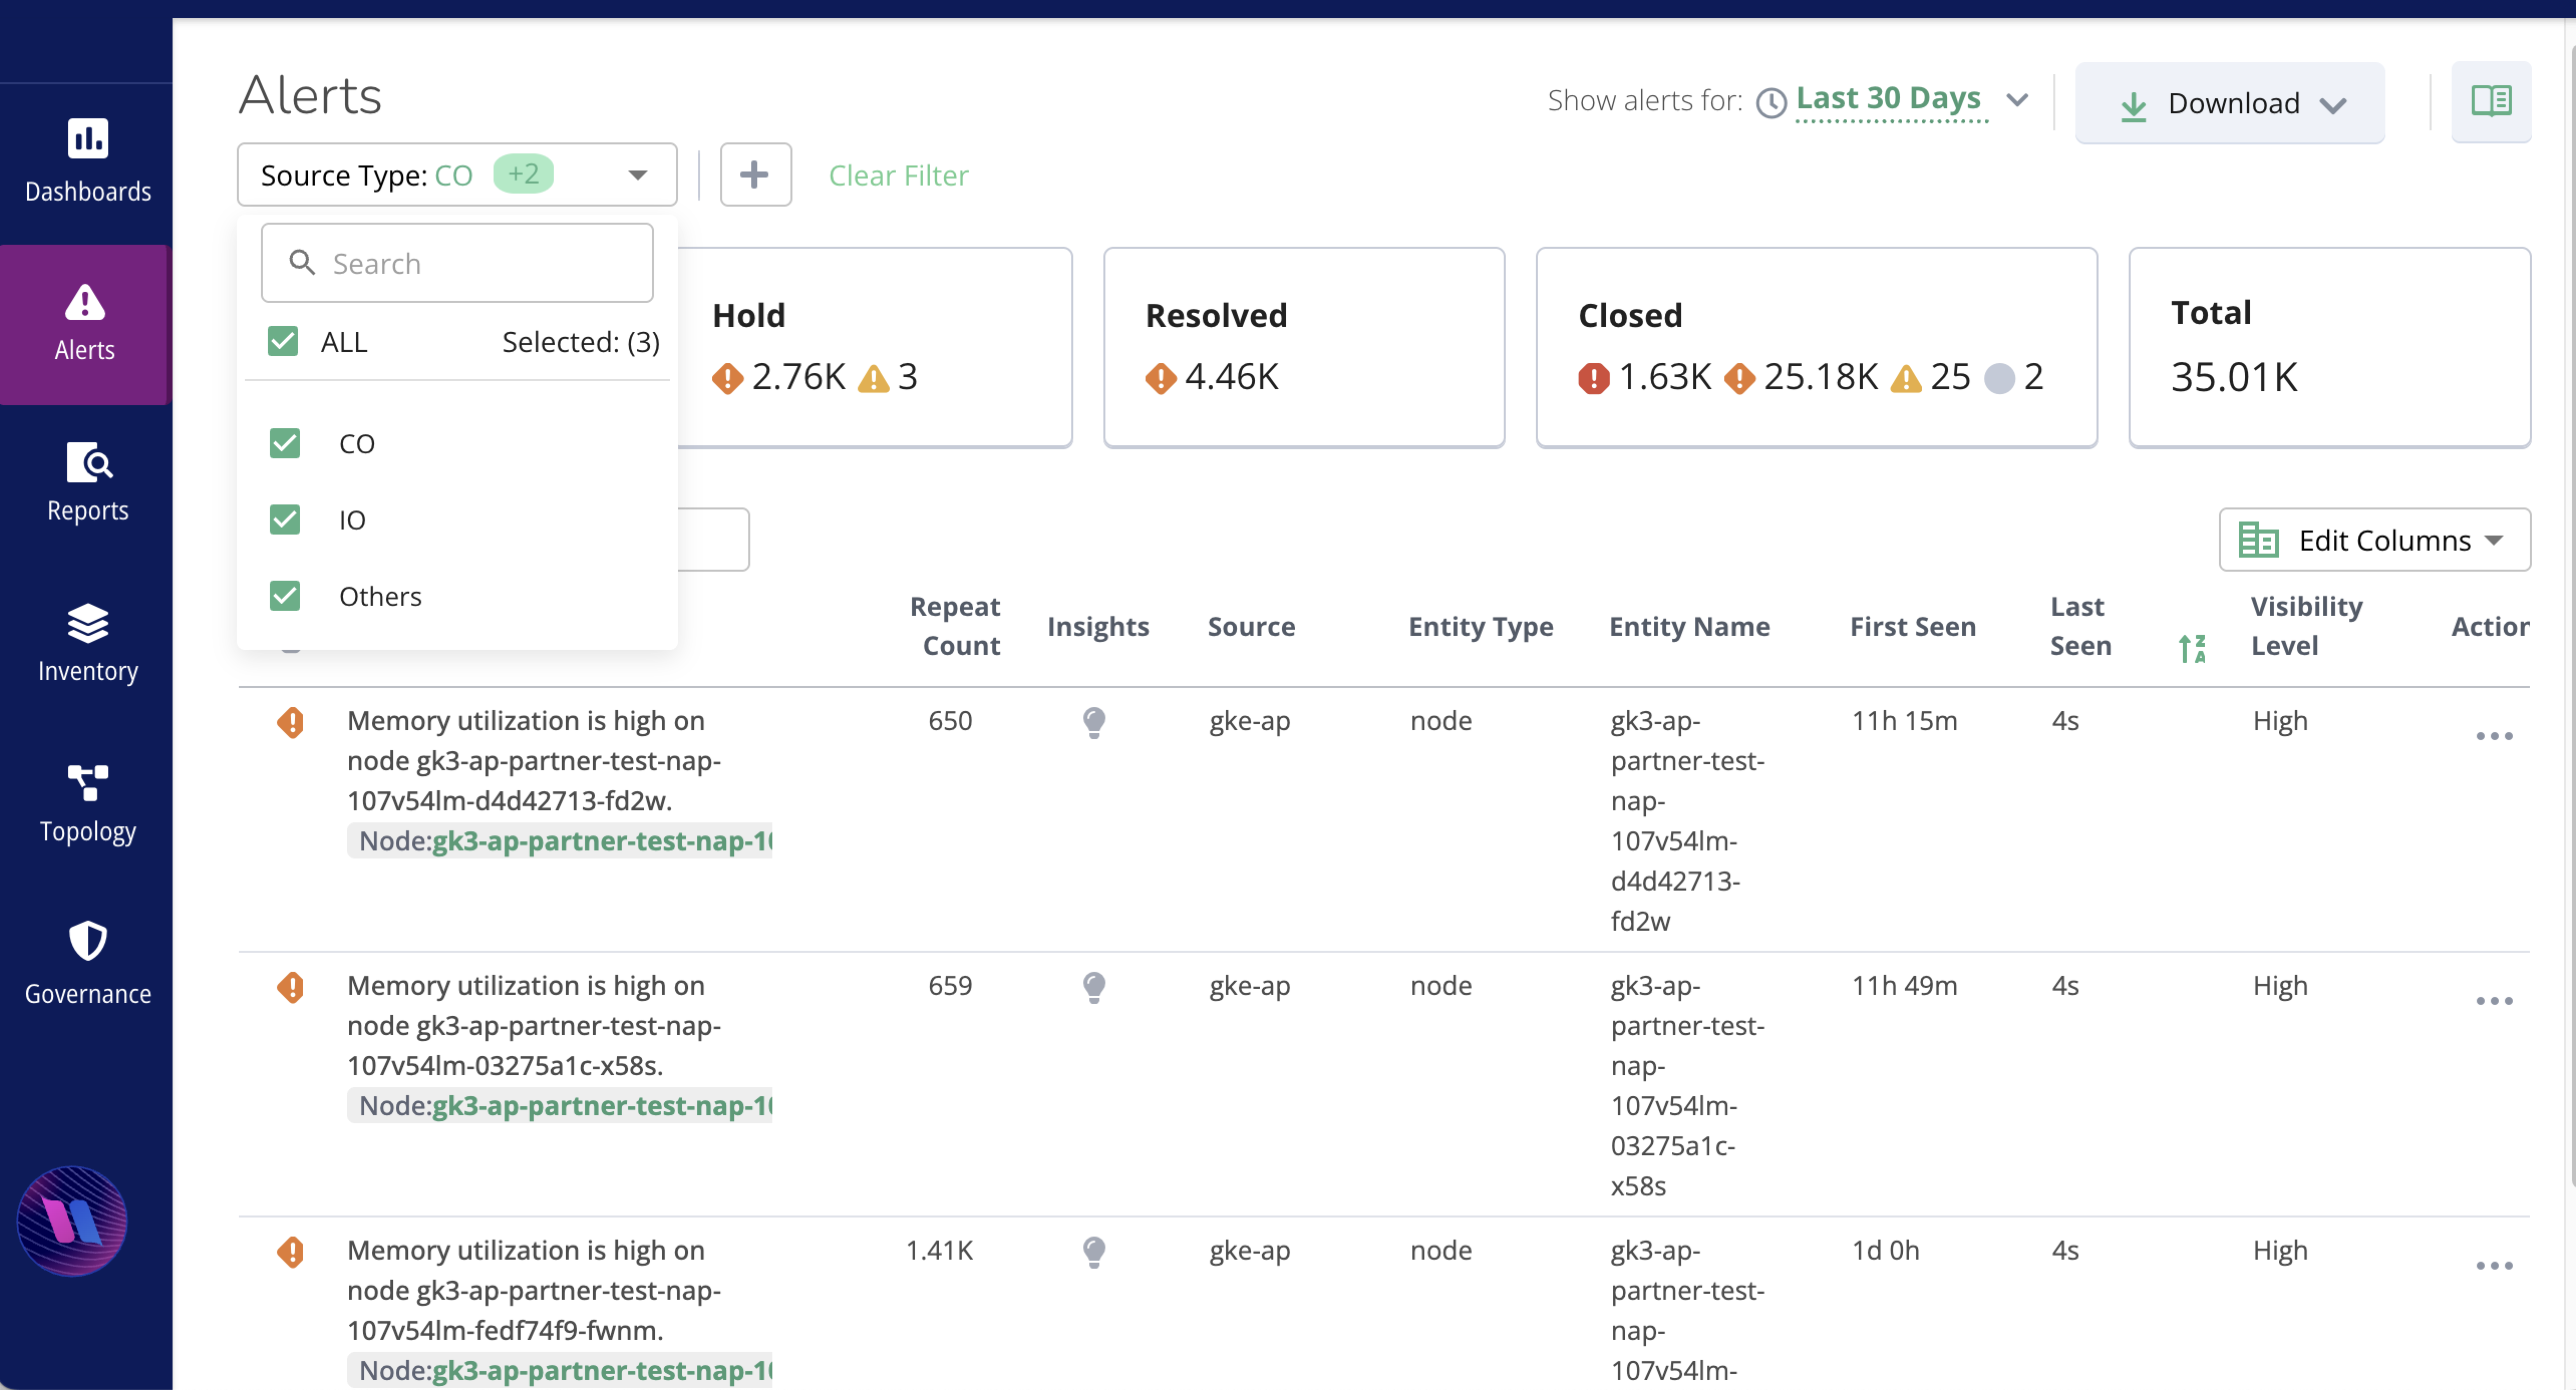
Edit columns
Edit Columns allows you to customize displayed columns, including entity name, type, ID, first seen, last seen, rule ID, and repeat count. This customization lets you choose, include, or exclude columns for a personalized and efficient monitoring experience. For example, you can prioritize specific information like entity names or rule IDs based on your preferences, extracting tailored insights from AIOps alert data.
Note
Column filters are case-sensitive. Ensure that you enter values using the exact letter casing shown in the data.
Column Name | Description |
|---|---|
Acknowledged | Shows whether an alert has been acknowledged. |
Actions | Describes the action taken or recommended based on the alert or insight.
|
Alert Description | A short statement of the condition that raised the alert, including the rule name and the entity the rule ran against. |
Applications | The applications that the alerted entity belongs to. |
Created By | Indicates the user or system responsible for creating the alert. |
Entity ID | A unique identifier for the entity, such as a device, application, or service associated with the alert. |
Entity Name | The name or label of the entity associated with the alert. |
Entity Type | Specifies the type of entity, such as a server, network device, or application generating the alert. |
First Seen | Timestamp indicating when the alert was first detected or observed. |
Incident Id | The identifier of the incident the alert belongs to. This column is empty when the alert isn't part of an incident. |
Insights | Additional contextual information or analysis related to the alert or entity. |
Last Seen | Timestamp indicating when the alert was last observed or updated. |
MTTR | Mean time to resolution: the time the alert took to move from open to resolved. |
Priority | Indicates the priority level or severity of the alert, often categorized as high, medium, or low. |
Related Entities | The entities that are associated with the entity the alert was raised on. |
Repeat Count | Number of times the alert has occurred or been triggered within a specific timeframe. |
Severity | The severity level associated with the alert, typically categorized as critical, major, minor, or informational. |
Source | Identifies the source or origin of the alert. |
Source Type | The Virtana Platform module that raised the alert, such as Infrastructure Observability or Container Observability. |
Status | The current status, such as the open/closed state of the alert. |
Sub-Status | Additional status details or sub-categories to further categorize the alert state. |
Sub Type | The kind of object that generated the alert, for example, Rule. |
Updated By | Indicates the user or system responsible for the most recent update or action taken on the alert. |
Visibility Level | The visibility assigned to the alert, for example, High. |
Save an alert view
Each time you filter the alert table, change its columns, or set a time range, you build a view of your alerts. Save that view so that you can return to it later without rebuilding the filters, and so that you can share it with your team.
To save the current view, follow these steps:
Set the filters, columns, and time range that you want to keep.
At the top of the page, click Save As.
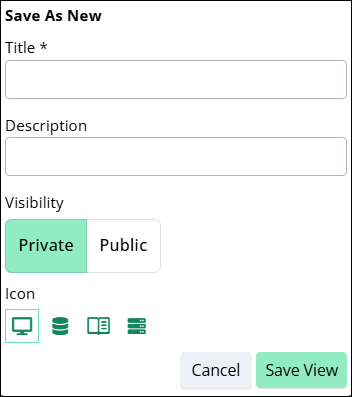
In the Save as New window, enter a title and description (optional).
Select your alert view visibility, select the icon, and click Save View.
Your saved views are listed in the alert views panel. To open the panel, click the panel icon  to the left of the Alerts page title.
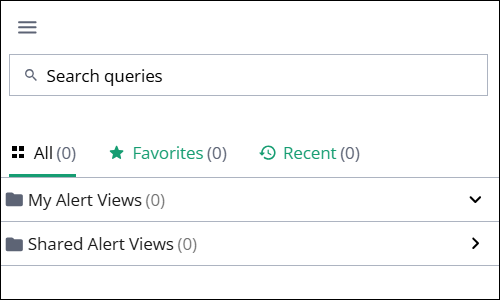
The following table describes the items in the alert views panel.
Panel item | Description |
|---|---|
Search queries | Filters the list of views by name as you type. |
All | Lists every alert view available to you. The number beside the tab label is the number of views. |
Favorites | Lists the views that you marked as favorites. |
Recent | Lists the views that you opened most recently. |
My Alert Views | The views that you created. |
Shared Alert Views | The views that other users shared with you. |
Bulk alert actions
You can now select several alerts from the alert table and apply one action to all of them at the same time, instead of opening each alert in turn.
To perform bulk alert actions:
In the alert table, select one or more alerts using the checkboxes in the first column.
Once at least one alert is selected, the Alert Actions dropdown becomes enabled at the top of the grid.
Click Alert Actions and choose one of the following:
Close: Close all selected alerts.
Add Note: Add a note to all selected alerts simultaneously.
Acknowledge: Acknowledge all selected alerts.
Unacknowledge: Remove the acknowledgement from all selected alerts.
Close an IO case from Global View
When you close an IO-originated alert in Global View, Global View also closes the matching case in the source IO instance, and when a case is closed in IO, the corresponding alert in Global View is automatically closed. This bidirectional closure is available in on-prem deployments in which the IO MCP endpoint is configured and active. To configure the IO_MCP_ENDPOINT, see Set up MCP for Global View.
Note
This option is available for on-premises deployments only, where Global View and IO are installed on the same network, and IO is reachable from the Global View cluster. This option is not available for SaaS environments.