VMware vSphere Integration
Discover ESX Hosts, VMs, Datastores, and vSAN.
 |
The vCenter integration is an agentless solution that discovers the VMware® estate, and integrates vSphere metrics into the IO platform, optimizing all VM workloads. This integration adds SAN NAS I/O intelligence and operational visibility to VMware deployments, enabling administrators to model and benchmark ESX™/ESXi™ server performance and optimally balance the deployment of virtual machines based on real-time measurements and I/O performance feedback. IO complements vCenter™ by correlating over 100 vCenter metrics in real-time with actual I/O performance data measured by other Virtana probes and integrations.
Prerequisites
For HBA card-HBA port associations to be discovered, the following conditions must be met, in this order:
Cisco SAN Integration and Brocade SAN Integration need to be set up to monitor the same environment as Microsoft Hyper-V Integration, IBM PowerVM Integration, and VMware vSphere Integration.
A Cisco or Brocade SAN Integration full discovery (either scheduled or manual) must have completed prior to the Microsoft Hyper-V Integration, IBM PowerVM Integration, or VMware vSphere Integration full discovery (either scheduled or manual).
If this order is changed or these conditions are not met, HBA ports are displayed without their HBA card associations.
In order to discover vSAN entities and collect related metrics, you must configure vSAN Performance Manager on your vCenter instances that will be monitored by IO.
Internal Entities added:
ESX FC Storage Adapter (accessible only through the Reports)
Metric: Status
Properties added:
HBA port:
Properties: FC Adapter Name, Status (populated only when the VMware and Cisco/brocade integrations are added)
Configuring VMware vSphere Integration
Note
If you want to enable the collection of capacity metrics, follow the steps outlined in https://kb.vmware.com/s/article/2107096 and disable the two maxQuery limits listed.
From the Settings page, click Integrations in the Probes and Integrations section.
The Integrations page is displayed.
Click View.
The VMware vCenter page is displayed.
Table 241. VMware vSphere InventoryField
Definition
Name
User-defined name for the integration, often the IP address or the type of integration. For example, VC_Production or VC_Lab. The name "vcenter" in any combination of case may not be used.
Subscription
Subscription status: Unsubscribed or Subscribed.
Last Discovery
Date and time that the integration was last discovered, discovering for currently discovering, no discovery, Discovery failed, or Warned. For Discovery fail or discovery Warned, you can mouse over the cell shows the error or warning as a tool tip.
Last Metrics Collection
Date and time of last metrics collection, Collecting metrics for metrics collection in progress, Metrics collection failed for failed metrics collection, no collection for no metrics collection, or Warned followed by a timestamp for a warning. For both failures and warnings, a mouse-over the cell generates a tool tip.
You are notified if a software integration fails to collect metrics for two hours. The notification takes the form of a IO Health Notification alert as well as an email notification.
At the end of each row is a down arrow, which, if you click it, provides a short cut to Configure, Test Connection, Start Discovery, or Delete the integration in the associated row.
Click New.
The Discover New Integration for VMware vSphere Integration page is displayed.
The required Web Service Port field in this page is pre-populated. Its value is driven by the use of the SSL check box. If the SSL check box is selected, the port is 443. If the SSL check box is not selected, it is port 80. You can override the pre-populated value if necessary.
The required Web Service API field is also pre-populated.
Complete the rest of the information as follows:
Field
Definition
Hostname/IP
VCenter host name or IP address. Required.
Username
Username for the VCenter. Required.
Password
Password for the VCenter. Required.
If the Use SSL check box is selected, you must either upload your certificate from your local system using the Browse button or fetch the certificate from your VMware vSphere system using the Fetch button. If the Use SSL check box is not selected, the Certificate File field is not present. Please see the SSL Certificate Handling section for more details.
Note
IO requires 1024- or 2048-bit certificates. The SSL certificate can be found on the vCenter server in the following location:
C:\Documents and Settings\All Users\Application Data\VMware\VMware VirtualCenter\SSL\rui.crt
Click Next.
IO tests the connection (hostname and credentials) and tries to find all the ESX servers. This process can take up to five minutes. When the process completes, the next page displays.
When this process is complete, the Create New Integration page displays.
The Hostname, Web Service API, Web Service Port, Username, Password, and Use SSL (as well as the certificate information if use-SSL was selected) fields are carried forward. The Metrics Polling Interval is auto-detected. The Name field is user-configurable.
Enter the integration Name.
By default, regularly scheduled discovery is enabled for IBM PowerVM, VMware vSphere, and Microsoft Hyper-V Integration configurations. If you would like to disable regularly scheduled discovery, uncheck the Enable scheduled discovery check box.
If you would like to have discovery scheduled regularly, keep the box checked and choose a discovery frequency and time of day. By default, the frequency and time of day for IBM PowerVM, VMware vSphere, and Microsoft Hyper-V Integrations is every day and 1am appliance time.
Optionally, click Test Connection to test the connection.
Use the information in the ESX Hosts table to subscribe/unsubscribe specific ESX servers.
The ESX servers in the ESX Servers table on the Create New VM window are those ESX servers that were auto-detected.
The columns headings in the ESX Hosts table are defined as follows:
Field
Definition
Server Name
Name of the ESX server
Inventory Path
Path of the ESX Server within the VMware vSphere Integration inventory hierarchy. The last node is the ESX server itself, while first node is the DataCenter, and the intermediate node is the cluster to which ESX server belongs.
Subscription
Subscribed or Unsubscribed
Subscribe to an ESX server by selecting the ESX server or ESX servers to which you would like to subscribe and click Subscribe.
All ESX servers are unsubscribed by default.
Click Save to save all of your changes.
The Discovery dialog box displays, asking if you want the discovery process to start upon saving. Virtana recommends immediate discovery as no metrics are collected into discovery is complete.
Click Yes to start immediate discovery.
You return to the main grid of integration configurations, and the integration that you just created has “Discovering…” in its last discovery time column.
If you drill down into the integration configuration again, a banner displays on your page saying that discovery is taking place, and might take as much as several hours to complete. While the discovery is taking place you are in read-only mode. You cannot make any changes to the integration or switch configuration.
SSL Certificate Handling
This integration requires a secure connection to the target device, which can be achieved automatically if the device has a certificate that has been signed by a root certificate authority. If this is the case, you may complete the form and click the Next button to proceed to the next page of the configuration.
If your device does not have a properly signed certificate, you may associate a certificate (for example, a self-signed certificate) with the device using one of the two following methods.
Automatically fetch the certificate from the target system. A valid IP address and port number are required.
Upload the certificate from your local system.
The first page of the VMware vSphere configuration looks like this:
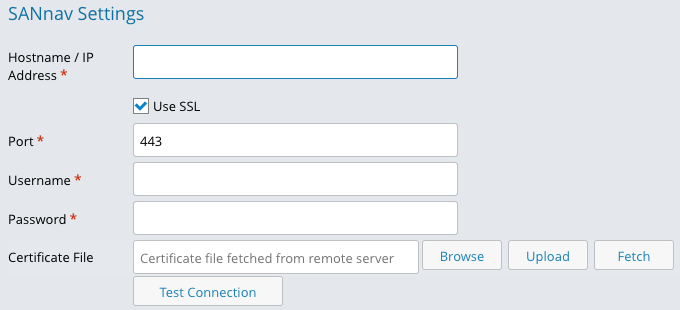
Using Fetch to Automatically Retrieve a Certificate
Clicking on the Fetch button will trigger an action that will automatically fetch the certificate from the target system. There are two cases:
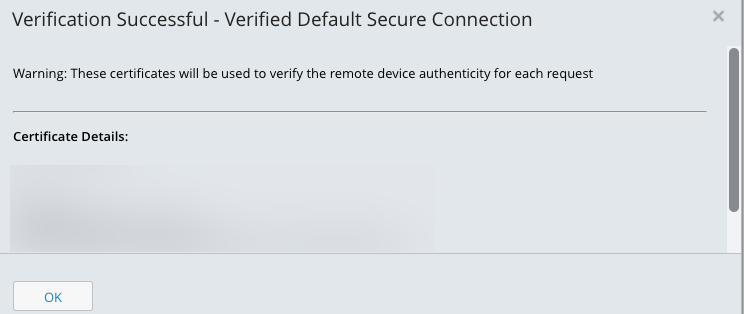
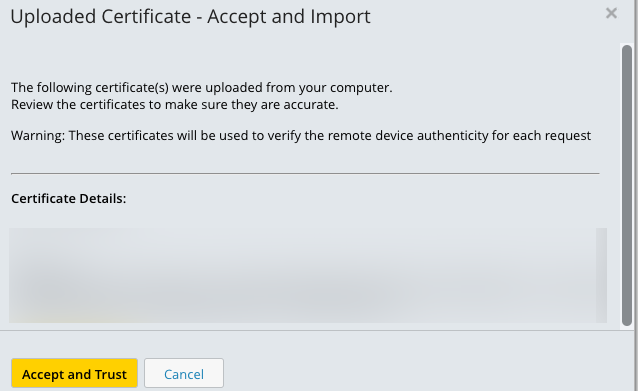
If the fetched certificate has been signed by a valid root certificate authority you will see a popup window with the details of the certificate as shown below. Press OK to continue configuration. Fill in the Name and authentication fields and click the Next button in the upper right hand corner of the screen.
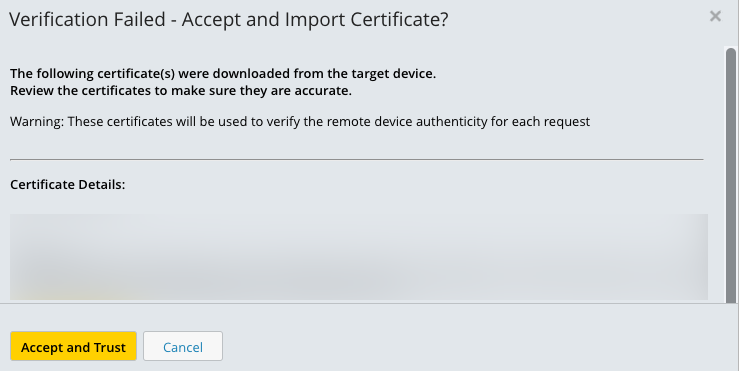
If the fetched certificate is, for example, a self-signed certificate, you will see a popup window with the details of the certificate as shown below. You may either Accept and Trust the retrieved certificate or you may Cancel. If you accept, the Certificate File field will be updated to display "Certificate file fetched from remote server". Fill in the Name and authentication fields and click the Next button in the upper right hand corner of the screen.
Uploading a Certificate
Clicking on the Browse... button will prompt you to upload a certificate from your local system. The Certificate File field will be updated to display the name of the uploaded file. Fill in the Name and authentication fields and click the Next button in the upper right hand corner of the screen.
Viewing the Locally Stored Copy of a Certificate
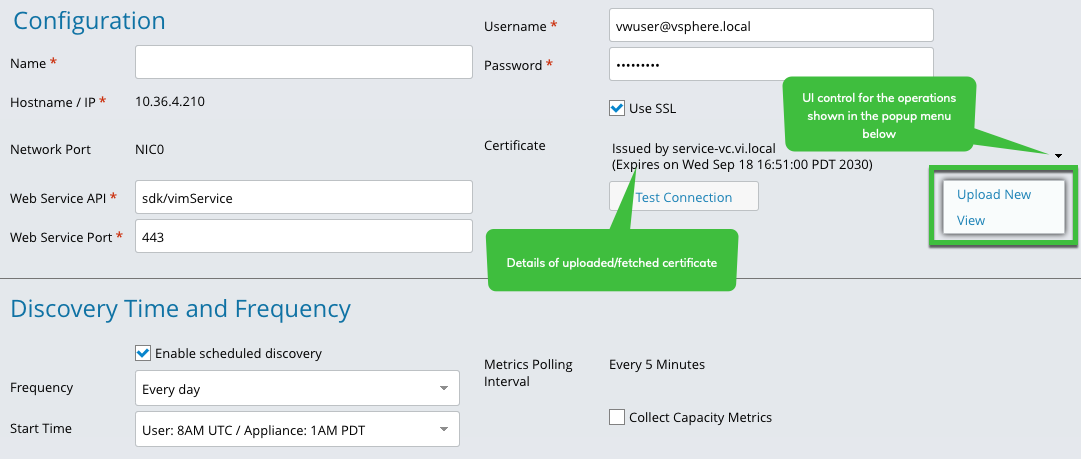
The second page of the VMware vSphere configuration provides UI elements that contain (1) details of the fetched or uploaded certificate and (2) a way to view the current certificate or upload a new/updated certificate.
Uploading a New Certificate Post-Configuration
As shown above, there is an option to upload a new certificate after the initial configuration via the Upload New menu item. A new control will open, as shown below. Click on the Browse or Fetch buttons to either upload a certificate from your local machine or fetch the certificate from your device. In either case, you must also click on the Upload button once the certificate is loaded to save the new certificate to IO.

Configuring for vApp Data Collection
If you intend to have vApp data reported in IO, additional configuration is required.
In IO:
Navigate to Settings > Services Management > ProbeVM for vSphere Proxy > Set Properties.
Add the following property setting:
Property name: com.vi.vmware.virtualapp.vcenters.queryavailablemetrics
Value: <the Hostname/IP name of the vSphere server probe>
Use a comma-separated list for adding multiple vSphere servers.
In vSphere:
Navigate to Statistics Intervals.
The path might be similar to Configuration tab > Settings > General > Statistics, depending on the version of vSphere you are using.
Make sure that the statistics intervals field is set to Level 4 on the vSphere server.
This allows for collection of CPU, memory, and network statistics.
VMware vSphere Considerations
When a vMotion is performed on a VM with no guest heartbeat, the VM is not updated until the next discovery.
When an ESX host is moved, the ESX inventory path might not immediately update in IO, because inventory information about ESX clusters only updates with a full discovery. To work around this issue, move the ESX server out of any current cluster before moving it into a new cluster.