Maintenance Windows
Maintenance Windows in IO are used to suppress alarm notifications during specified time periods. Maintenance Windows are designed to reduce the number of false alarm notifications generated during known periods of abnormal activity. The intention of the Maintenance Windows feature is to increase the reliability of alarm notifications.
New Maintenance Window
Maintenance Windows allow you to define scheduled periods during which alerts and health notifications are suppressed for selected entities.
Create a Maintenance Window
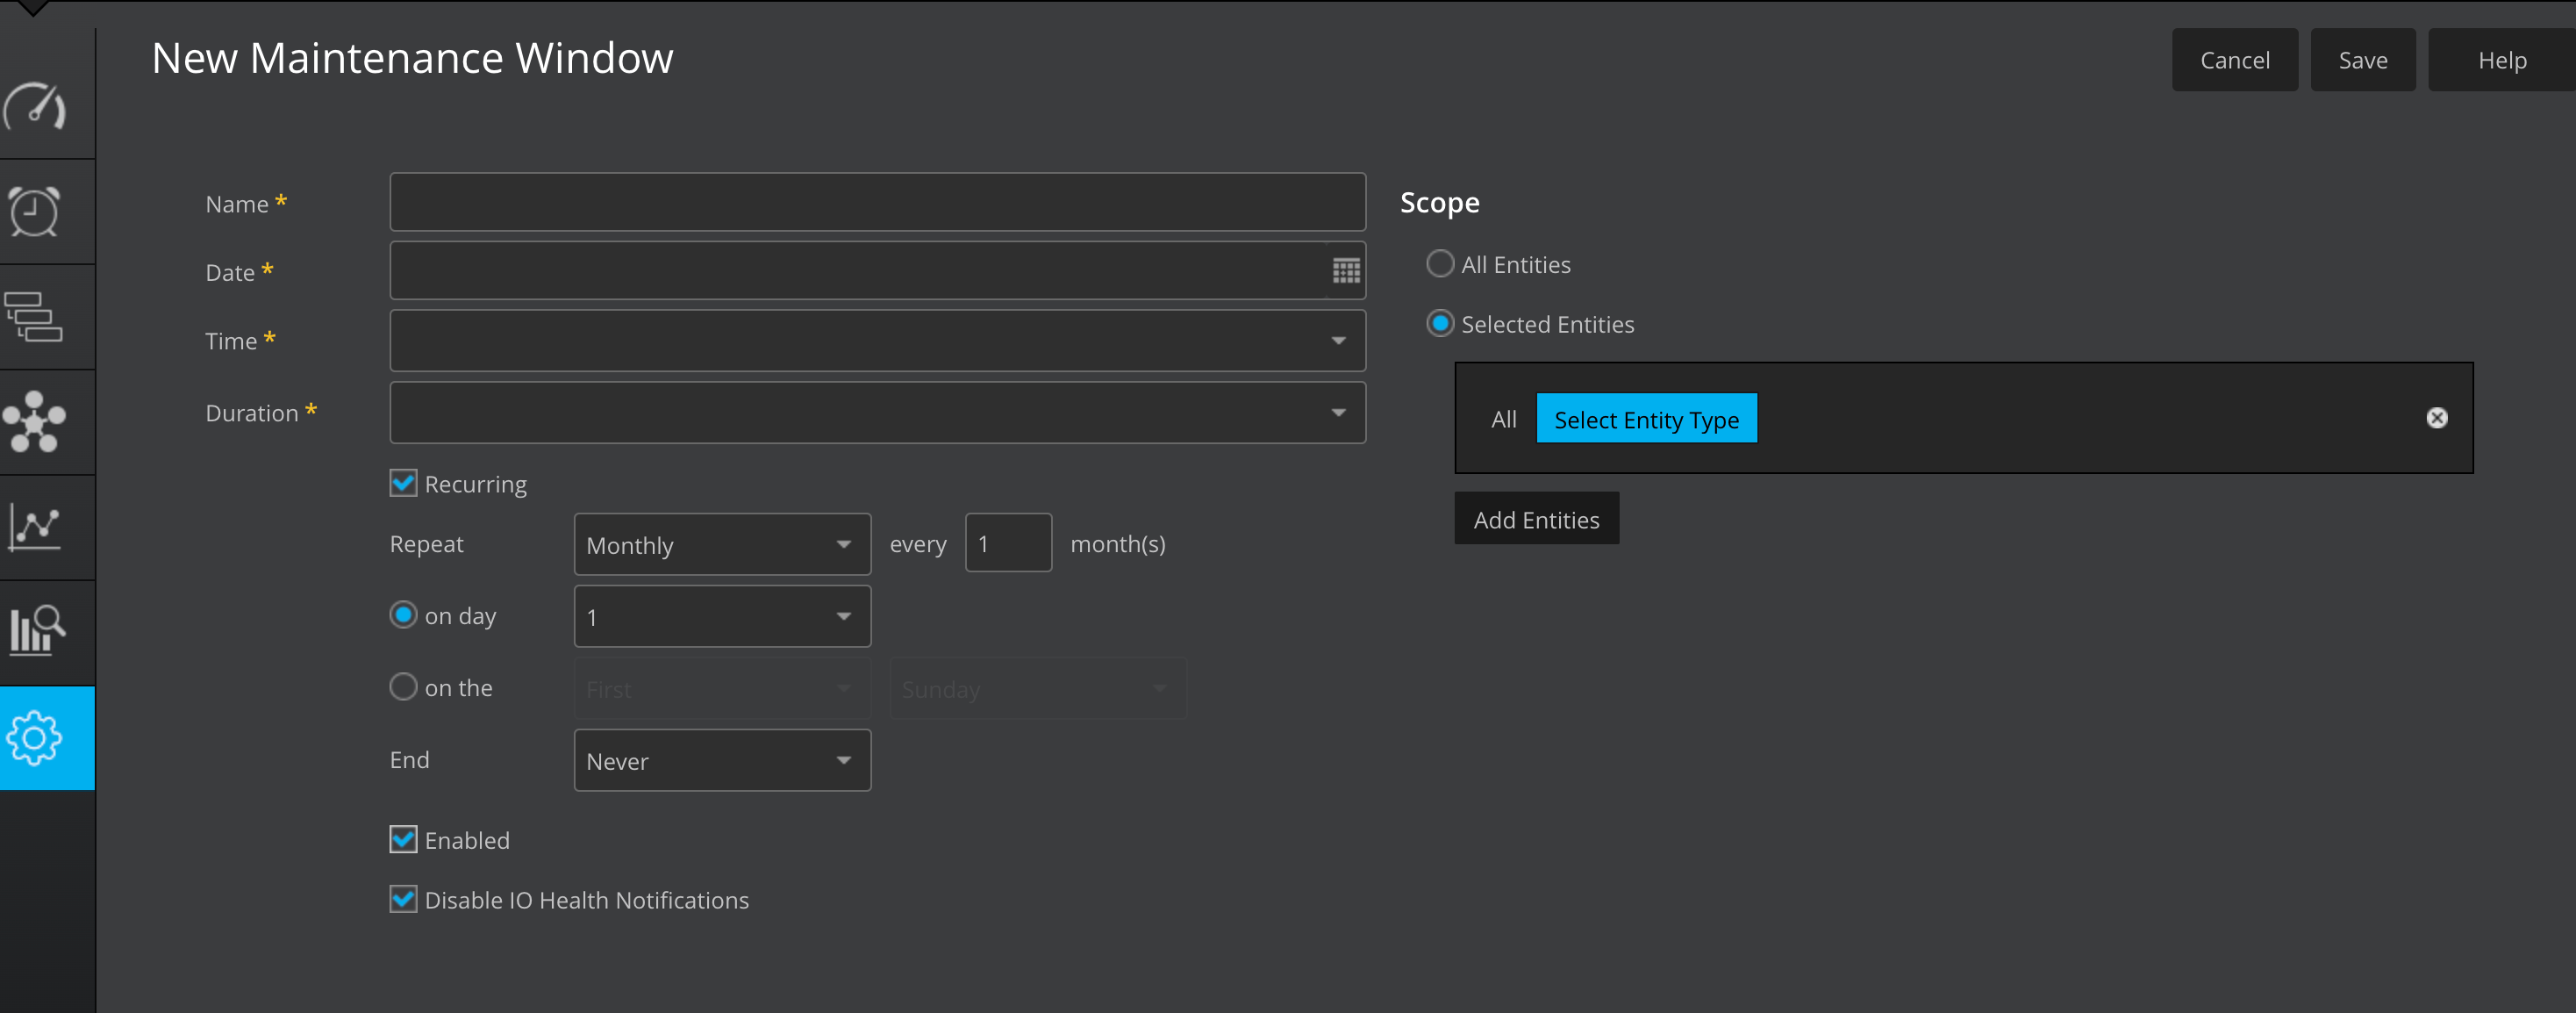
Navigate to Settings > Maintenance Windows.
Click New Maintenance Window.
On the New Maintenance Window page, provide the required details.
Name: A unique and descriptive name for the maintenance window.
Date and Time: The start date and time of the maintenance window.
Duration: The total length of time the maintenance window remains active.
Scope: The Scope section defines which entities are included in the maintenance window.
Scope Options:
Select All Entities to apply the maintenance window across the entire environment.
Select Selected Entities to apply the maintenance window only to specific entities.
When Selected Entities is enabled, you can choose entities using the following options:
The All option (Add All) automatically includes all entities within the selected category.
Tiers – Applies the maintenance window to all entities associated with selected tiers.
All Host Types – Applies the maintenance window to all entities across all supported host types.
Maintenance Window Options (Checkboxes)
Select Recurring to create a maintenance window that automatically repeats based on a defined schedule.
Select Enabled to activate the maintenance window. If the checkbox is not selected, IO Health alerts continue to be generated as usual during the maintenance window.
Selecting Disable IO Health Notifications suppresses all IO Health alerts for the entities included in the maintenance window. Alerts and notifications are not triggered while the maintenance window is active.
Note
By default, Disable IO Health Notifications is enabled for a new maintenance window.
Edit a Maintenance Window
From the Administration section of the Settings screen, click Maintenance Windows.
The Maintenance Windows screen contains a grid that shows all of the currently configured maintenance windows.
Identify the maintenance window entry that you want to update and click on it.
The Edit Maintenance Window screen displays.
Modify the fields that you need to update:
Field
Definition
Name
User-defined name for the maintenance window.
Date
Calendar date for the maintenance window. Also has option to select Today.
Time
Time of day for the maintenance window to begin, with options listed in 15 minute increments.
Duration
Time duration for the maintenance window.
Scope
Use the Scope settings to specify which entities to suppress during the maintenance window. The All Entities radio button is the default, and suppresses alarms on all entities during the maintenance window. Select the Selected Entities radio button to suppress alarms on specific entity types during the maintenance window.
Recurring
Use the Recurring checkbox to specify constraints for a monthly, weekly, daily, or hourly recurrence of the maintenance window.
Click Save.
Verify that the maintenance window is updated by verifying its entry on the Settings> Maintenance Windows page.
Delete a Maintenance Window
From the Administration section of the Settings screen, click Maintenance Windows.
The Maintenance Windows screen contains a grid that shows all of the currently configured maintenance windows.
Identify the maintenance window entry that you want to delete.
Hover your cursor over the entry and click the x at the end of the row.
A Warning dialog appears, asking you to confirm the deletion.
Click OK.
The entry is deleted and no longer displays on the Settings> Maintenance Windows page.