Property Rule Alarms
Use the Property Rule to trigger alarms based on specific properties of an entity, such as application name, tags, or other attributes. This rule allows you to define one or more criteria that determine when an alarm should be raised.
Access the Property Rule Page
Go to Alarms in the left navigation menu.
Select Rules and click Add Rule.
Choose Property as the rule type.
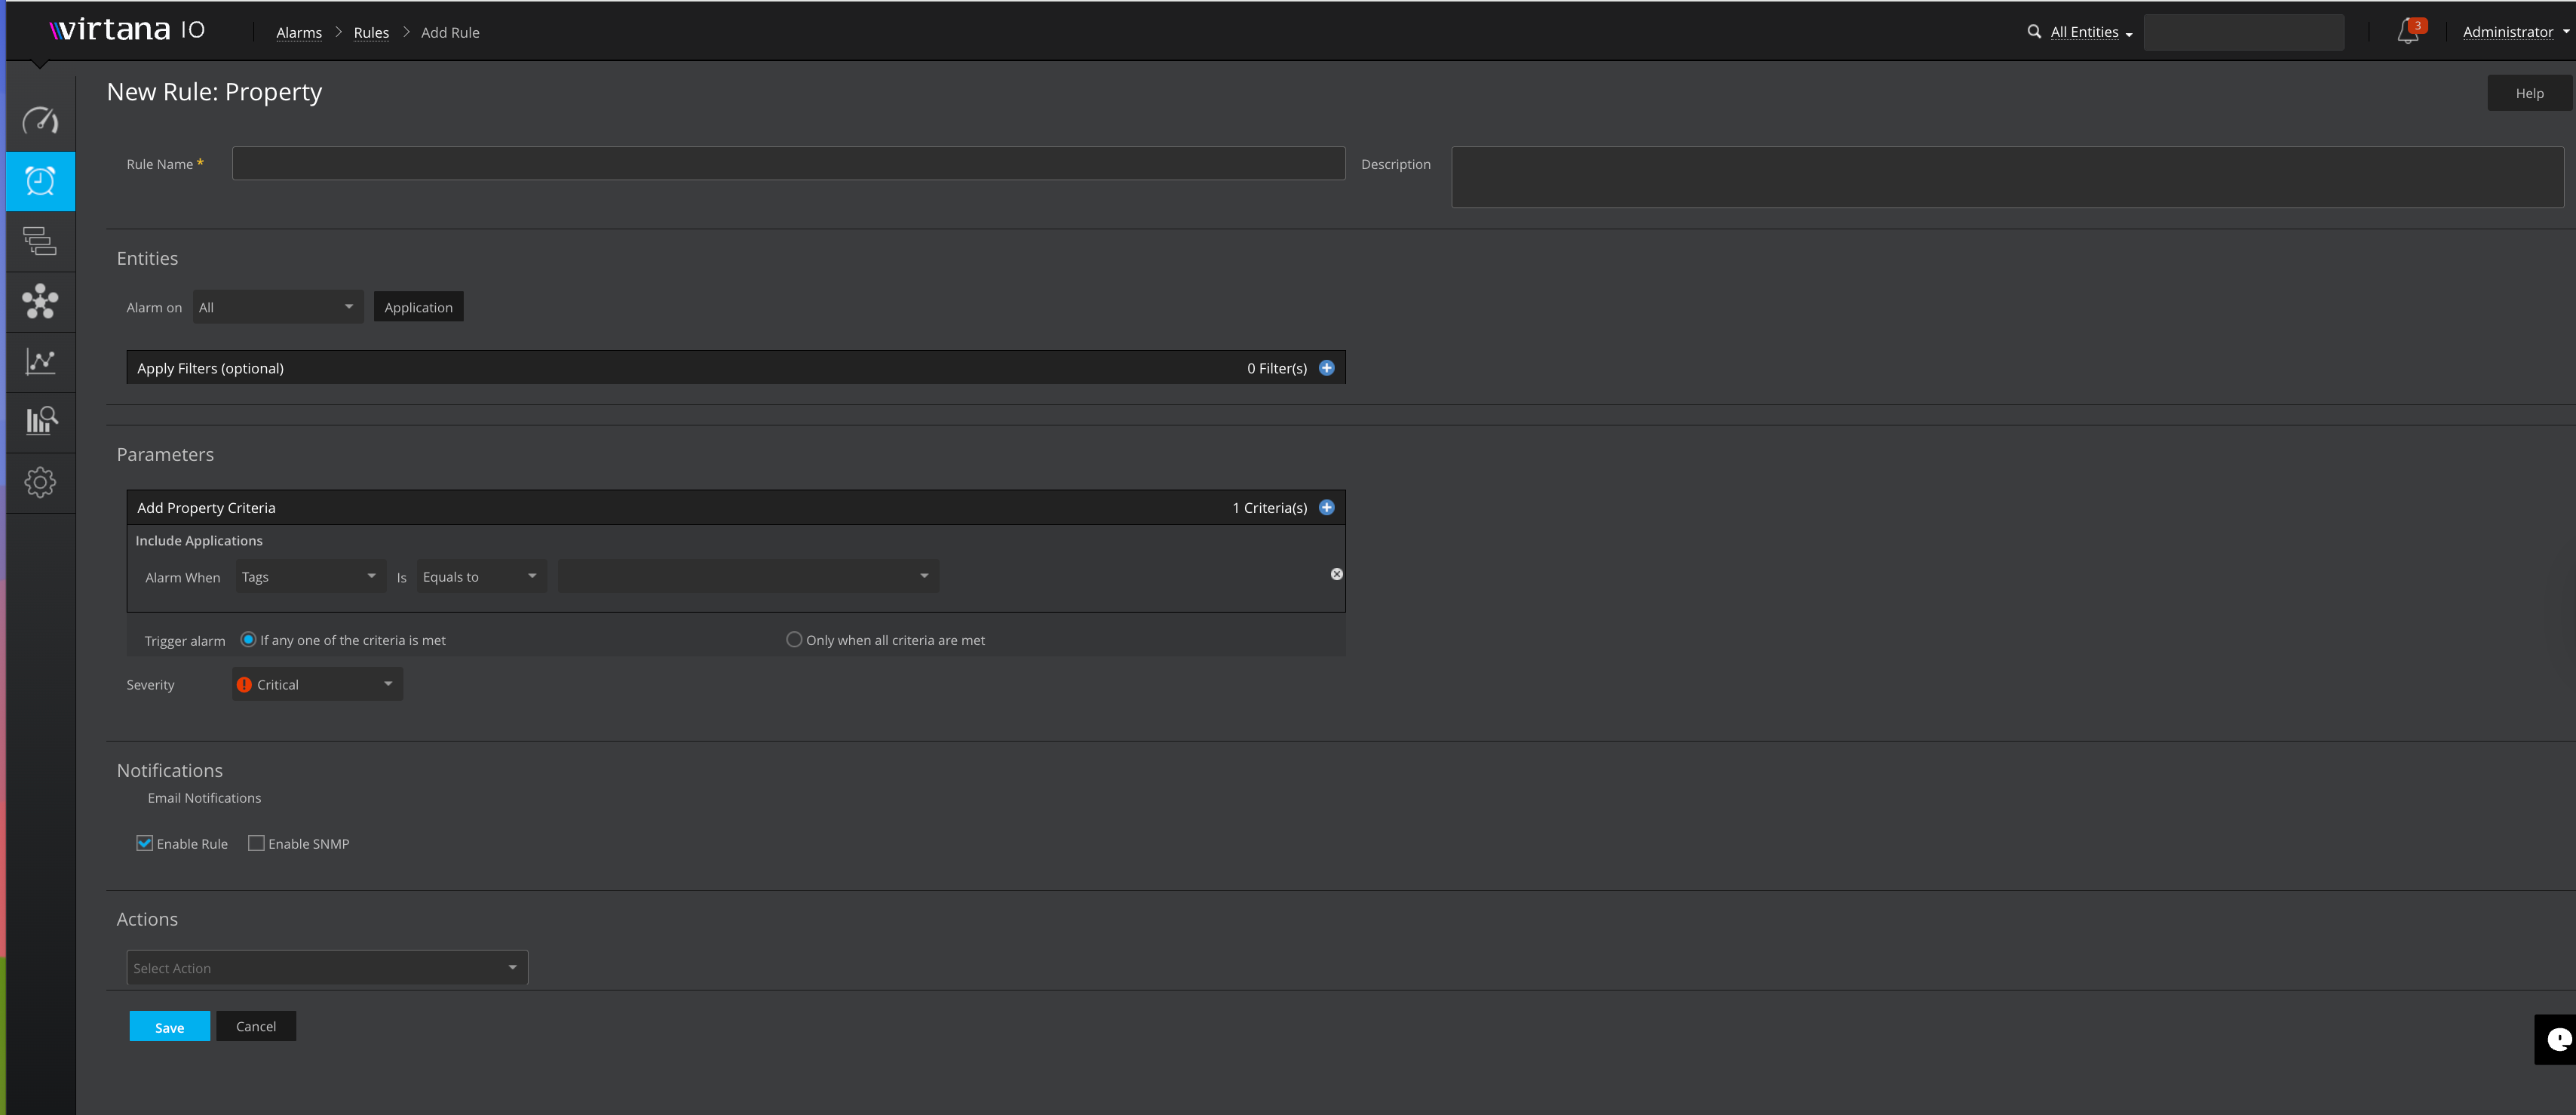
Enter Rule Details
Rule Name: Enter a name for the rule. This field is mandatory.
Description: Add a short description to explain the purpose of the rule.
Select Entities: Select an entity type to alarm on. You can choose to alarm on all entities or only the entities assigned to a tier.
Apply a filter. You can use entity filtering or data filtering. You can apply a filter to the entity selection if you wish to alarm only on specific entities. Alarm filtering is similar to report entity filtering.
To filter for specific entities, select the plus sign to add a filter, then Filter [Entity Type].
You can filter for entities in/not in a list, related to an entity, or with a specified property.
Configure Property Parameters:
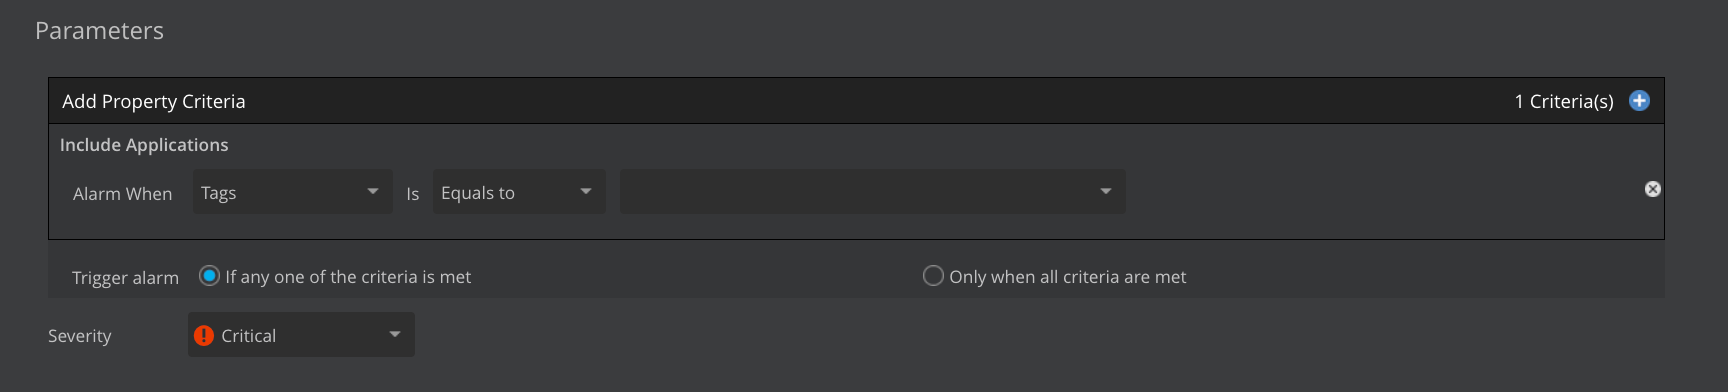
The Alarm When dropdown allows you to choose the specific property of the selected entity that you want to monitor. Once you choose an entity, the dropdown displays the relevant properties for that entity.
The Is dropdown provides comparison operators that determine how the selected property will be evaluated. After choosing a property, you can specify the appropriate condition and value based on your selection.
Equals to – Property must exactly match the specified value.
Not Equals to – Property must not match the specified value.
Matches – Property must match a pattern or partial expression.
Trigger Alarm: This setting controls how multiple criteria within Add Property Criteria are evaluated together.
You can choose:
If any one of the criteria is met
Only when all criteria are met
Severity determines how urgent or impactful the alarm is.
Critical (shown with a red icon)
Other severity levels, depending on configuration
Configure notifications: You can set up a notification plan for the alarm rule to notify users when the alarm is triggered. To add users to the notification plan, click the Add box and check the users to be added. You can also use an email distribution list for the notification plan.
The Also Notify field provides the ability to email alarm notifications to people who are not registered users of IO. Unregistered users added to this field can only receive initial notifications about new cases, but do not receive any succeeding notifications, such as investigation updates. Check the Enable SNMP box to send alarm details to a configured SNMP trap. You can use SNMP traps to trigger actions based on your specific requirements automatically.
Choose Action.
You can choose a default action, which might be predefined in your system. Alternatively, you can select actions such as sending notifications through Webex, Teams, Slack, or other integrated platforms.
Save Rule: Once you have configured all the necessary parameters, click Save to create your new alarm rule.
Viewing Alarm Notification
After you configure an alarm using either a Single Metric Rule , Advance Rule, or a Property Rule, the system sends notifications through the action methods you selected—Slack, Microsoft Teams, Webex, or HTTP endpoints.
All notification types follow a consistent format, making it easy to understand the details of the triggered alarm.
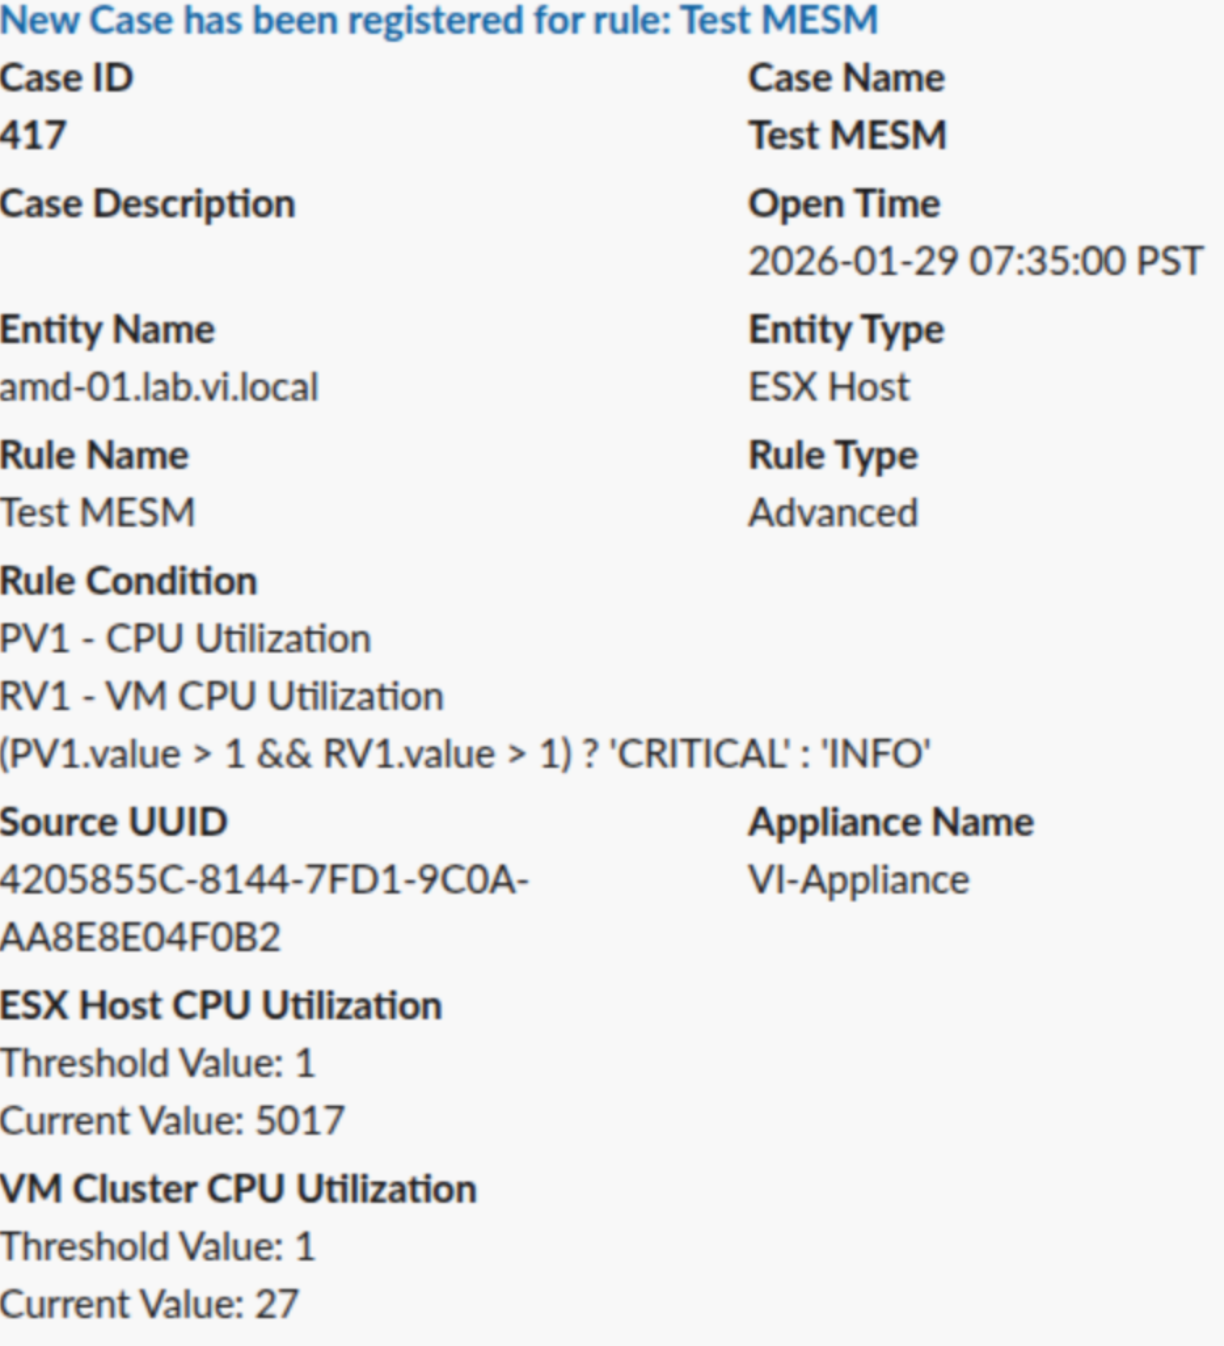
Notification Fields (Common for All Rule Types)
Field | Description |
|---|---|
Case ID | Unique identifier assigned to the alarm case. |
Case Name | Name automatically generated or assigned to the case. |
Case Description | Description of the rule that triggered the alarm. |
Entity Name | Name of the VM, host, switch, or entity involved. |
Entity Type | Type of the monitored entity (e.g., VirtualMachine, ESX VM). |
Rule Name | Name of the rule that triggered the alarm. |
Rule Type | Indicates whether the rule is Single Metric or Property. |
Source UUID | Unique identifier for the entity where the alarm originated. |
Appliance Name | Name of the appliance sending the notification. |
Open Time | Timestamp when the alarm was triggered. |
A Single Metric Rule alarm occurs when a monitored metric value crosses the threshold defined in your configuration.
Additional fields displayed:
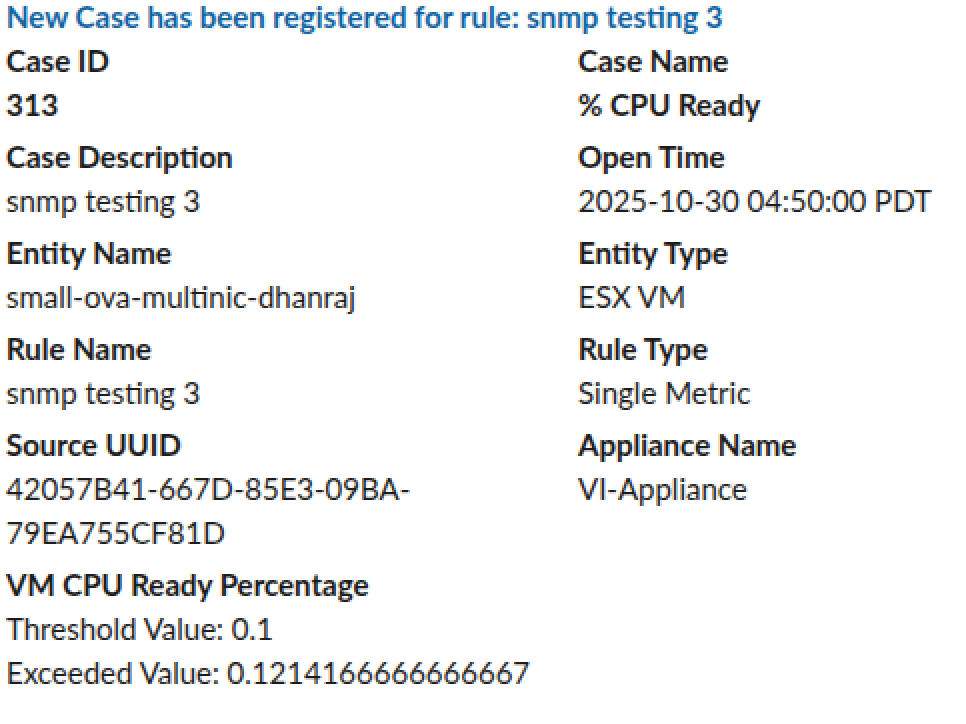
Threshold Value: The metric value that triggers the alarm when exceeded.
Exceeded Value: Actual value recorded at the time the alarm fired.
A Property Rule alarm occurs when an entity property matches the condition defined in the rule.
Additional fields displayed:
Rule Condition: Condition applied to the property (e.g., Alarm when OverallStatus equals green).
Property Value: Actual value of the monitored property at trigger time.
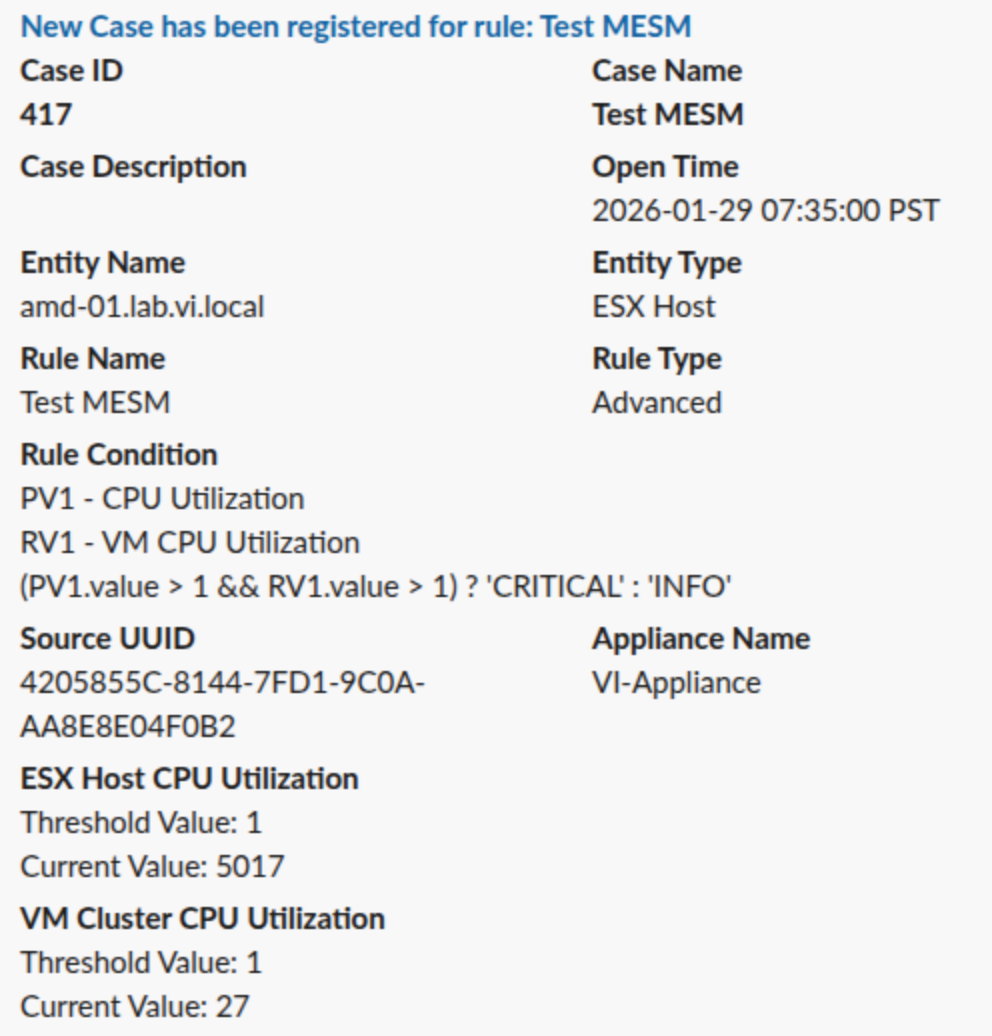
Advance Rule: An Advanced Rule notification occurs when a complex rule expression, based on multiple metrics and/or properties, evaluates to true for an entity.
Note
No matter which action method you configure—Slack, Teams, Webex, or HTTP—the notification layout remains consistent.