Installing on a Linux KVM hypervisor
Use the procedures on this page to install the collector virtual appliance as a guest system on a Linux Kernel-based Virtual Machine (KVM) hypervisor. The procedures have been tested on RHEL/CentOS hypervisor hosts.
Prerequisites
To perform these procedures, you need:
A KVM hypervisor host with Virtual Machine Manager (
virt-manager) installed and a bridge network adapter configured.For more information about configuring a bridge network adapter, refer to KVM documentation.
Permission to download files from delivery.zenoss.io.
Customers can obtain permission by filing a ticket at the Virtana Support site.
Optionally, a VNC client and server, to enable GUI access to the hypervisor host.
Procedures
Follow these steps to install on a KVM hypervisor host:
Downloading the QCOW file
Follow these steps:
In a web browser, navigate to delivery.zenoss.io, and then log in.
Display the Virtana Service Observability files.
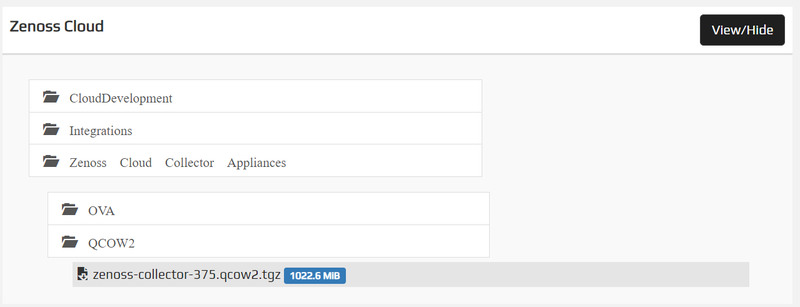
Download the collector QCOW distribution file.
In the preceding example, the filename is
zenoss-collector-375.qcow2.tgz. (The version number may be greater than 375.)Make sure you have the latest distribution
Always use the latest QCOW2 distribution file. For example, if you downloaded a QCOW2 file for a previous installation, please verify that its file name is identical to the latest file available on delivery.zenoss.io before proceeding. New collectors should always be installed with the latest QCOW2 distribution file.
Copy the QCOW distribution file to the hypervisor host.
For example, to copy the file to the
/tmpdirectory, enter the following command. Substitute the hostname or IP address of the KVM hypervisor host forKVM_HOST:scp zenoss-collector-*.tgz root@KVM_HOST:/tmp
Installing the virtual machine
Follow these steps:
Log in to the KVM hypervisor host as root, or as a user with superuser privileges.
Extract the QCOW image from the distribution file.
For example, if the file is located in
/tmp, enter the following commands:cd /tmp; tar --checkpoint=250000 -xzf zenoss-collector-*.tgz
The
tarcommand displays progress information similar to the following:tar: Read checkpoint 250000 tar: Read checkpoint 500000 tar: Read checkpoint 750000 tar: Read checkpoint 1000000 tar: Read checkpoint 1250000 tar: Read checkpoint 1500000 tar: Read checkpoint 1750000 tar: Read checkpoint 2000000 tar: Read checkpoint 2250000 tar: Read checkpoint 2500000
On success, a new file is created. The new file's name is identical to the distribution file's name, less the
.tgzextension.File name extension required in OpenStack environments
If you are installing in an OpenStack environment, add the
.imgextension to the QCOW file name. For example:mv zenoss-collector-10.qcow2 zenoss-collector-10.qcow2.img
In Virtual Machine Manager, select File > New Virtual Machine.
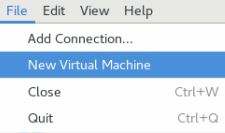
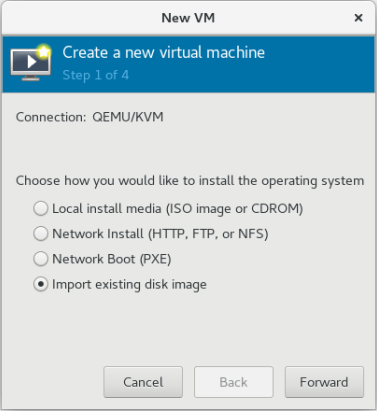
At Step 1 in the New VM dialog box, select Import existing disk image, and then click Forward.
At Step 2 in the New VM dialog box, specify the disk image and operating system.
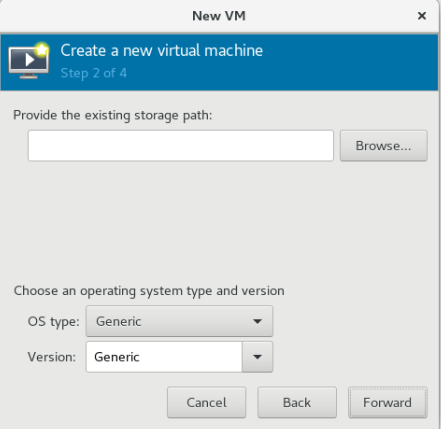
In the Provide the existing storage path field, enter the path of the QCOW file, or use the Browse button to locate the file.
For OpenStack environments, append the
.imgfile extension first (step 2).From the OS type list, select
Linux.From the Version list, select
Ubuntu 20.04.Click Forward.
At Step 3 in the New VM dialog box, specify the CPU and RAM resources for the virtual machine.
For more information about collector virtual appliance requirements, see Resource requirements
.
At Step 4 in the New VM dialog box, specify the name of the virtual machine and a bridge adapter.
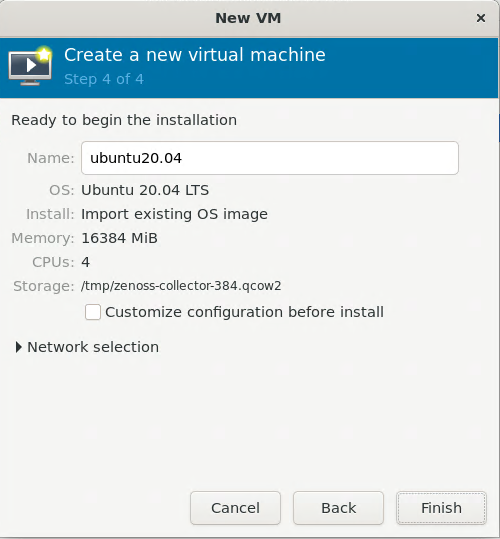
In the Name field, edit the default name, if desired.
The virtual machine name does not affect collector functionality.
From the Network selection option, select the bridge adapter that maps to an interface that is on the LAN to monitor.
Click Finish.
Configuring collector networking
FIXME TRANSCLUSION: reuse _tui.md here (wire with fix_paligo_links.py transclusions)
Optional: Adding multiple interfaces
FIXME TRANSCLUSION: reuse _interfaces.md here (wire with fix_paligo_links.py transclusions)
Configure default route interface
Connect to the collector through SSH or a virtual machine console.
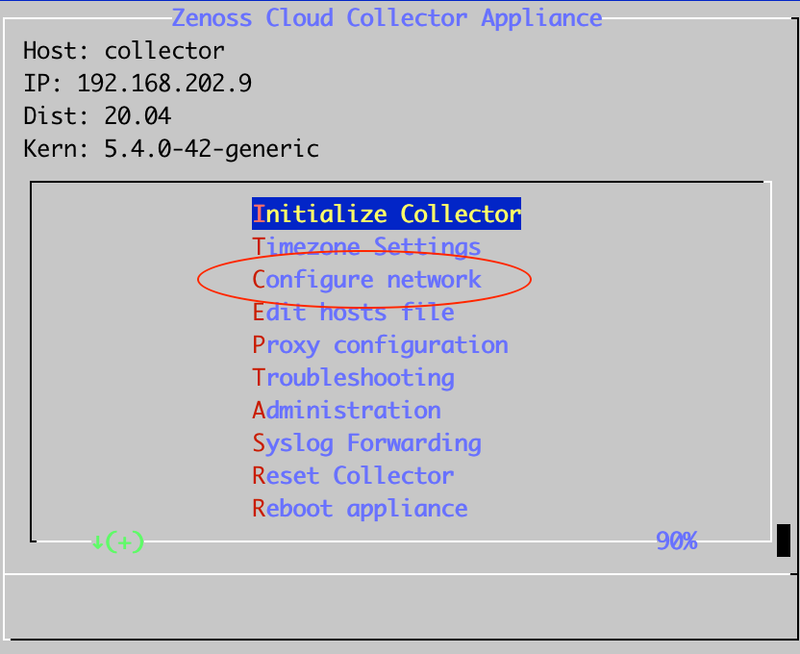
From the main menu, select Configure network.
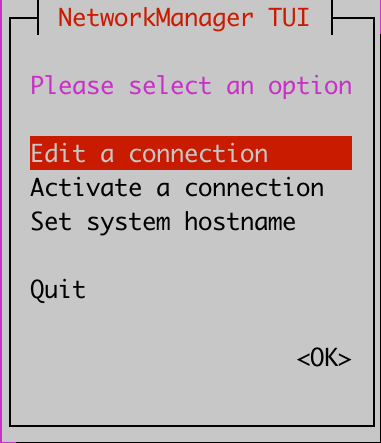
Select Edit a connection.
Select Wired connection 1, and then click Edit.
In the Device field, enter the MAC address of the network adapter.
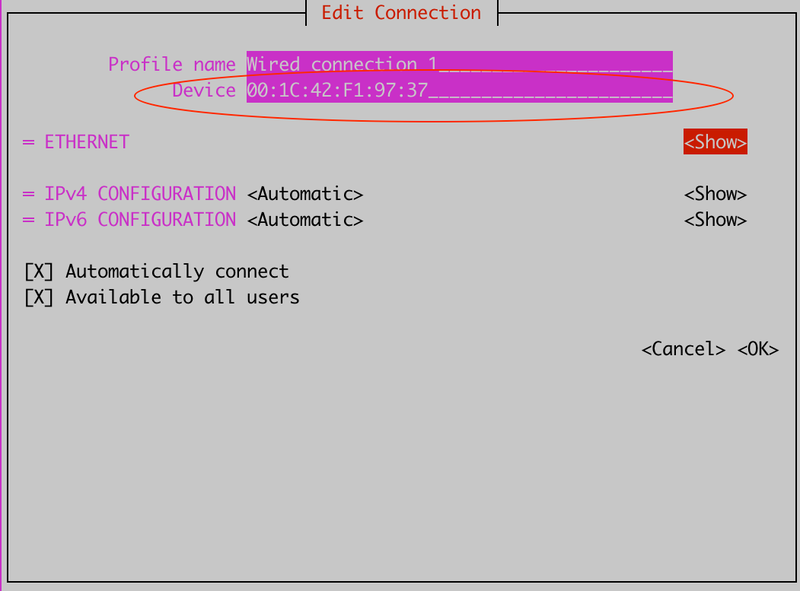
To save the configuration, click OK.
Power off the collector and add additional interfaces to the virtual machine.
Configure additional interfaces
From the main menu, select Configure network.
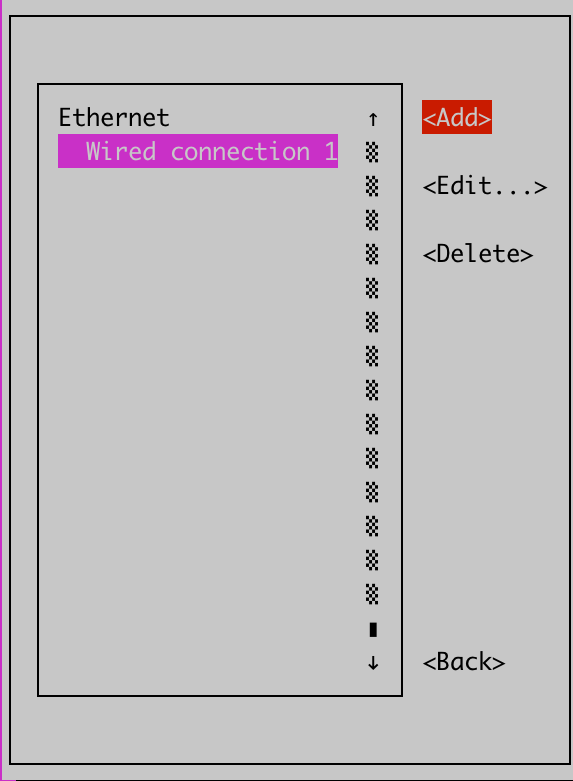
Select Edit a connection.
Click Add.
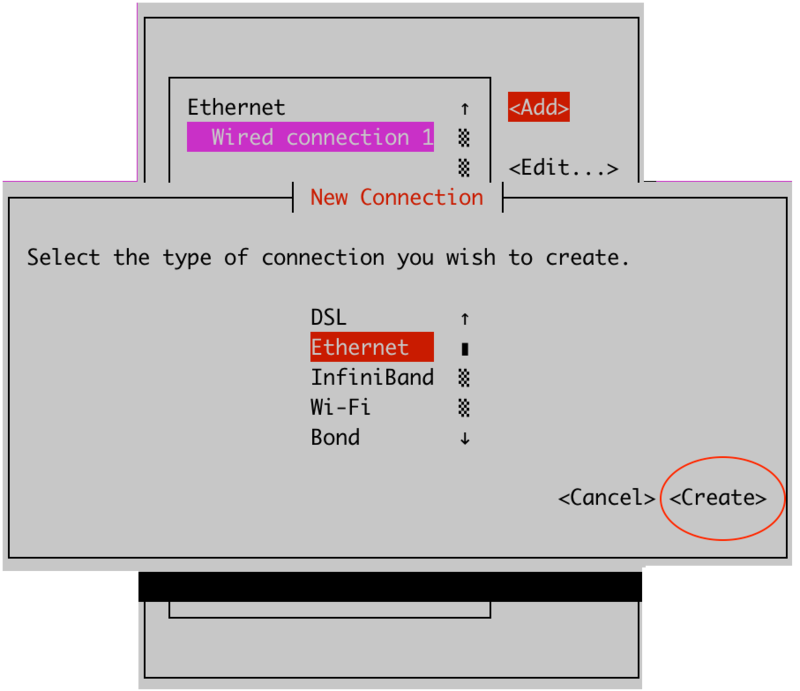
In the New Connection dialog, select Ethernet, and then select Create.
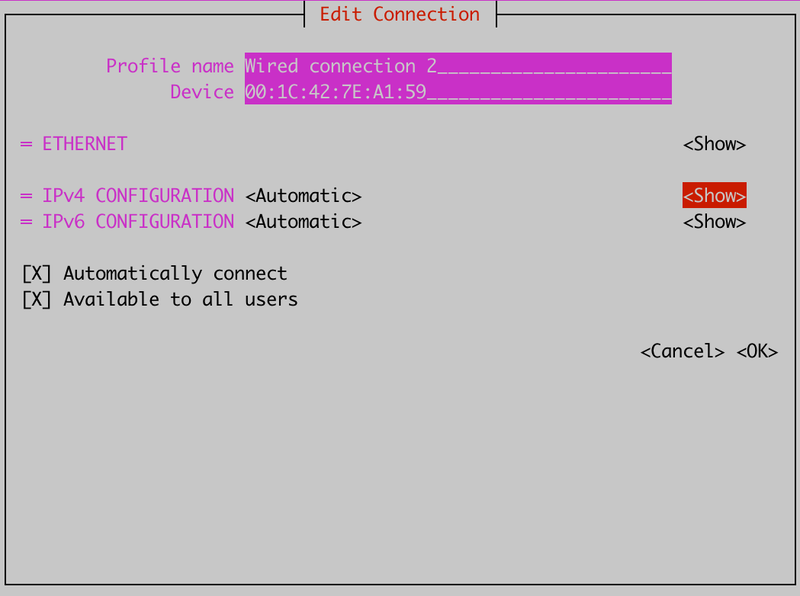
Set Profile name to Wired Connection 2.
In the Device field, enter the MAC address of the network adapter.
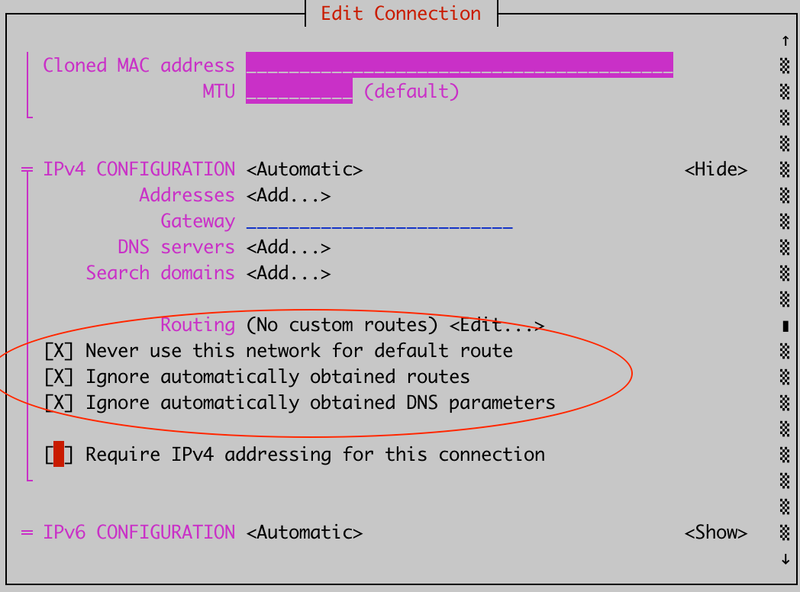
Under IPv4 Configuration, click Show, and then set the following options:
Never use this network for default route
Ignore automatically obtained routes
Ignore automatically obtained DNS parameters
To save the configuration, click OK.
Reboot the collector appliance.
Next step
Connect to a Collection Zone (Initializing a collector appliance
).