Add a maintenance trigger
The following steps guide you through adding details for the maintenance trigger. The trigger is sent when the conditions are met in the criteria.
Note
You must be assigned the Manager role to create a rule or trigger.
Open the ADMIN > Actions page, and then click the TRIGGERS tab.
In the upper-right corner, click ADD TRIGGER.

The ADD TRIGGER dialog box opens.
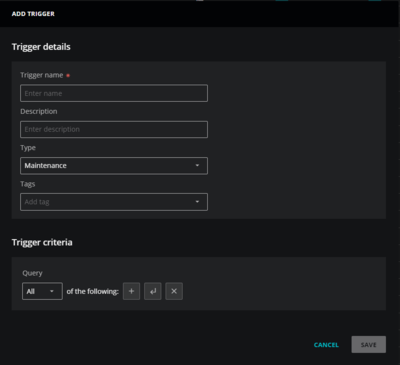
In the Trigger details section, enter the following information:
Field
Description
Trigger name
A unique, short identifier for the trigger (required). The name can't be changed after you click SAVE.
Description
(Optional) Enter text to describe the trigger.
Type
In the dropdown list, select Maintenance.
Tags
(Optional) Add one or more terms to associate with the trigger.
In the Trigger criteria section, create a query to identify the specific maintenance window and its start or end time. For more information about building queries, see Trigger queries.
Click Add simple clause (plus sign) to add maintenance name and maintenance tags.
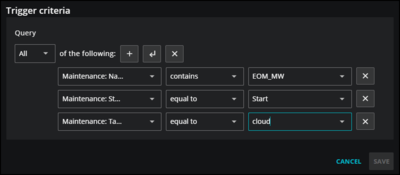
In Maintenance window state, select the appropriate maintenance state criteria in the dropdown menu. You can choose:
Pending start: The notification is triggered when the maintenance window is ready to start but hasn't yet started. This is useful when you want to give your users additional time to prepare for the maintenance window.
Start: The notification is triggered at the start of the maintenance window.
End: The notification is triggered at the end of the maintenance window.
Failed: The notification is triggered when the maintenance window fails to start or finish as expected. This is useful when you want to troubleshoot why a maintenance window failed.
Click SAVE.