Operating System Integration
 |
The Operating System Integration interacts with physical and virtual machines for application discovery and operating system monitoring. To these ends, IO communicates directly with the machines to collect information and statistics, using WMI for those running Windows operating systems, and using SSH for those running various flavors of UNIX.
For application discovery, IO collects information from servers about the services (such as database and app servers) that are running on an operating system, its resources, as well as the IP addresses with which it is communicating. Application discovery is not performed on Windows domain controllers.
Note
Windows Management Instrumentation (WMI) only identifies physical Network Interfaces for which the MAC address of the Bonded NIC is the same as the MAC address of the physical NIC. This results in physical NICs not being reported as children of a NIC bonded to multiple physical NICs. Therefore, the relationship between a Windows Bonded NIC and its children cannot be reported in IO topology views or entity inventory pages.
The following operating system versions are supported for application discovery:
Linux
Ubuntu (16.0.4.2, 17.0.4)
SUSE (11, 12)
CentOS (6.8, 7.4)
Red Hat Enterprise Linux (6.9)
Oracle Linux (6.9)
Debian (9)
Solaris 10 and 11 (64-bit)
Windows
Windows Server 2019
Windows 2016
Windows 2012 R2
Windows 2008 R2 Standard
For operating system monitoring, IO collects information about the operating system's compute, storage, and networking resources, and collects metrics for these resources.
The following versions of operating systems are supported for operating system monitoring:
Linux
Ubuntu (16.0.4.2, 17.0.4)
SUSE (11, 12)
CentOS (6.8, 7.4)
Red Hat Enterprise Linux (6.9)
Oracle Linux (6.9)
Debian (9)
LVM implemented on top of multipath devices on Linux is not supported. IO does not discover or collect metrics for operating system instances with this configuration.
Windows
Windows Server 2019
Windows 2016
Windows 2012 R2
Windows 2008 R2 Standard
Configure Operating System Instances
Use the Configuration tab to establish Windows (WMI) and Linux (SSH) credential sets for specified hosts. Credential information is supplied by the customer. The credentials needed IO can be read-only, and do not require admin privileges and root access. In many cases, customers are already using management tools with established credentials, and these can often be leveraged for use with Operating System Integration.
About This Task
There are specific permission/administrator requirements for using the OS Data Collector.
For Linux systems, a non-root account can be used. The only minor effect of a non-root account is that the “hypervisor type” property is not populated for ESX VMs.
For Windows 2016 and Windows 2012R2A, a non-administrator account can be used.
A non-administrator account can also be used for Windows 2008 R2 Standard, but network and disk entities cannot be discovered from it.
When a non-administrator account is used, the account must be in the "Performance Monitor Users Group," and "User Account Control" must be disabled. See https://docs.microsoft.com for a description of the "User Account Control"feature's relationship to WMI.
Known Issues
Description | Workaround |
|---|---|
On some versions of Linux, the speed of a network interface cannot be obtained from the operating system. | None. |
You cannot create a report when the %Network Received Utilization and %Network Transmit Utilization metrics are used with the Application filter. | You can see data for these metrics with the Network Interface filter. Manually add appropriate Network Interface entities to your application. |
Upon upgrade to IO 6.1 or later, any existing Logical Volume entities are archived and Logical Volumes re-discovered. | None. Metrics collected prior to IO 6.1 for preexisting Logical Volumes can be accessed by requesting reports on the archived Logical Volumes. |
Prerequisites
If you have enabled VMware vSphere Integration or IBM PowerVM Integration, you should have run at least one discovery on those integrations before making an Operating System Integration discovery. Otherwise, you might see duplicate compute entities in the UI.
Click Settings, then Integrations in the Probes and Integrations section, and then the View button for Operating System.
The Operating System page display consists of two tabs:
Configuration
Subscribe to OS Instances
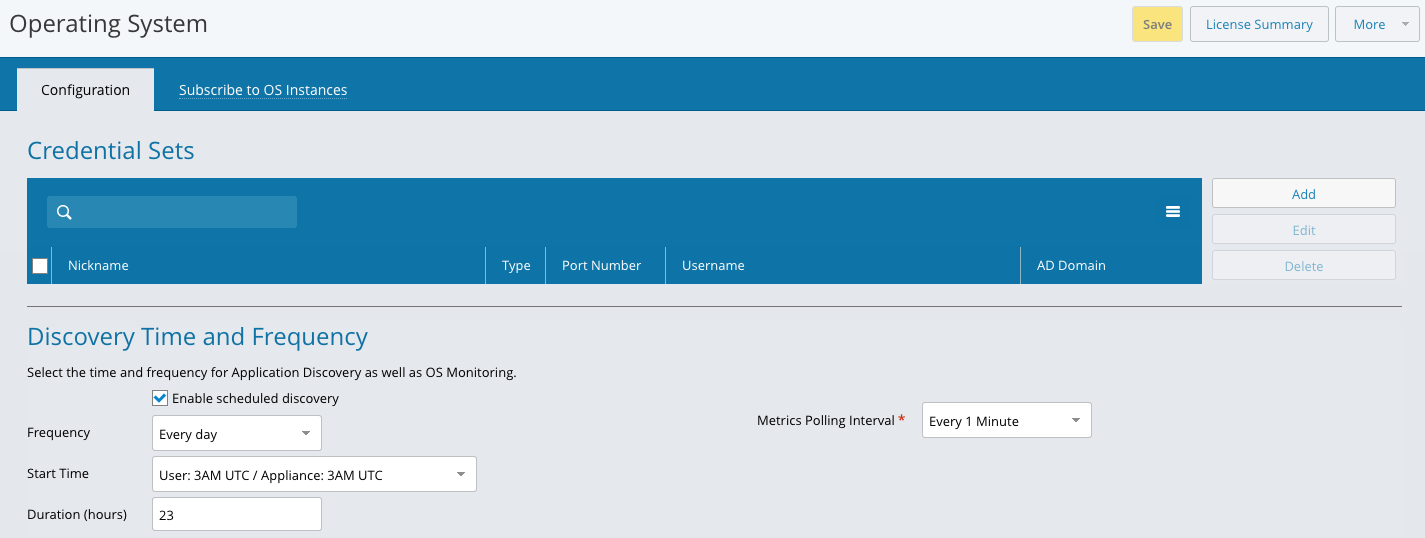
On the Configuration tab, click Add to add a credential set.
The New Credential Set dialog box displays.
There are two variations of the New Credential Set dialog box, depending on whether you are adding Linux (SSH) or Windows (WMI) credentials.
You can use a private key for SSH credentials, but it requires a key file. Passphrase is optional.
If the host password is changed, the credential set must also be changed. All passwords stored IO are encrypted.
Note: For Windows OS monitoring, CIFS Security Mode NTLMv1 and NTLMv2 are both supported as mount types (security modes), and the following applies:
none: Attempt to connect as a null user (no name)
ntlm: Use NTLM password hashing (default)
ntlmv2i/NTLM - force packet signing: Use NTLMv2 password hashing with packet signing.
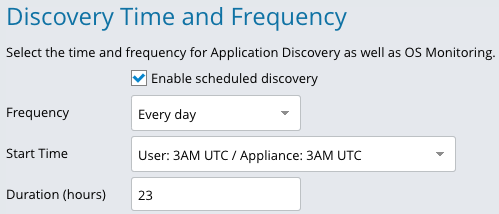
Discovery Time and Frequency is, unlike other scheduled discovery processes, bounded by a specified duration in hours. After that amount of time, discovery is paused and bookmarked, and the next scheduled discovery starts at that bookmark.
These settings apply to discovery for both application discovery and OS monitoring.
Related Topics
Subscribe to OS Instances
The Subscribe to OS Instances tab adds or imports OS Instances and then subscribes to or unsubscribes from them for application discovery and/or OS monitoring. Either an IP address or a hostname is required. If a conflict is found, the IP address takes precedence.
Click Add to add a host.
The New OS Instance dialog box displays.
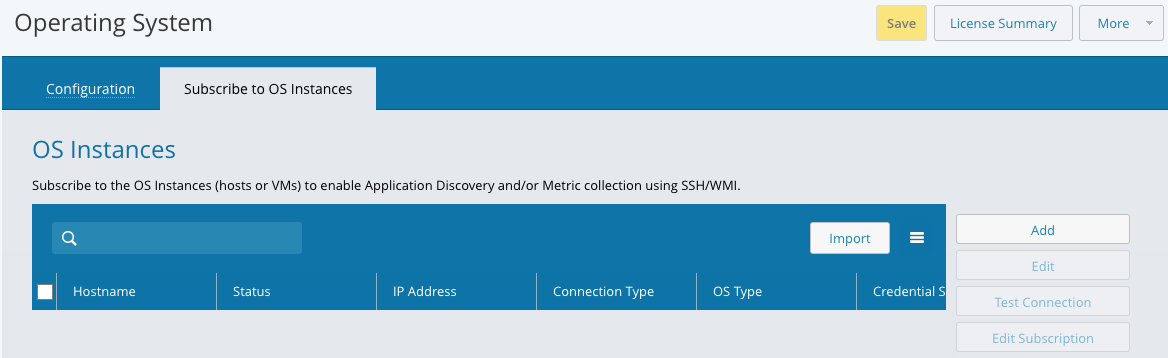
There are two variations of the New OS Instance dialog box, depending on whether you are adding a Linux or Windows OS instance.
Click Import to import hosts from a CSV file of a specified format.
You can click Save on the main OS Instances page at any time to save the current status of the operation.
Click Test Connection to verify that the specified credentials can be used to connect to the host.
Select individual, multiple, or all hosts, and click Subscribe/Unsubscribe.
The Import OS Instances dialog box displays.
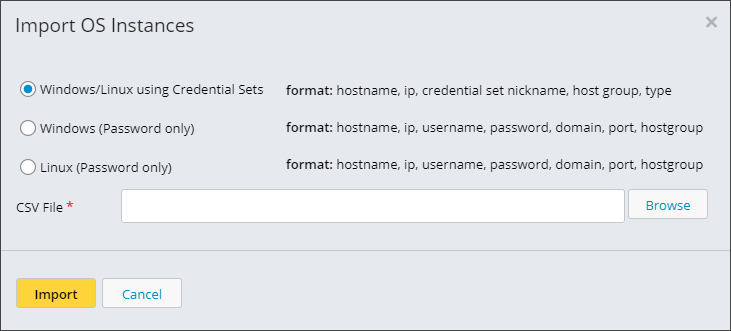
A discovery audit file contains details of the import.
The App Discovery and OS Monitoring columns show the subscription status of the host entry for those services.
You can click on the triangle on the right edge of the column to change the subscription status. If the entry has Subscribed selected for App Discovery, it is included for App Discovery. If the entry has Subscribed selected for OS Monitoring, IO discovers resources within that OS and collect metrics for it.
To change the subscription status for one or more entries at the same time, select individual, multiple, or all hosts, and click Edit Subscription. A pop up window displays and from there, you can set the App Discovery and OS Monitoring subscription states.
Click Save to save the configuration.
Discovery occurs at the schedule that you have set up in the Configuration tab. If you want discovery to occur now, click Start Discovery.
Note
OS monitoring metrics collection being for an OS instance only after it has been successfully discovered.
The Status column indicates the discovery status and metrics collection of the OS instance. The Last Metrics Collection column indicates when the last metrics collection was attempted for that OS Instance.
Related Topics
SSL Certificate Handling
This integration requires a secure connection to the target device, which can be achieved automatically if the device has a certificate that has been signed by a root certificate authority. If this is the case, you may complete the form and click the Next button to proceed to the next page of the configuration.
If your device does not have a properly signed certificate, you may associate a certificate (for example, a self-signed certificate) with the device using one of the two following methods.
Automatically fetch the certificate from the target system. A valid IP address and port number are required.
Upload the certificate from your local system.
The first page of the VMware vSphere configuration looks like this:
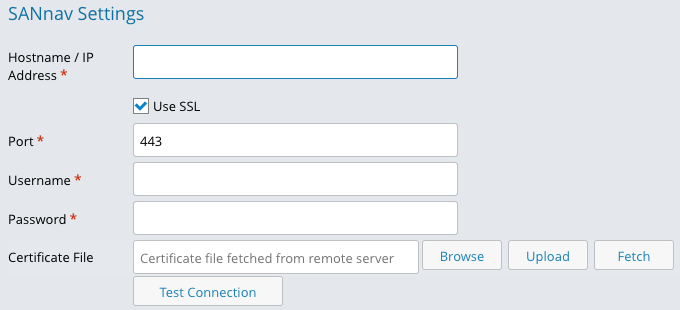
Using Fetch to Automatically Retrieve a Certificate
Clicking on the Fetch button will trigger an action that will automatically fetch the certificate from the target system. There are two cases:
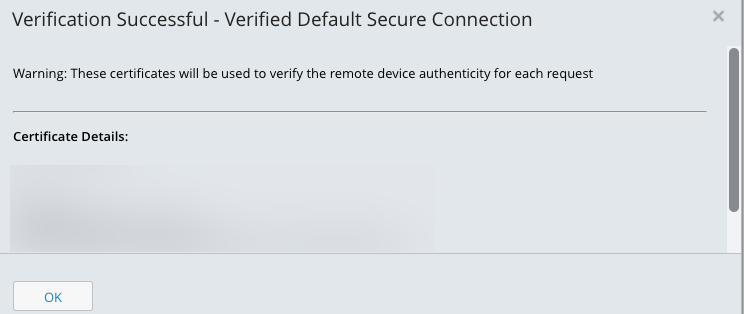
If the fetched certificate has been signed by a valid root certificate authority you will see a popup window with the details of the certificate as shown below. Press OK to continue configuration. Fill in the Name and authentication fields and click the Next button in the upper right hand corner of the screen.
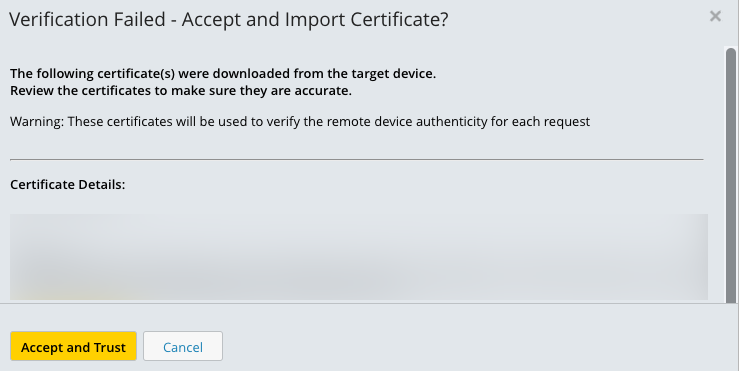
If the fetched certificate is, for example, a self-signed certificate, you will see a popup window with the details of the certificate as shown below. You may either Accept and Trust the retrieved certificate or you may Cancel. If you accept, the Certificate File field will be updated to display "Certificate file fetched from remote server". Fill in the Name and authentication fields and click the Next button in the upper right hand corner of the screen.
Uploading a Certificate
Clicking on the Browse... button will prompt you to upload a certificate from your local system. The Certificate File field will be updated to display the name of the uploaded file. Fill in the Name and authentication fields and click the Next button in the upper right hand corner of the screen.
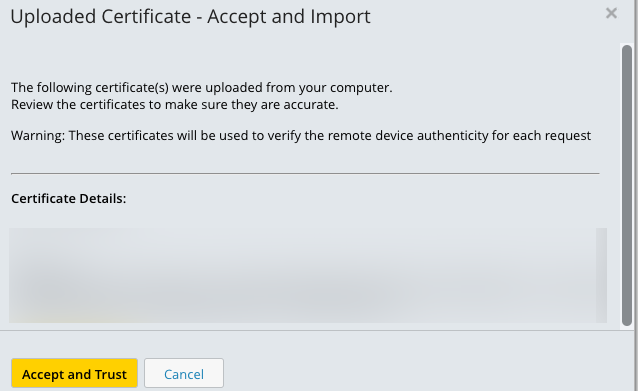
Viewing the Locally Stored Copy of a Certificate
The second page of the VMware vSphere configuration provides UI elements that contain (1) details of the fetched or uploaded certificate and (2) a way to view the current certificate or upload a new/updated certificate.
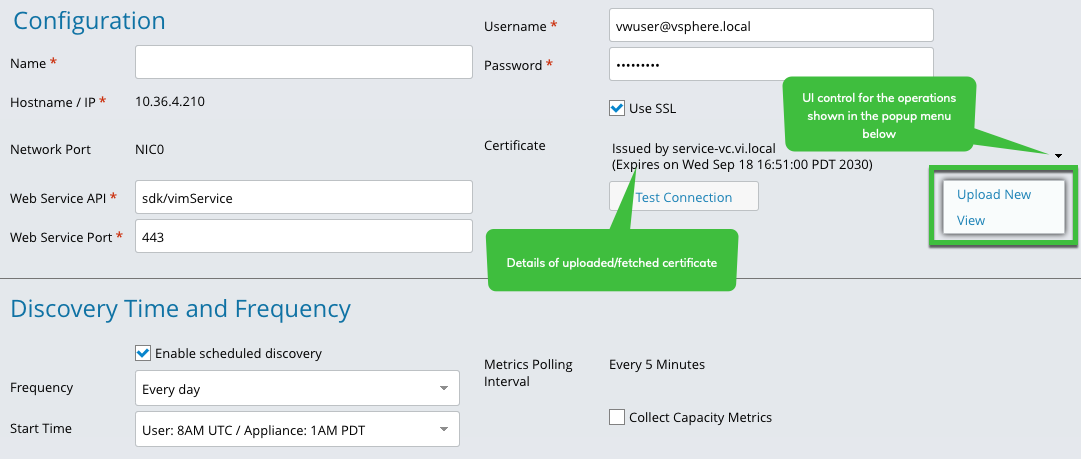
Uploading a New Certificate Post-Configuration
As shown above, there is an option to upload a new certificate after the initial configuration via the Upload New menu item. A new control will open, as shown below. Click on the Browse or Fetch buttons to either upload a certificate from your local machine or fetch the certificate from your device. In either case, you must also click on the Upload button once the certificate is loaded to save the new certificate to IO.

Import File Format
The following format is required for CSV files used to import OS instances.
Hostname: Optional
IP address: Used for the address device on the network
Credential set nickname: Name of the credential set
Host group: Not used, leave blank
Type: SSH or WMI
Example Import file:
In the format hostname:ip:credential nickname:type:
Your Host,10.36.4.41,visvc,,ssh
,10.36.4.42,visvc,,ssh
,10.36.4.44,visvc,,ssh
,10.36.4.56,visvc,,ssh
,10.36.4.57,visvc,,ssh
,10.36.4.105, iouser - Win,,wmi