Adding a Report as tab in Inventory View
To add a report as a tab in Inventory, do the following.
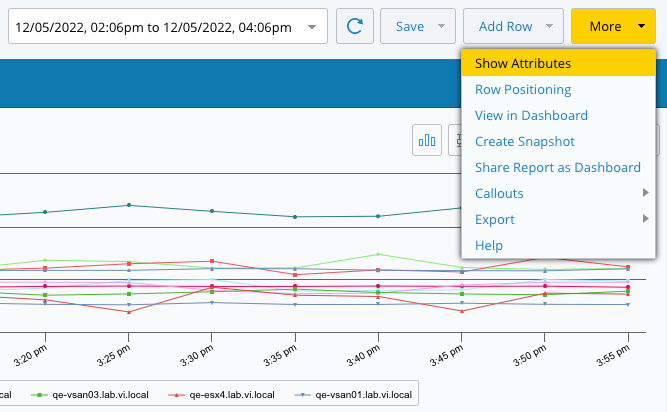
Click More > Show Attributes.
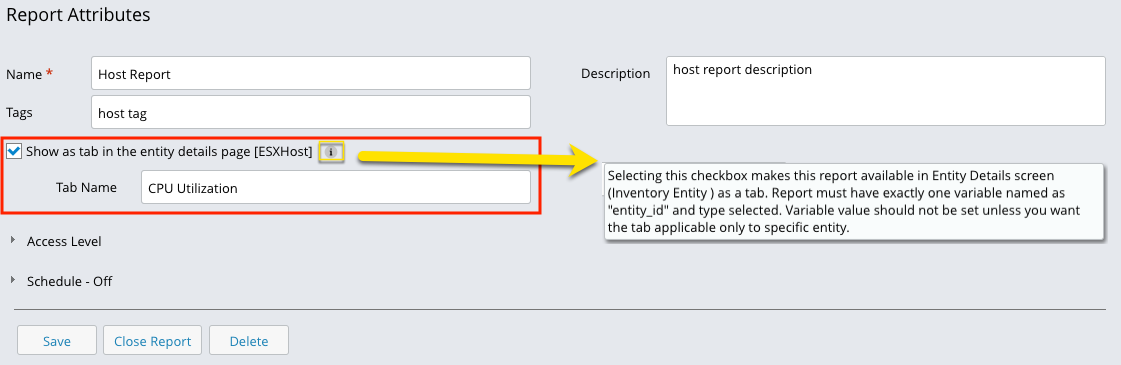
Under Report Attributes.
Select the Show as tab in the entity details page [EntityType] checkbox, where EntityType is the entity type (e.g., ESX Host) selected for the report and related variable, and provide a name for the Inventory tab in the Tab Name field.
Preview Tab Order: While viewing an Inventory report's attributes and deciding on a tab name, you may preview the tab order by clicking on the Preview Tab Order button to the right of the Tab Name field.
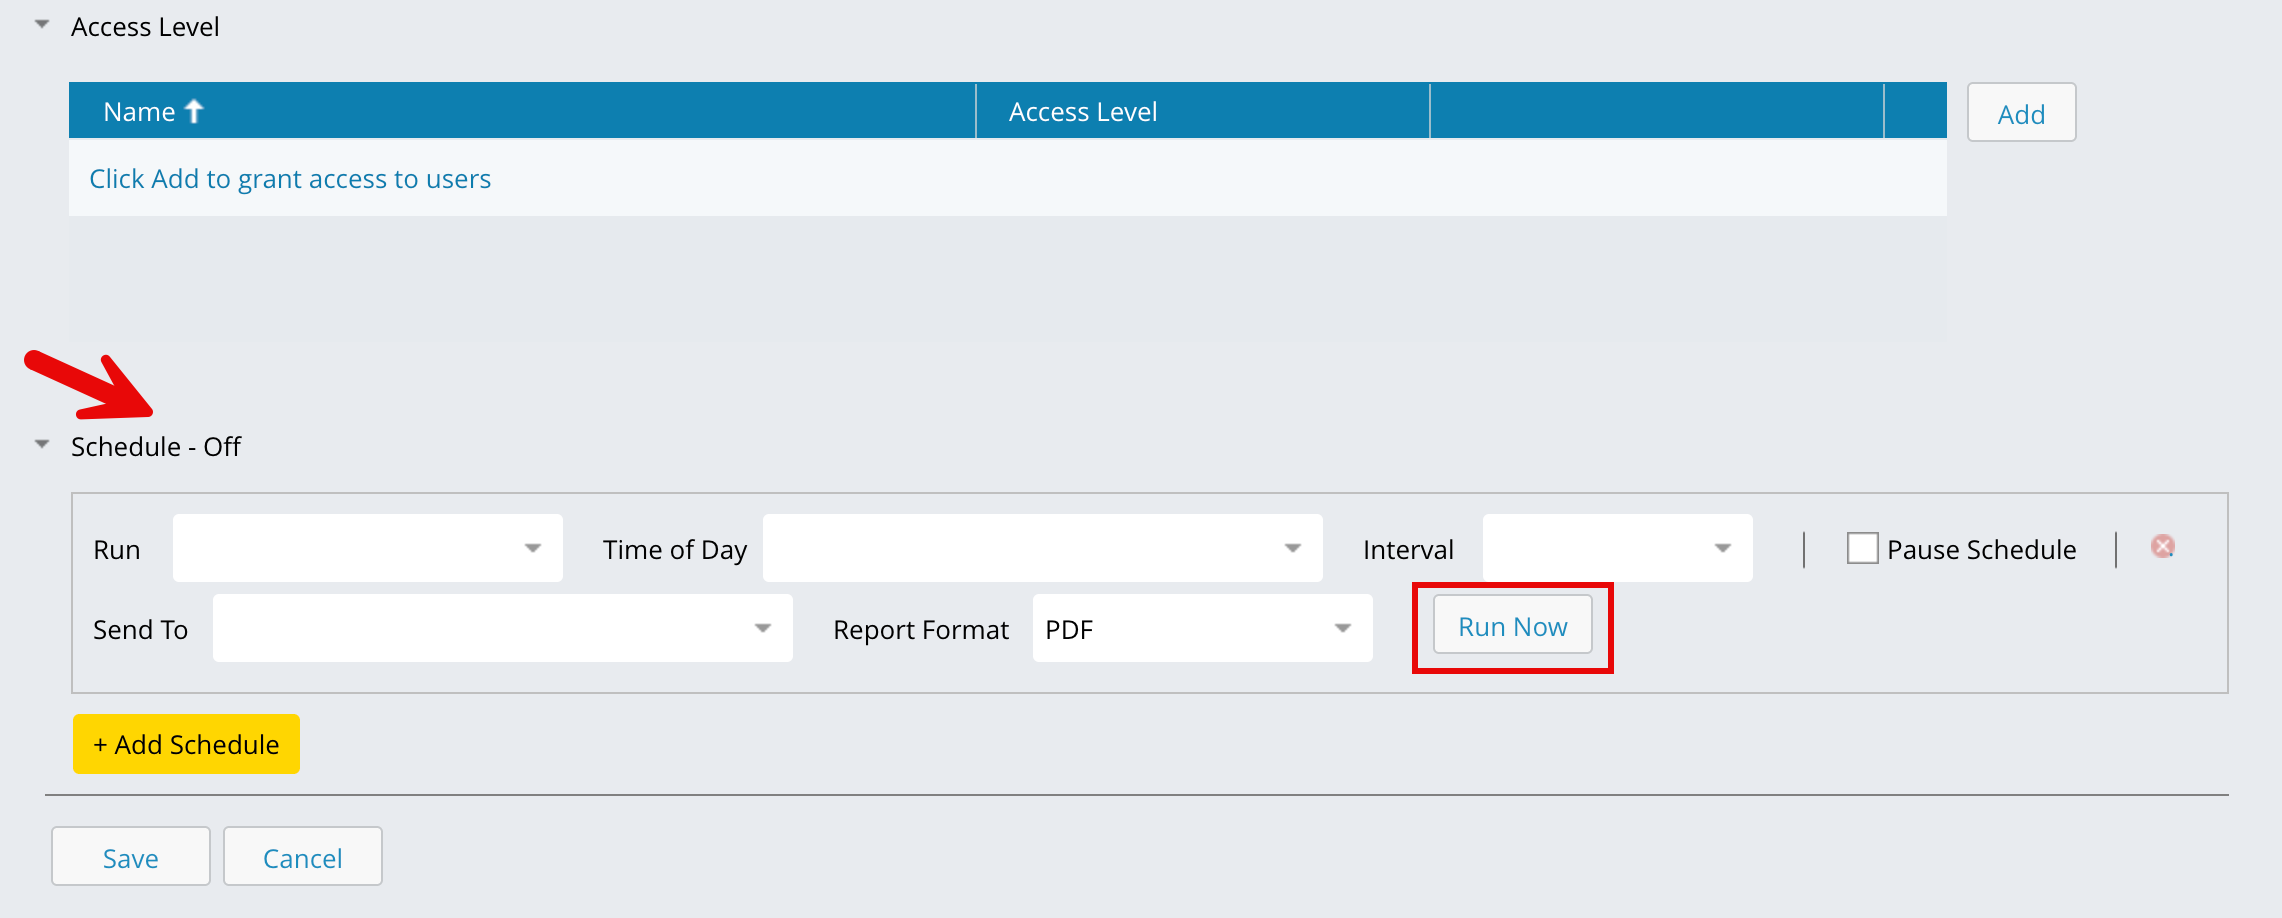
Access Level: Click Add to grant access to users.
Schedule The Schedule feature allows you to generate and send reports at defined intervals automatically.
Configure the schedule options:
Run: Select how often the report should run, options include Every Day, Every Other Day, or specific days of the week (for example, Every Monday, Every Friday).
Interval: Select the time range for the data to be included in each report.
Send To: Choose the recipients who will receive the generated report.
Report Format: Select the file format for the report — PDF, PNG, or SVG.
Pause Schedule: Enable this option to temporarily stop report generation without deleting the schedule.
Click Run Now to generate the report immediately without waiting for the next scheduled time.
The Run Now feature allows you to instantly create a scheduled report and send it to your registered email address, even if a regular schedule is already set for that report.
Note
Before using the Run Now option, ensure that the outbound email service is enabled in your system settings. This allows the system to successfully deliver the report to your inbox.
Click Save. The system will automatically generate and send the report based on your defined schedule.