Deploying the OVA on Nutanix
Image Creation in Nutanix
Open the Nutanix Prism UI.
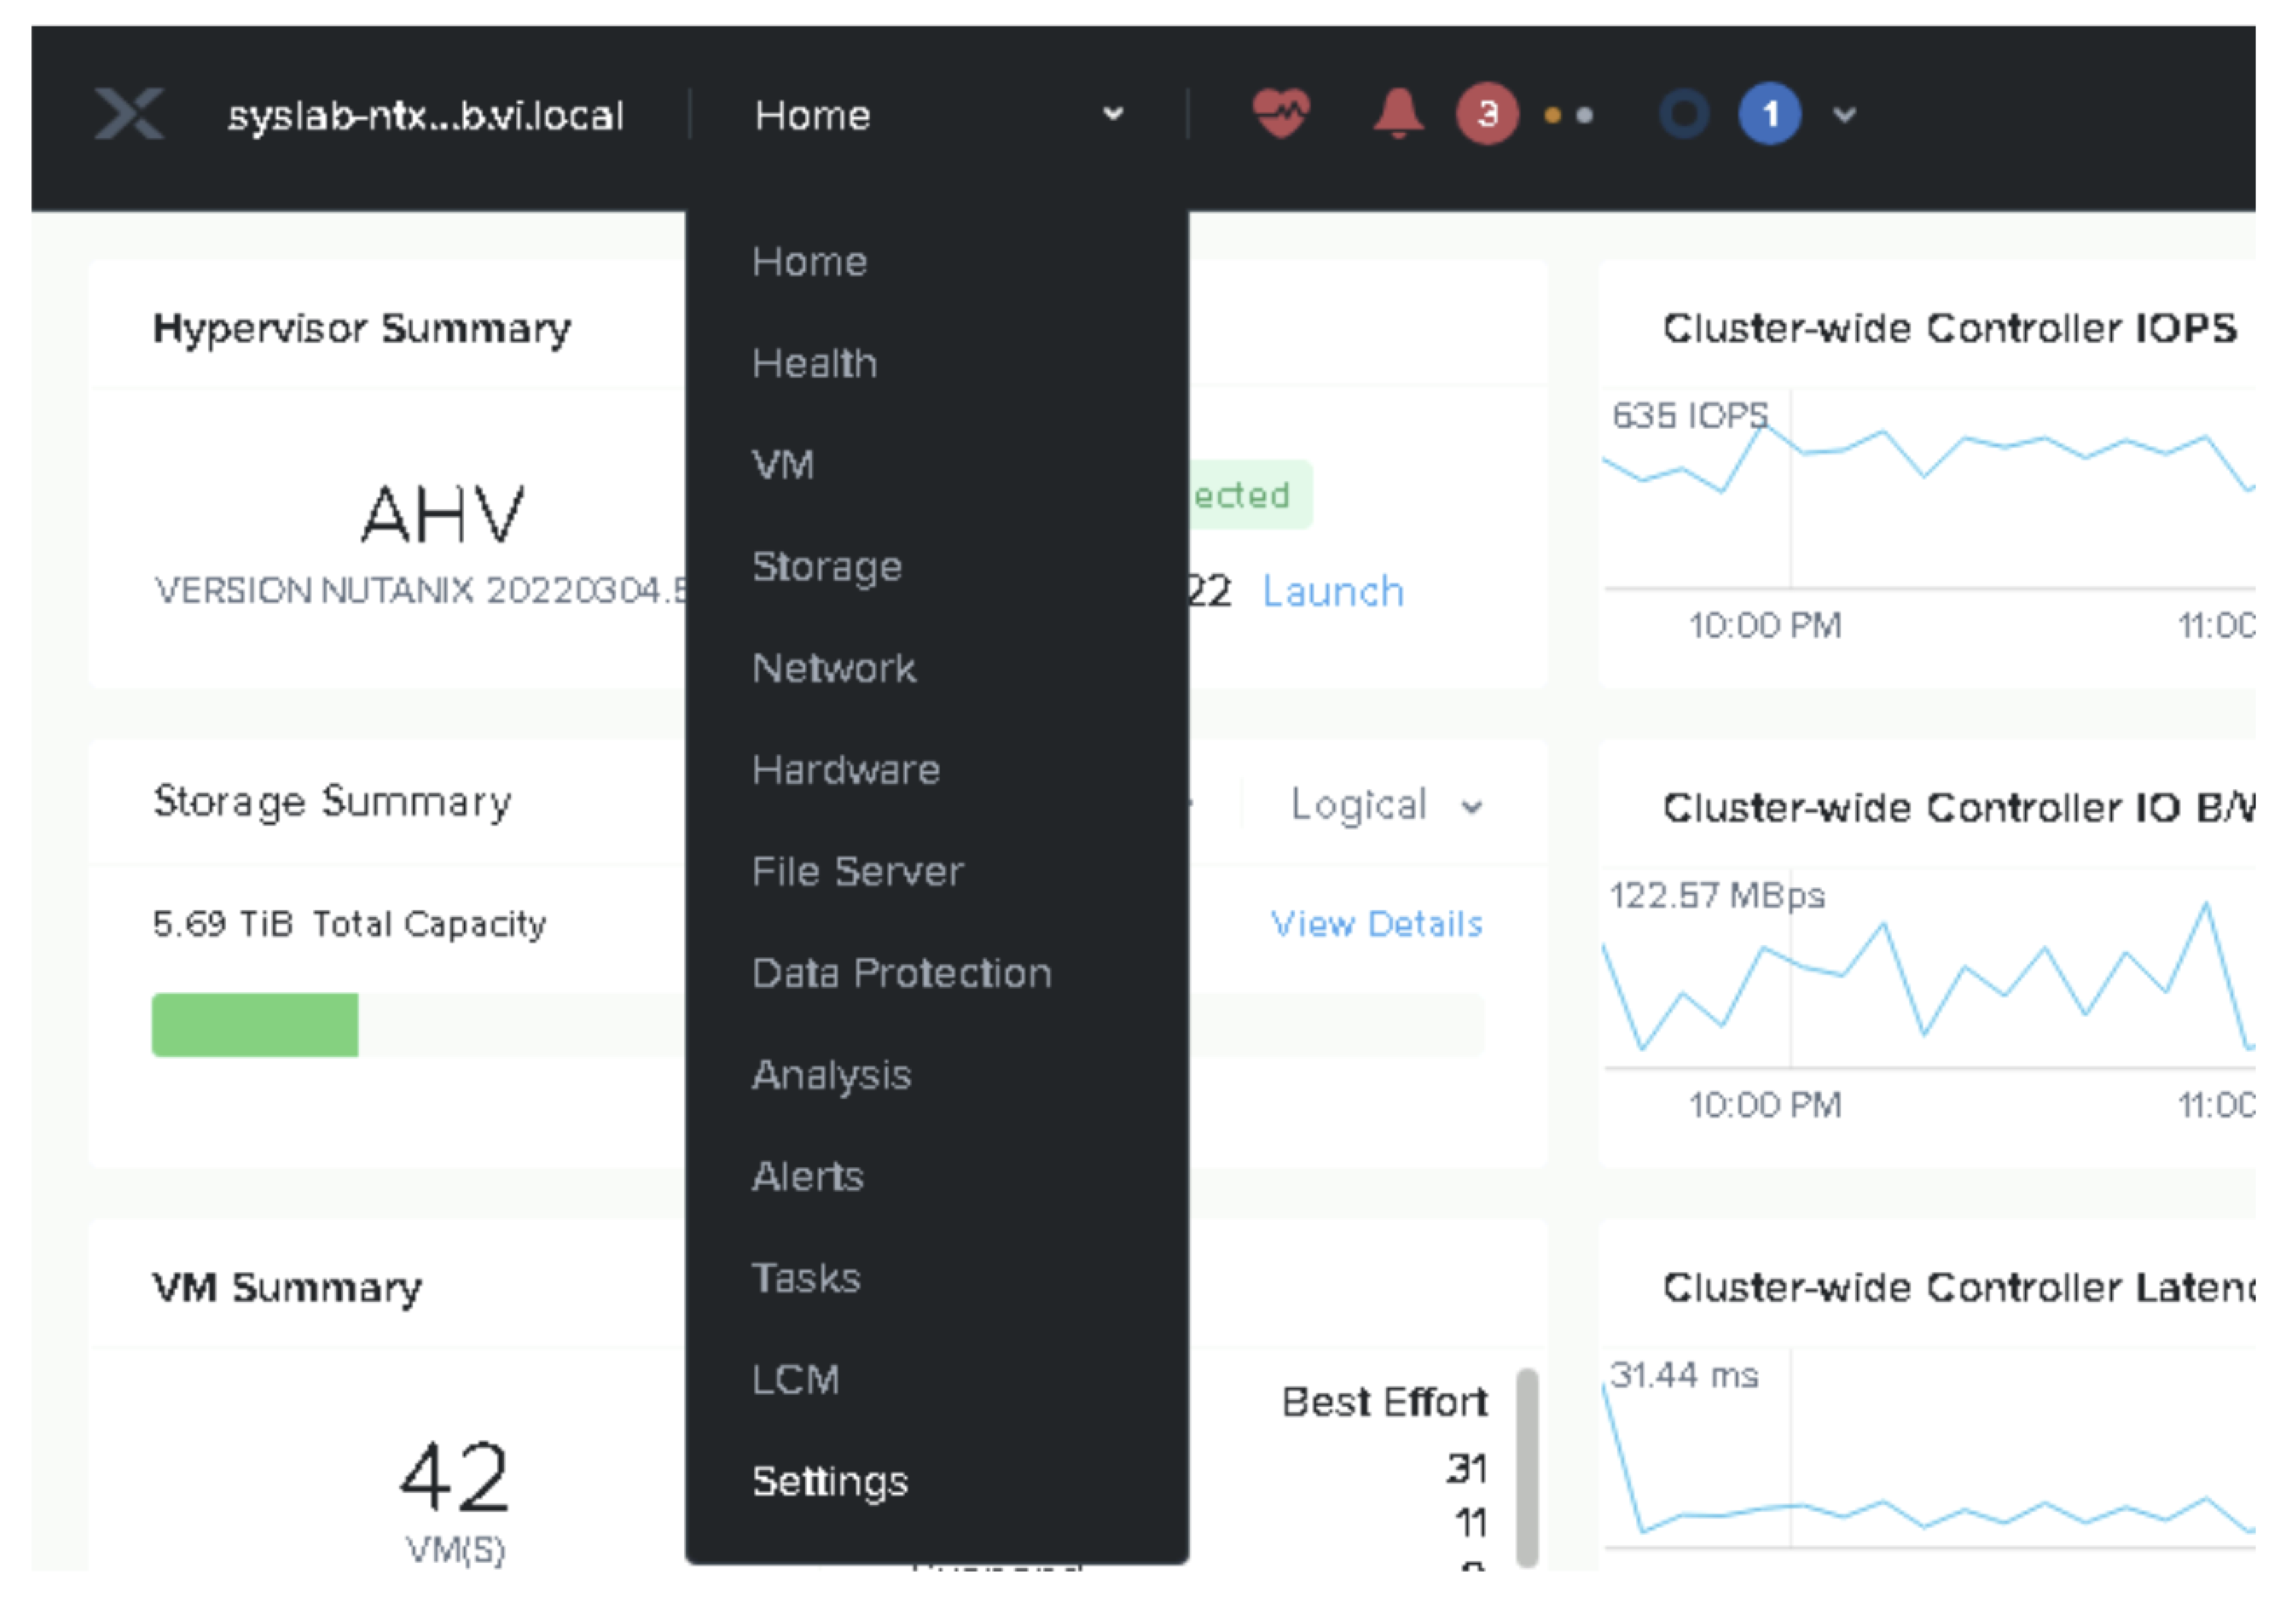
Navigate to Image Configuration: Go to Settings > Image Configuration.
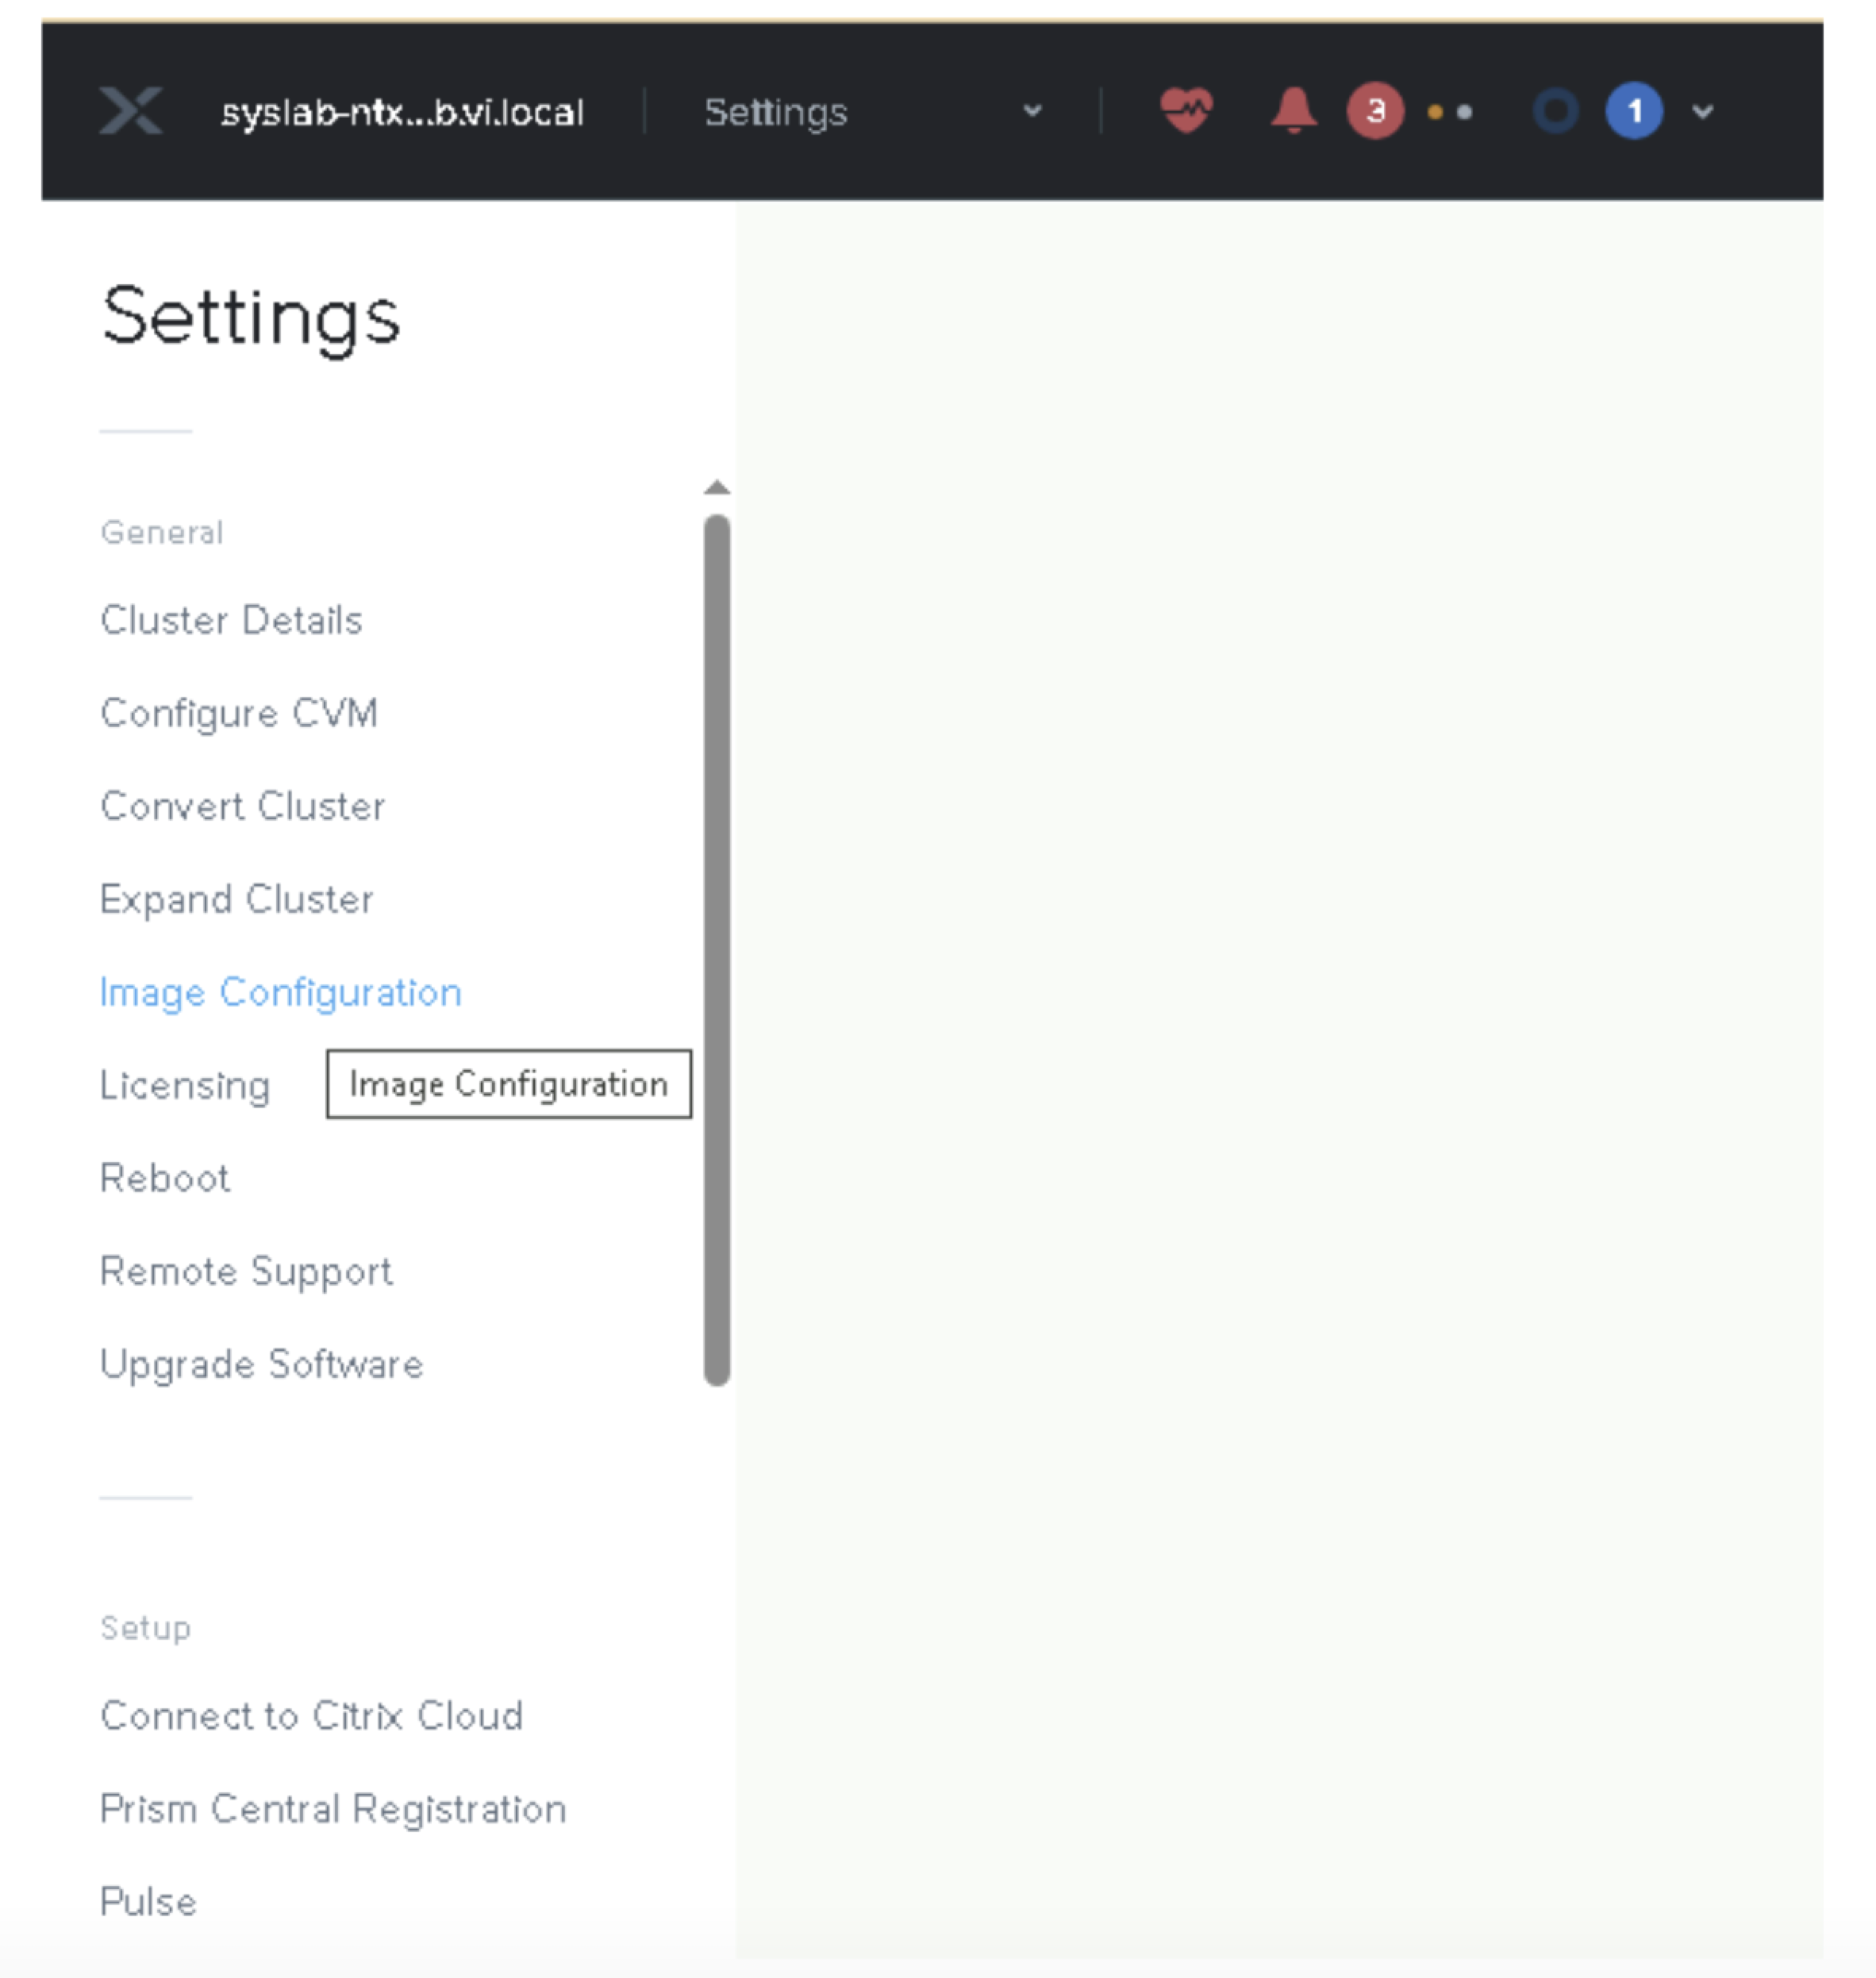
Click Upload Image.

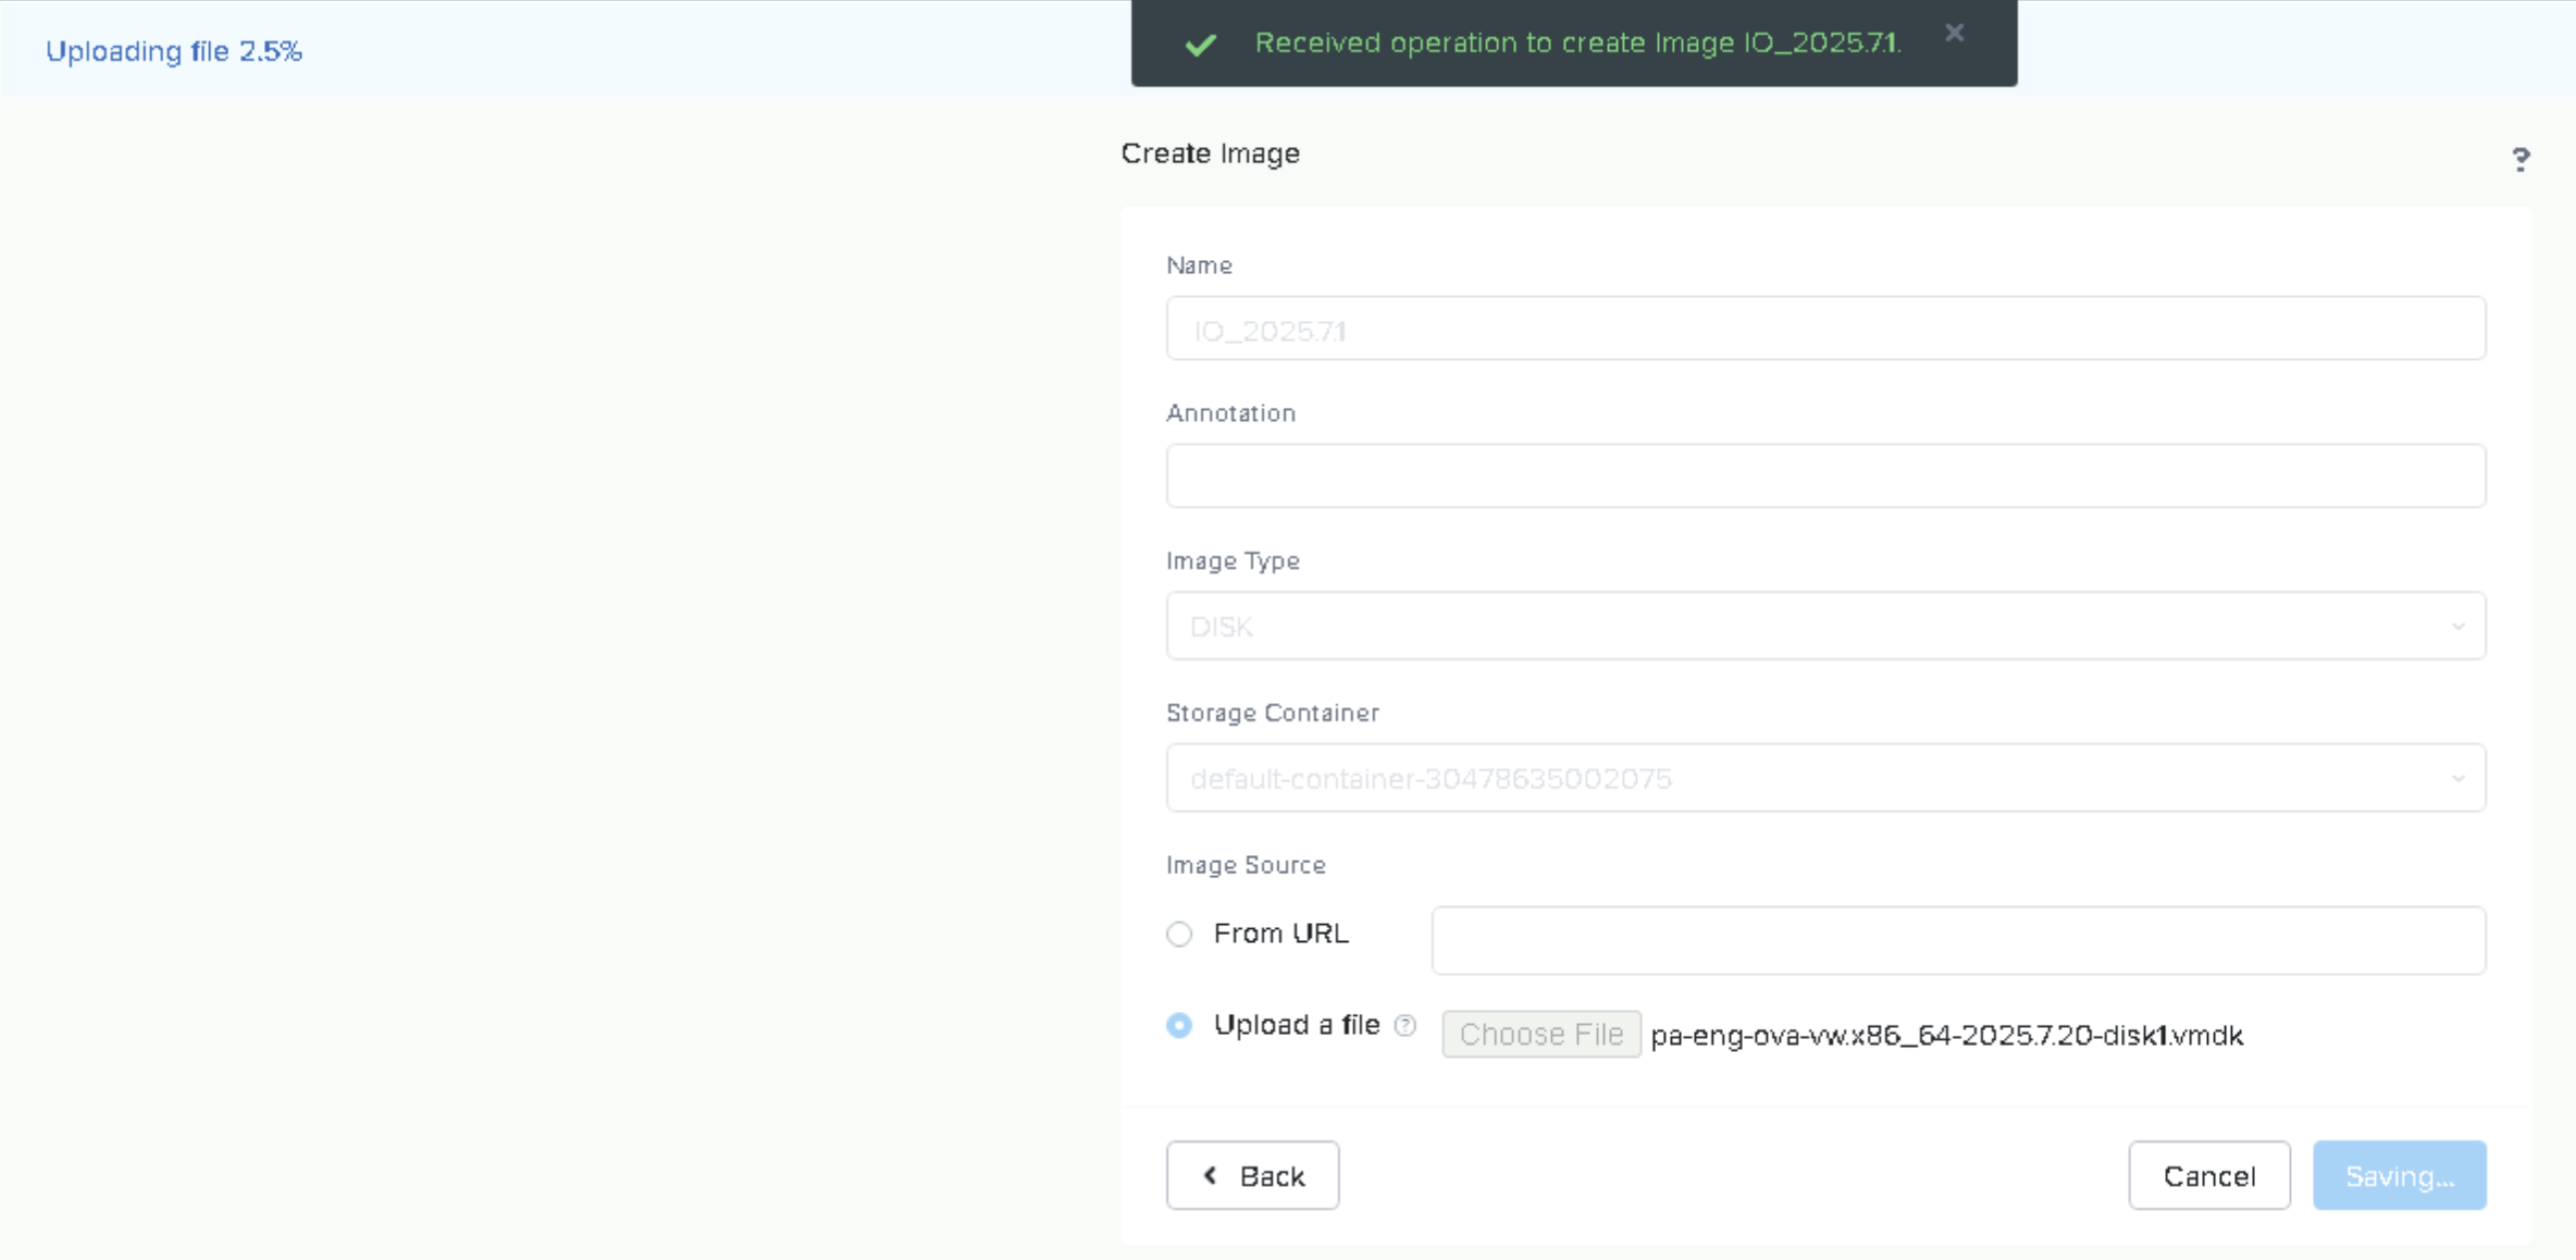
Configure Image Details:
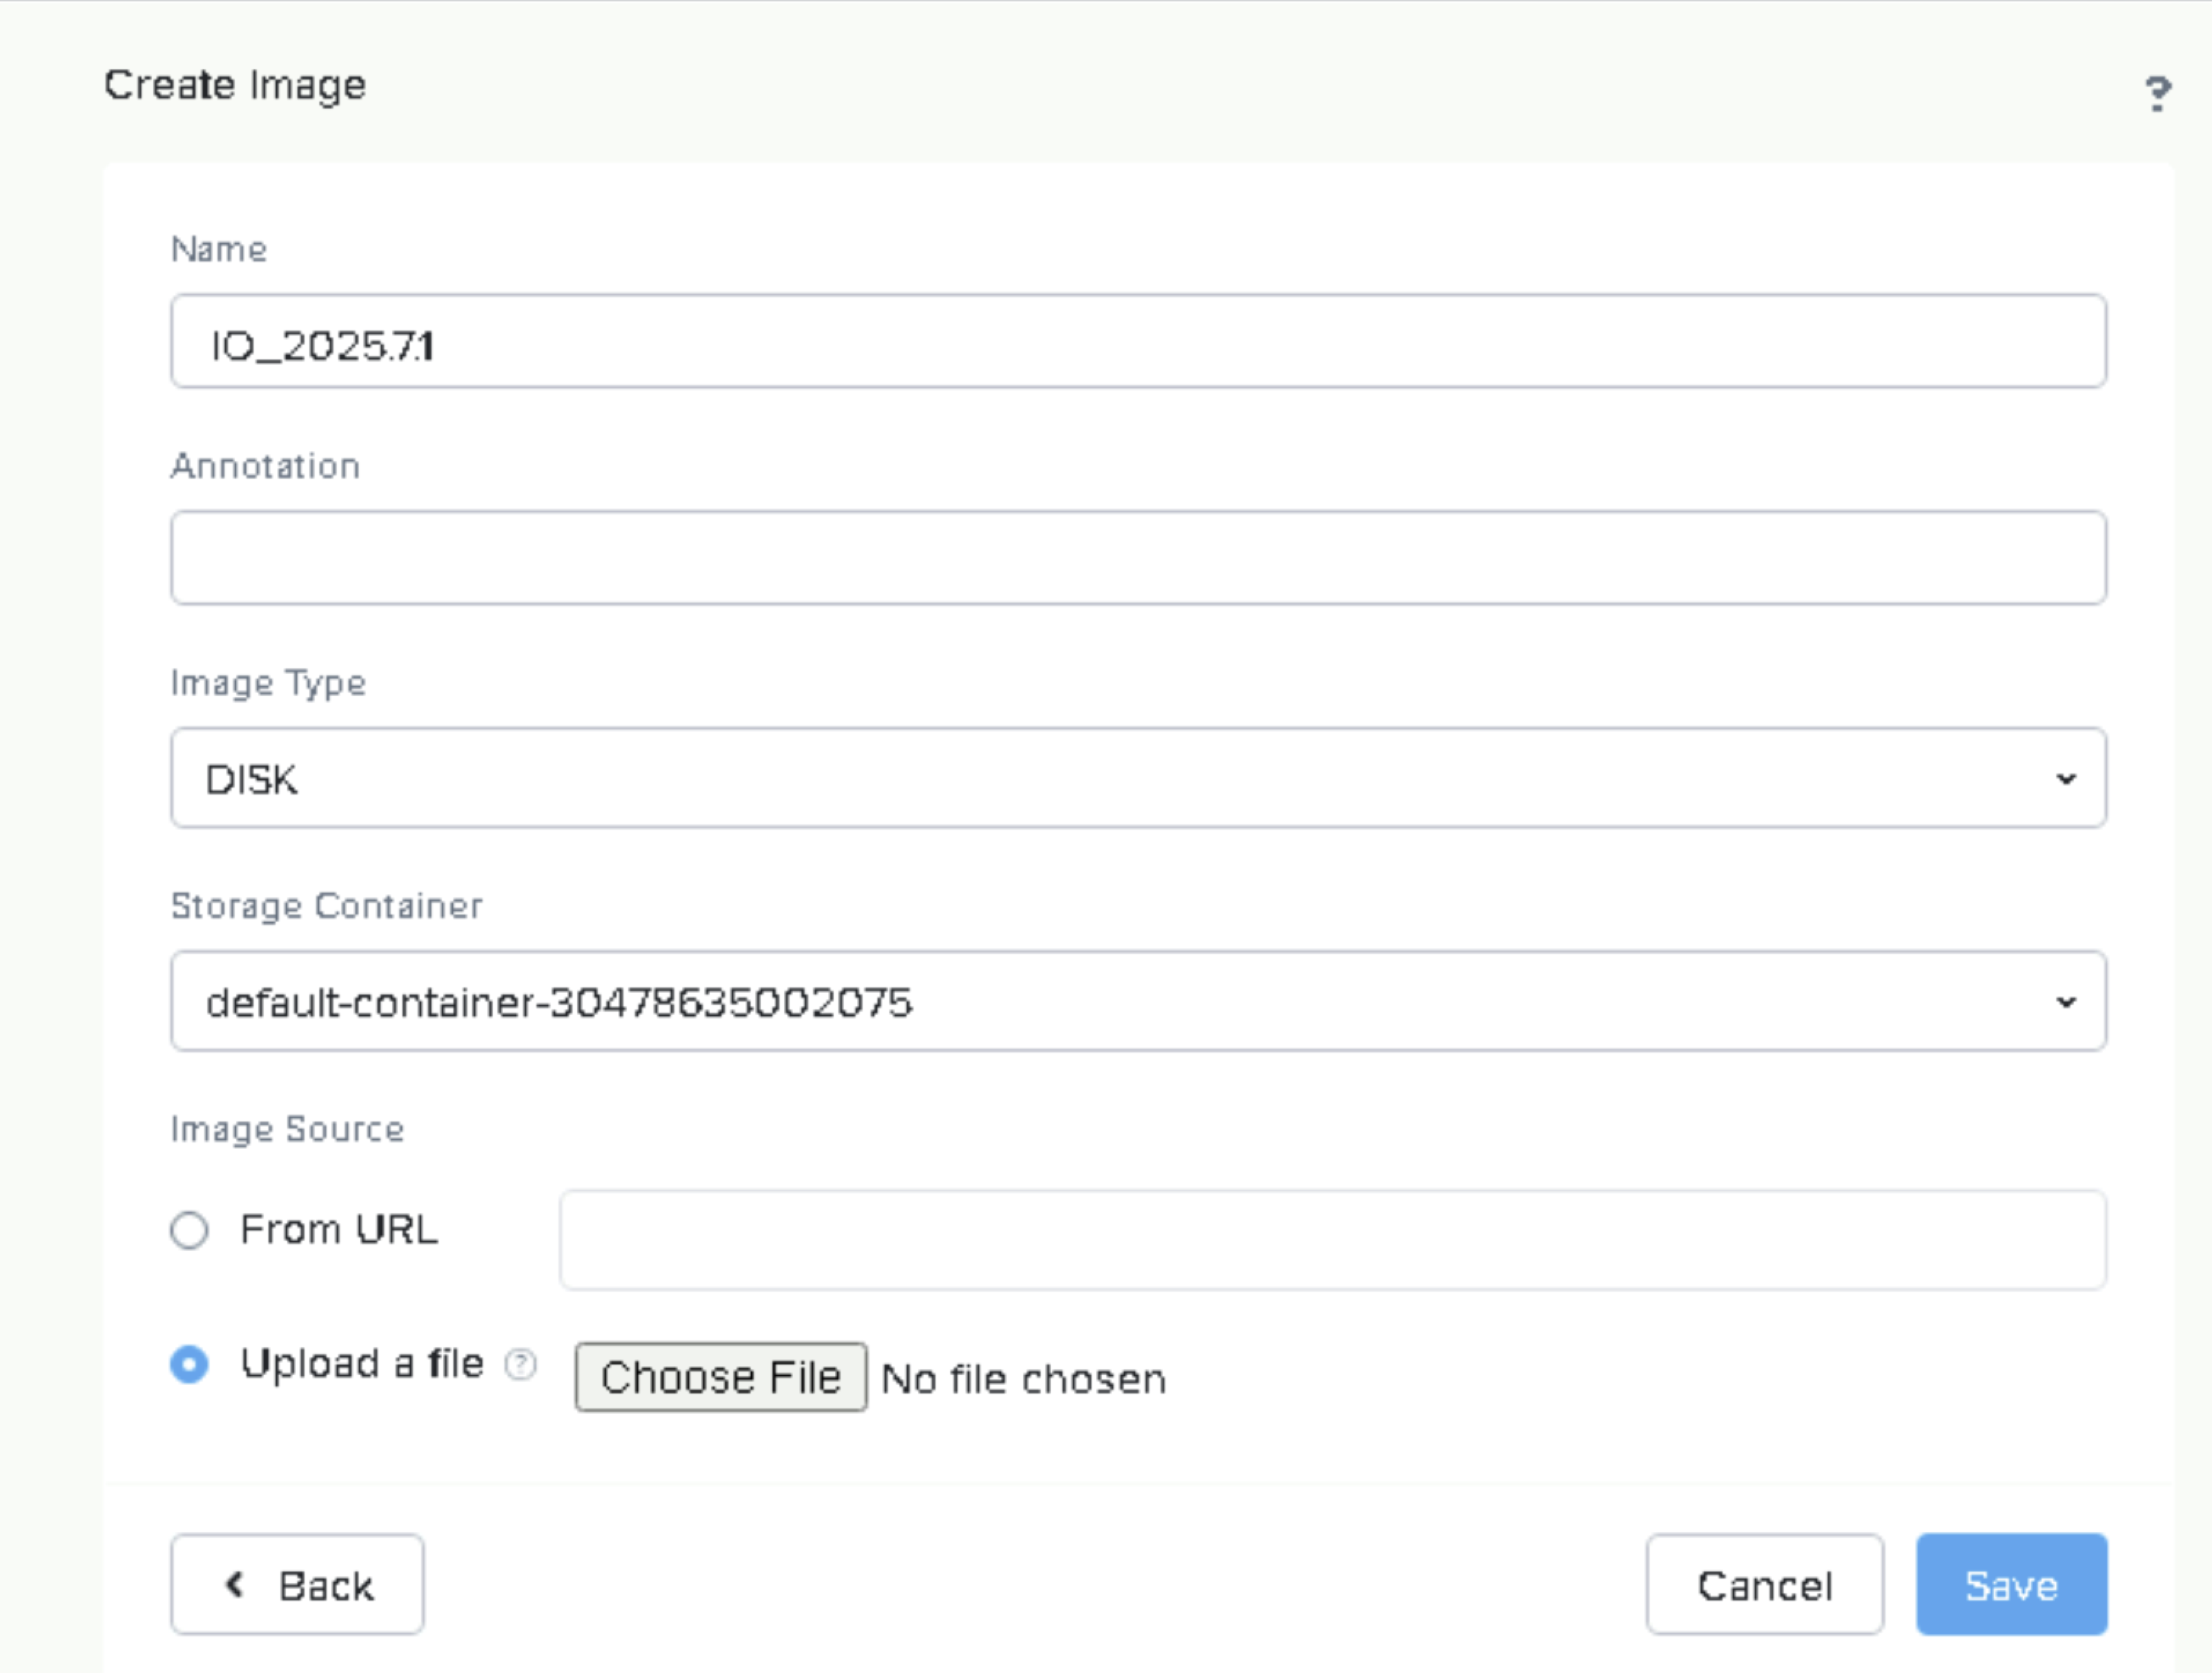
Enter a name for your image.
Select DISK as the Image type.
Specify the container as default-container.
Click Upload a File.
Choose either the Hyper-V VHDX file (Uncompressed) or the VMware VMDK file (Uncompressed) from your local system.
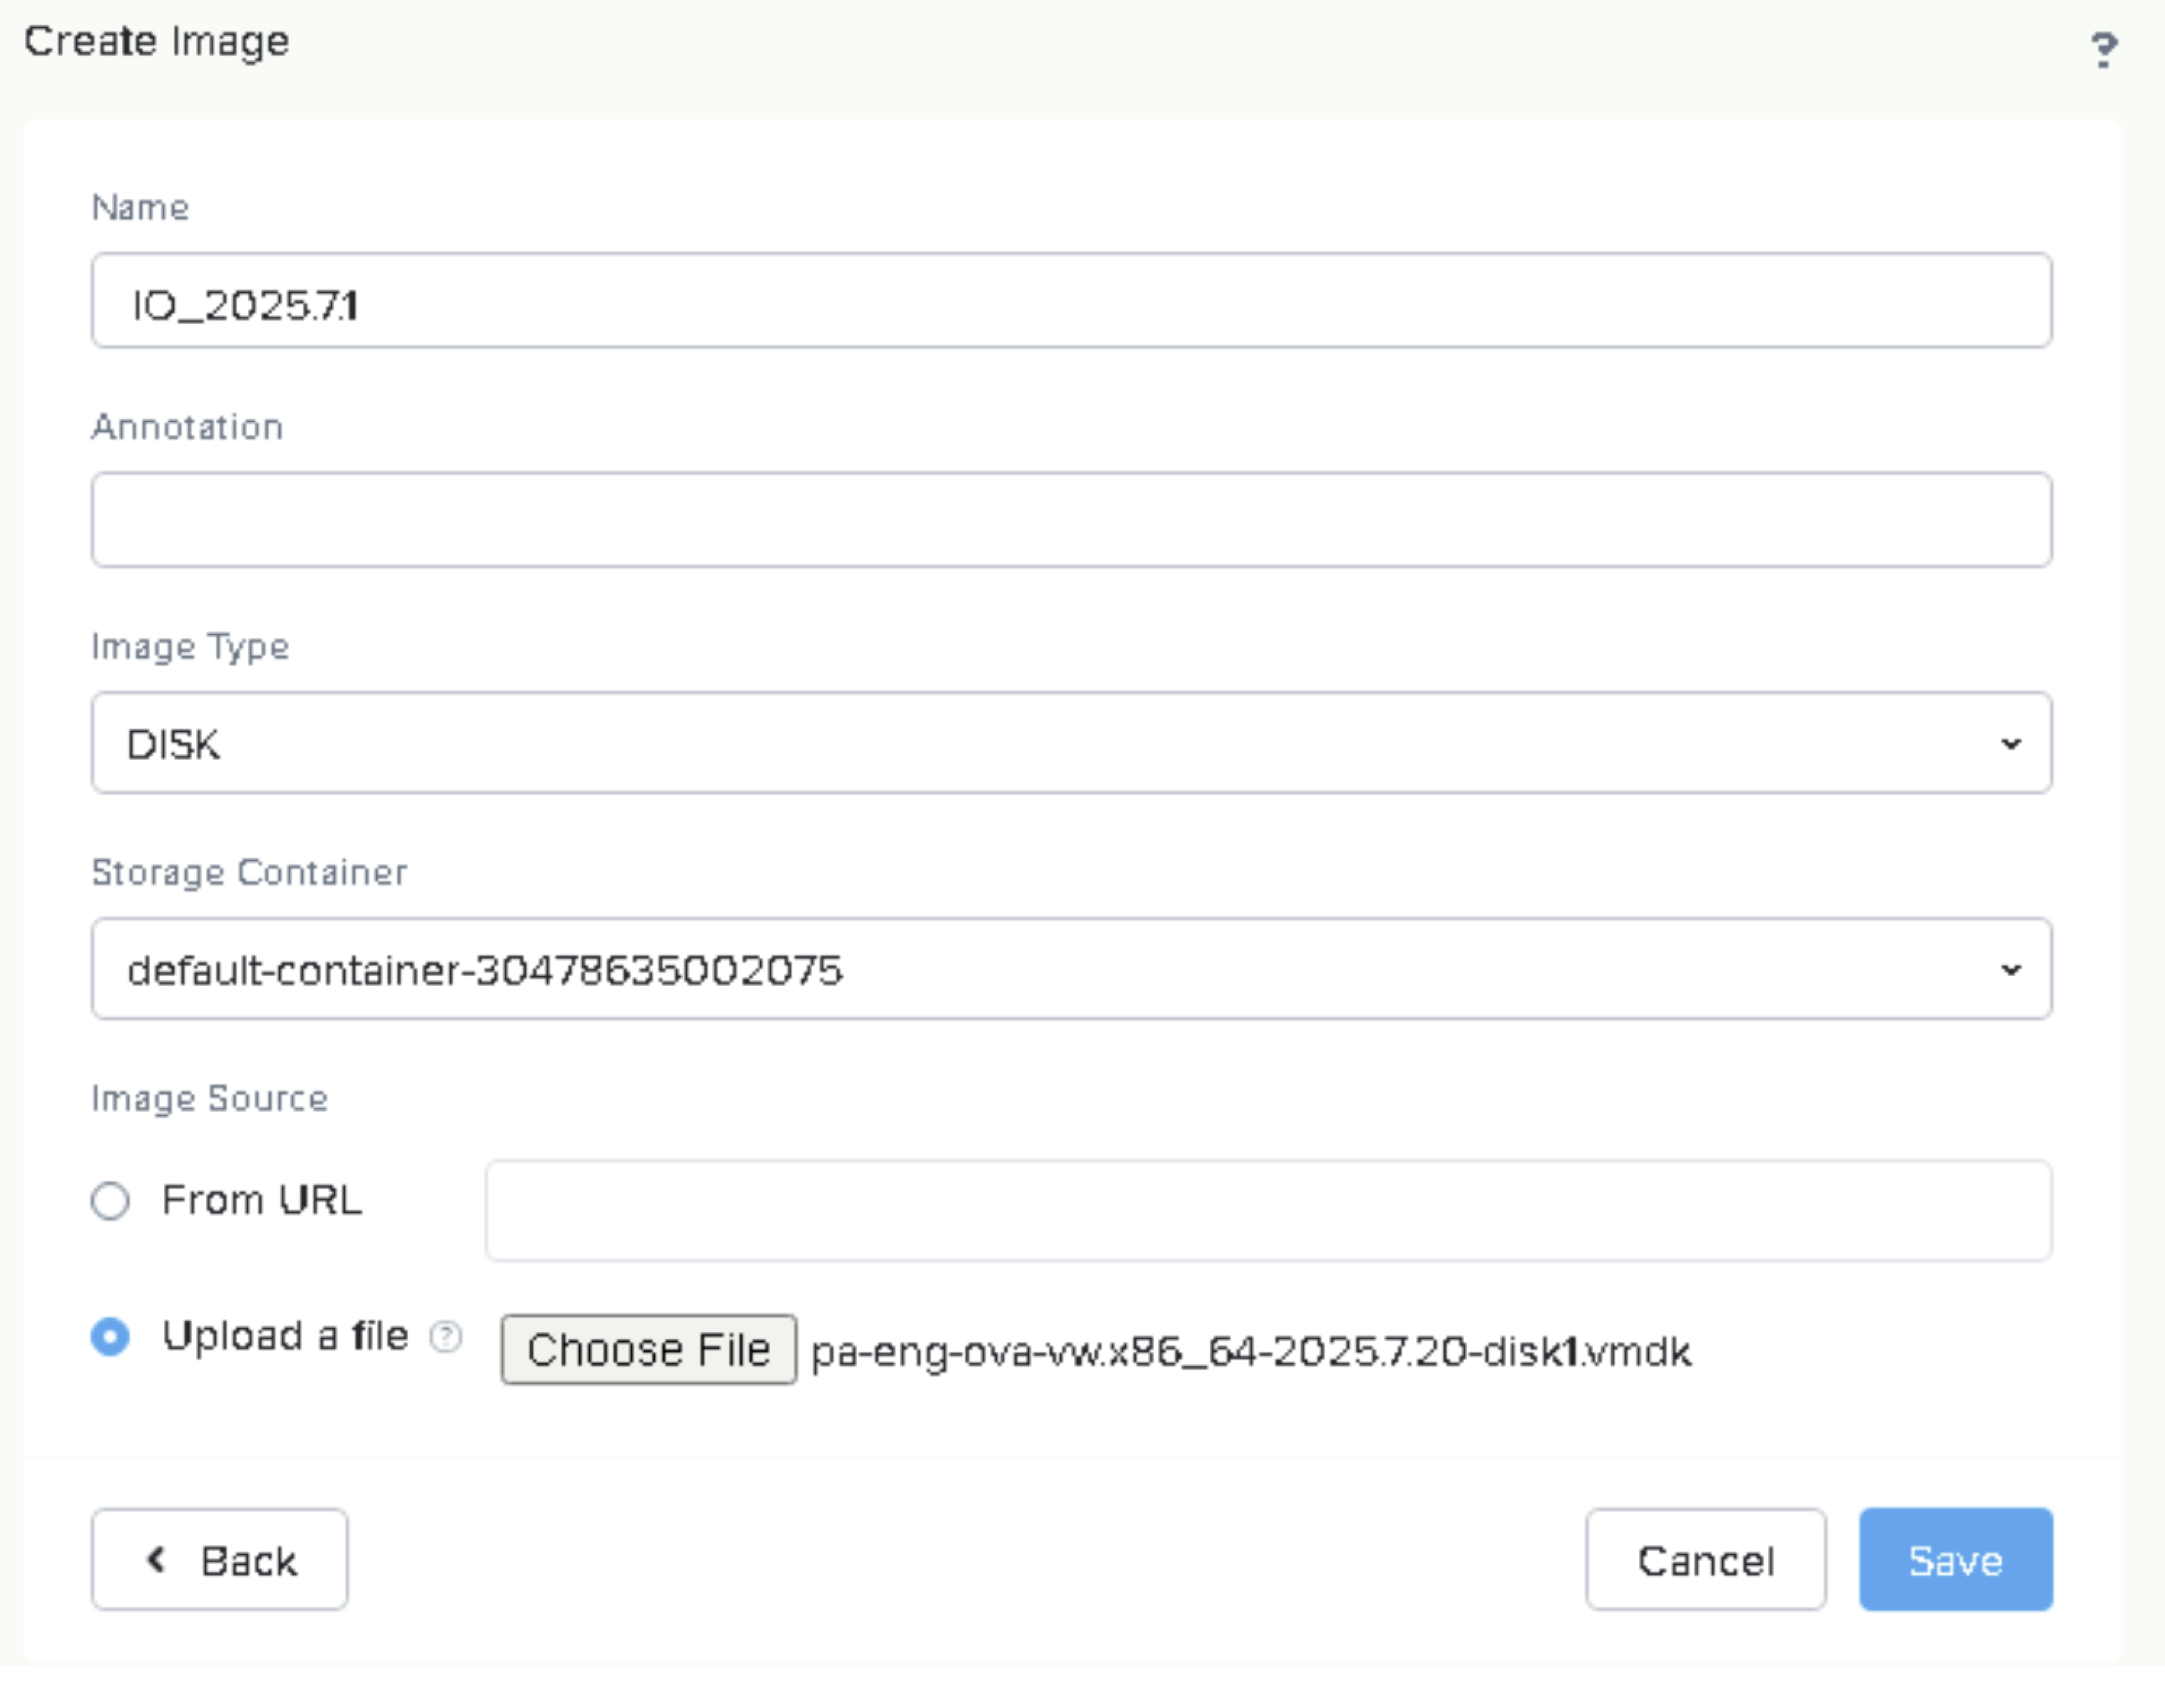
Click Save and wait for the file upload to complete.
After upload, the image may initially show as Inactive while Nutanix processes and converts it to a QCOW disk image.
Refresh the page as needed until the status changes to ACTIVE. This indicates the image is ready to use.

Creating a Virtual Machine (VM)
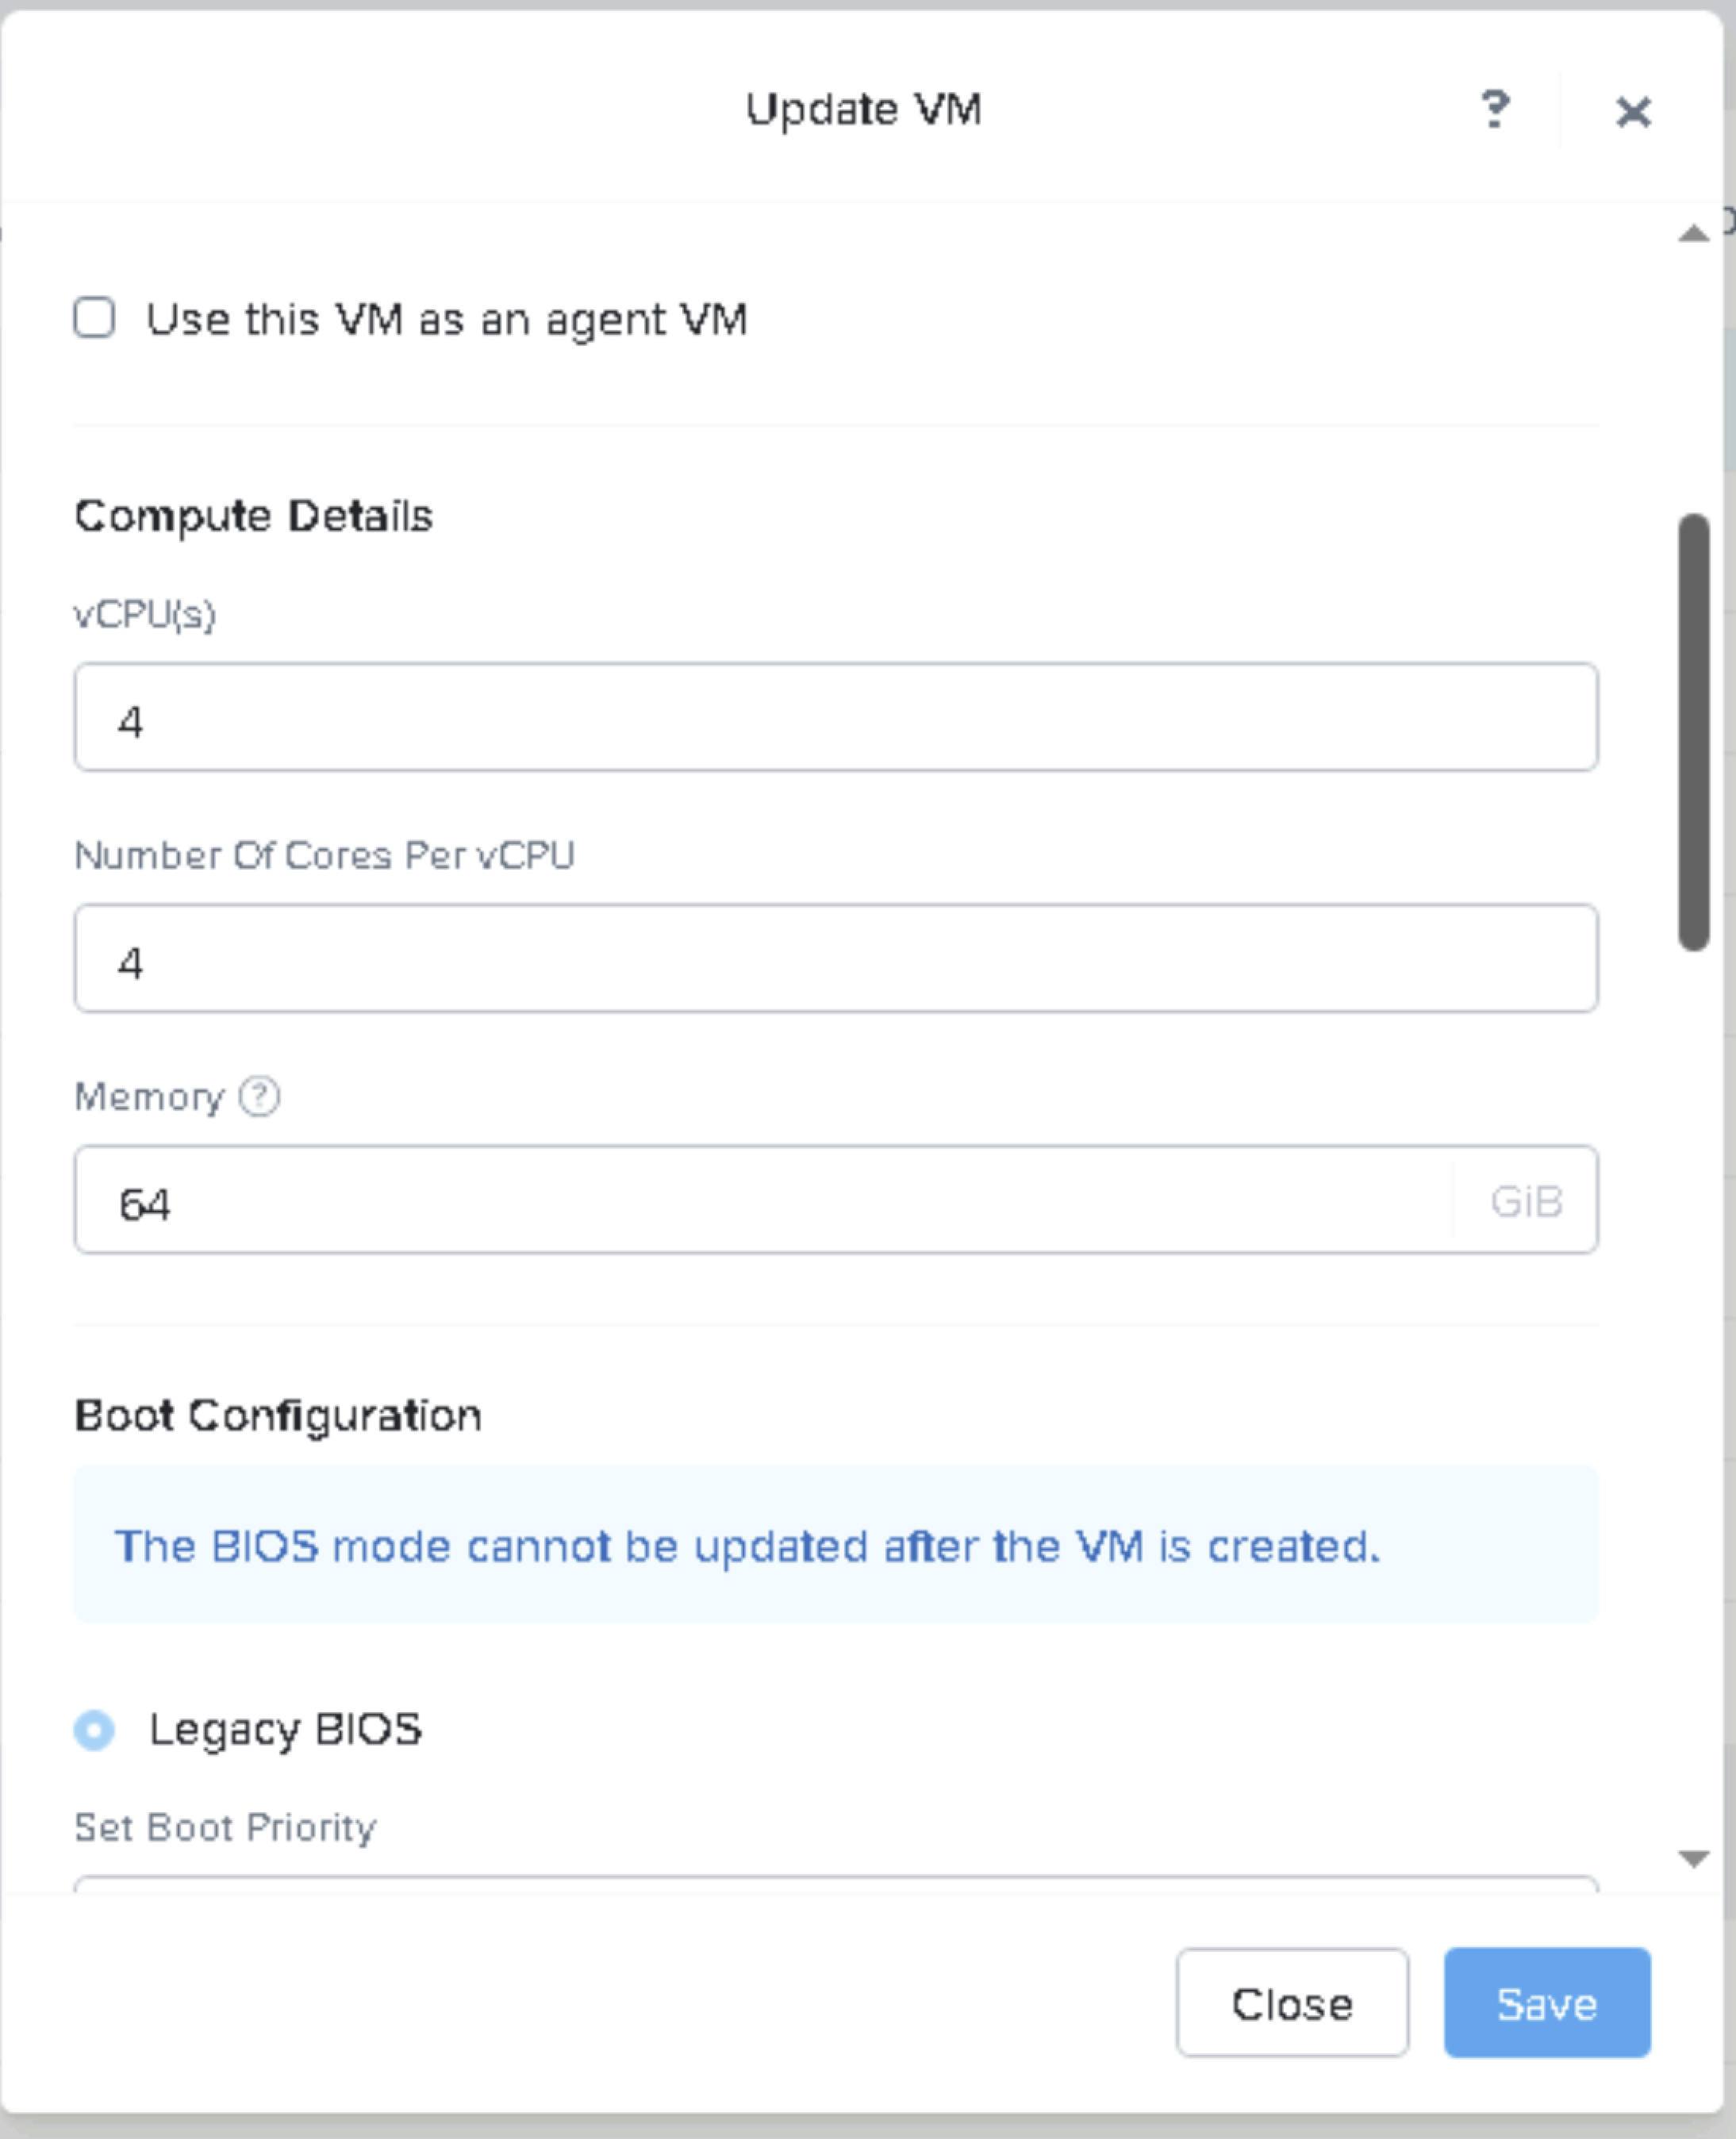
Navigate to the VM tab in Table view. Fill in the Name and Timezone fields (add a Description if desired).
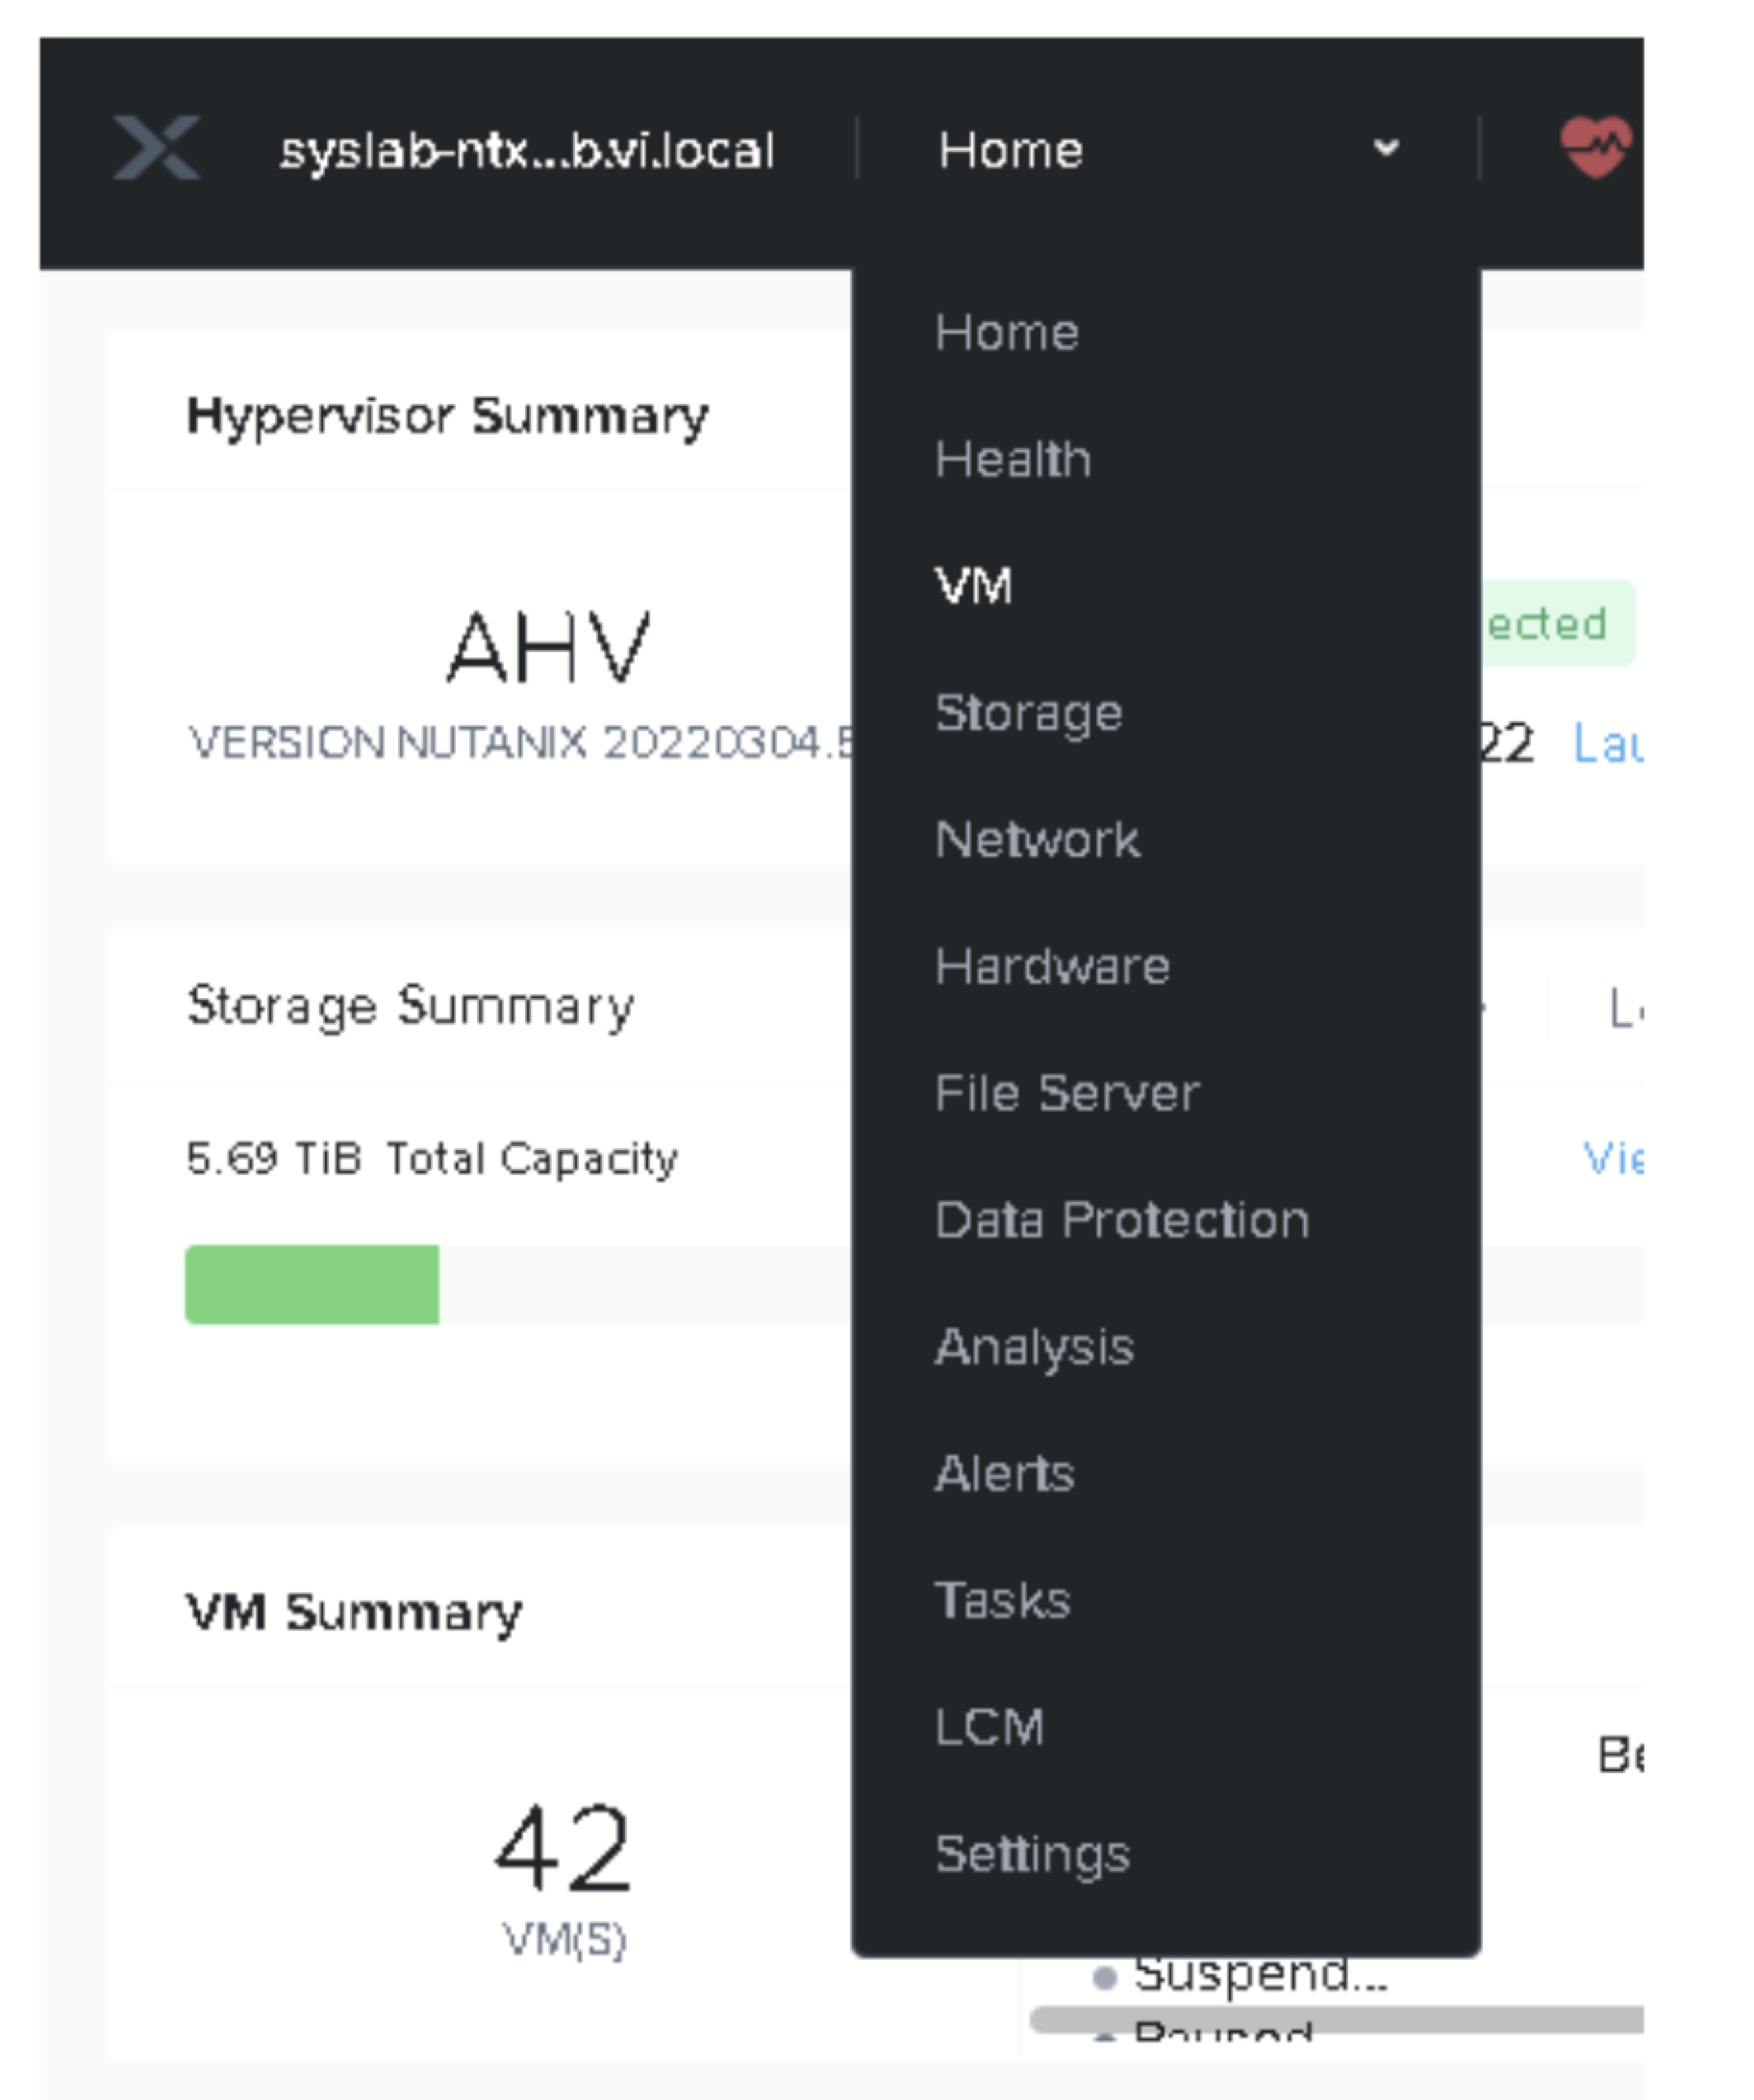
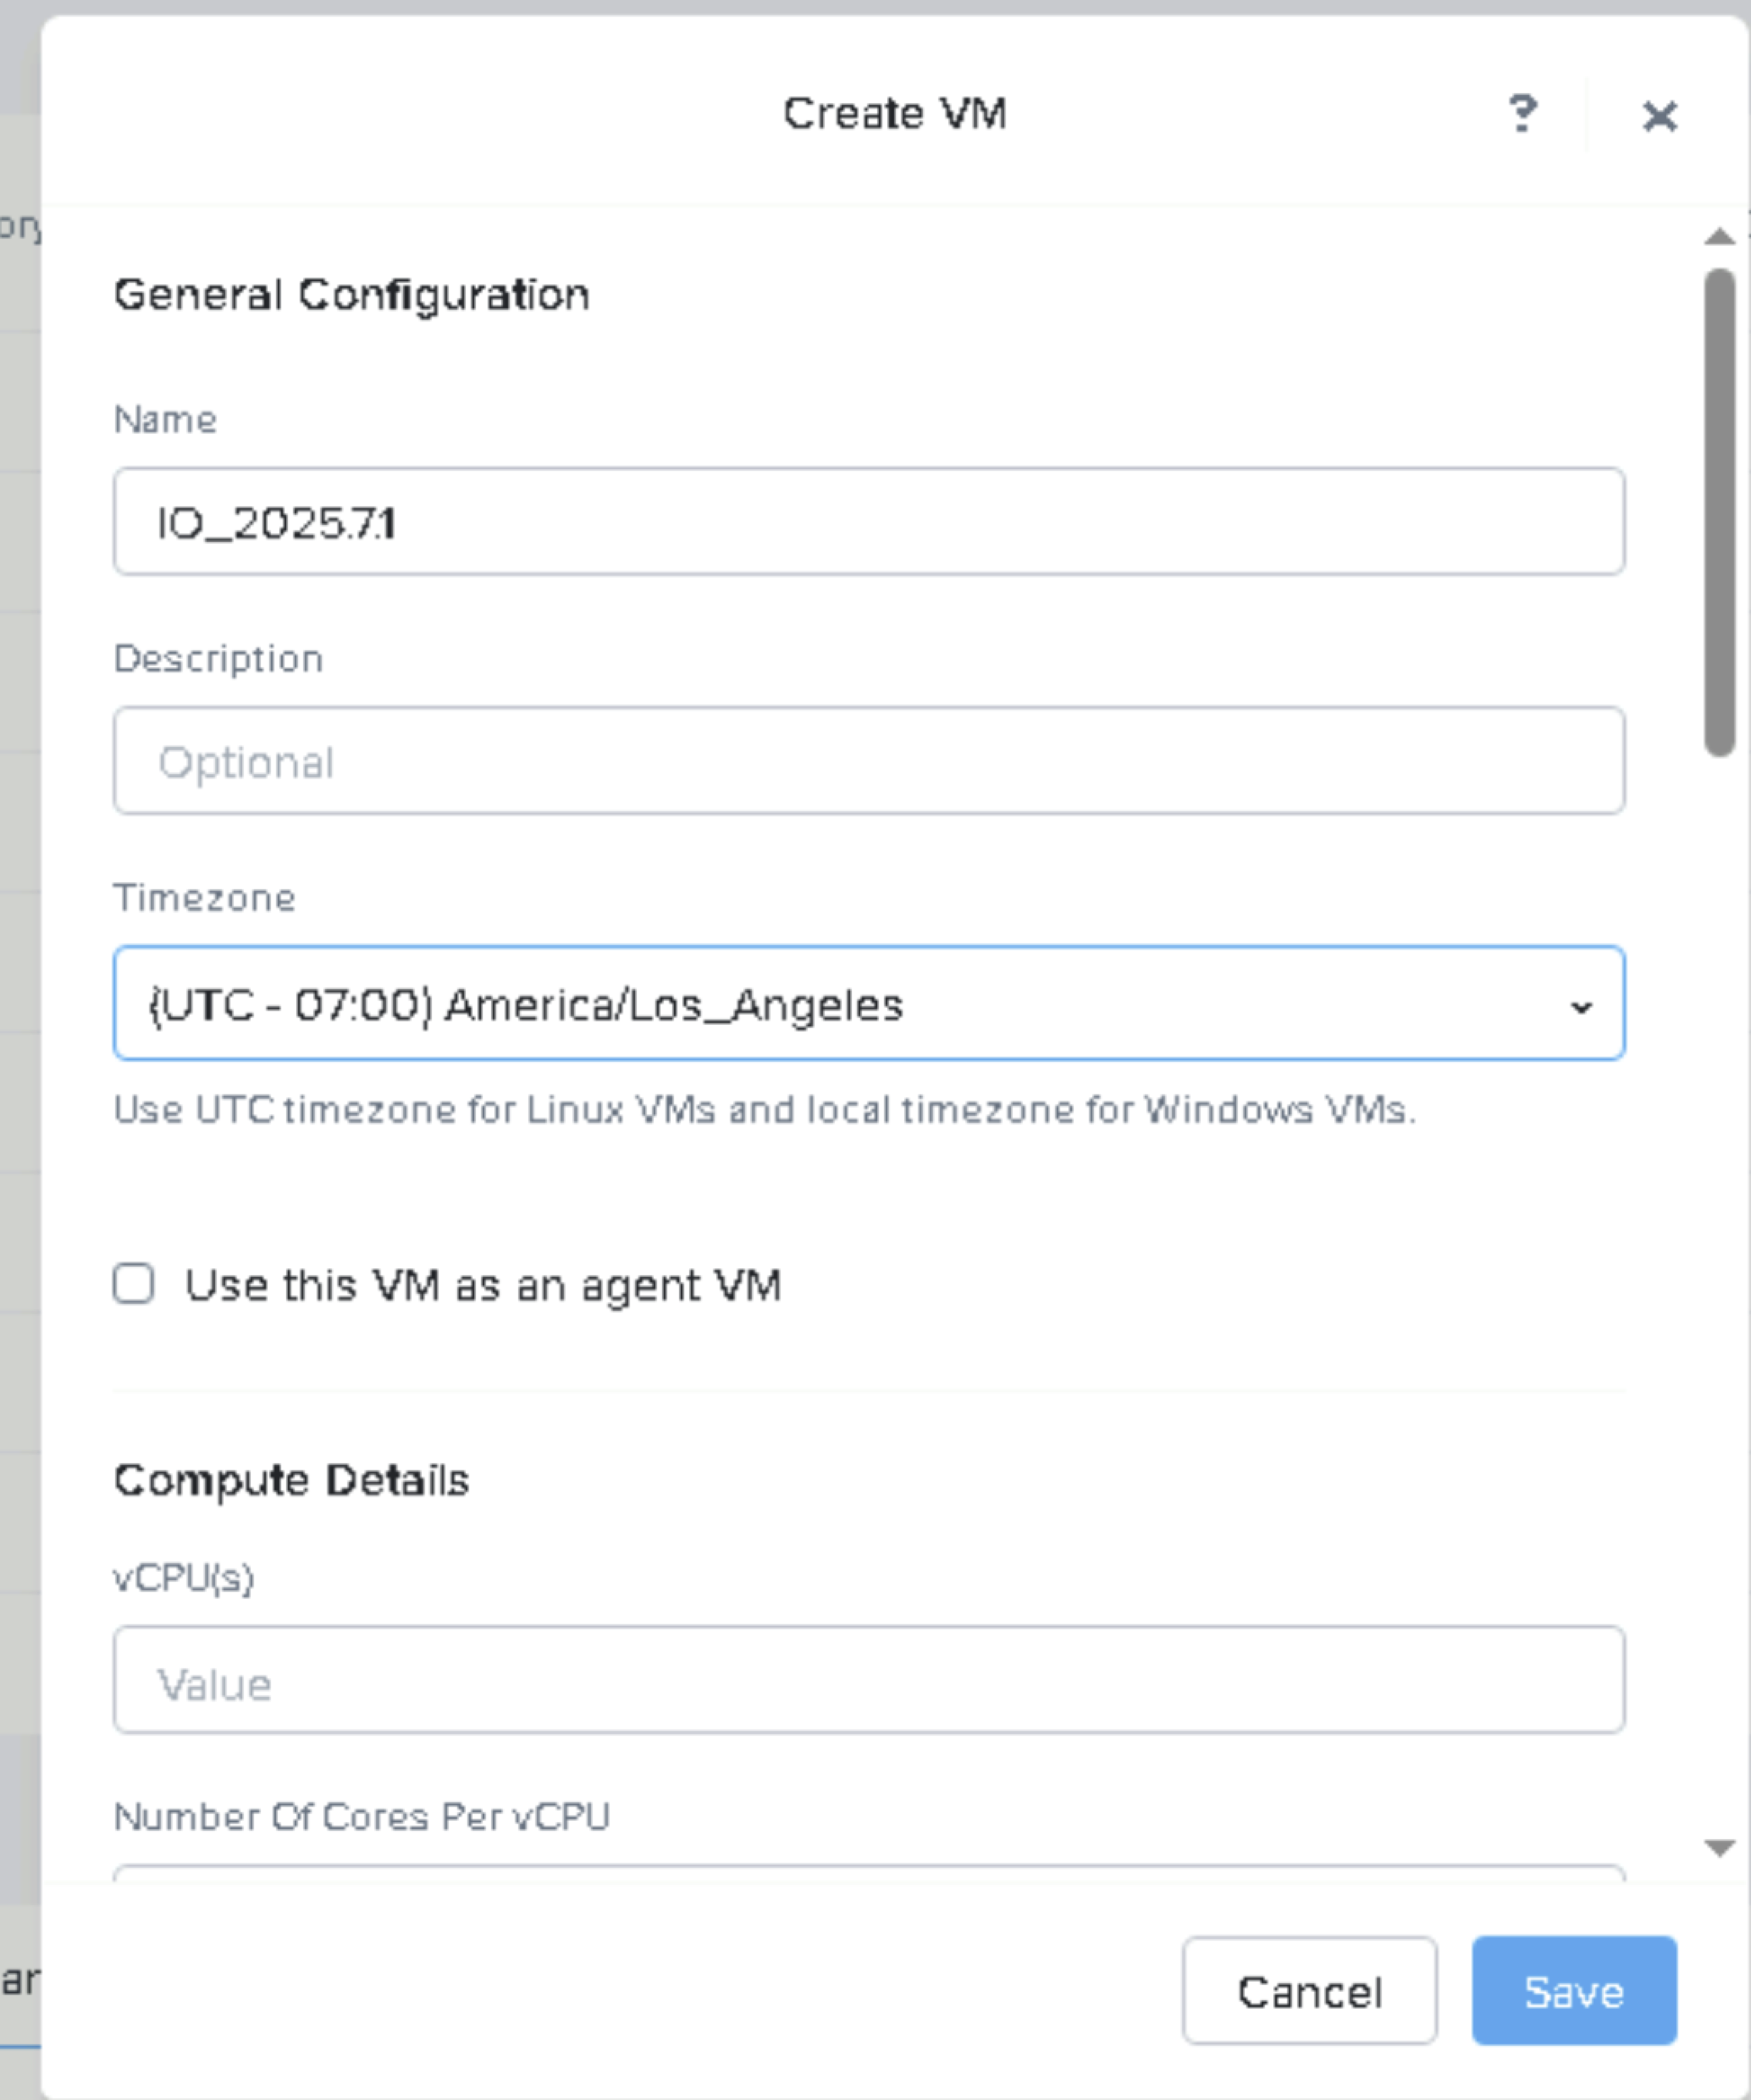
Add CPUs and Memory as required. Example: 16 cores (4 sockets x 4 cores) and 64 GB RAM.
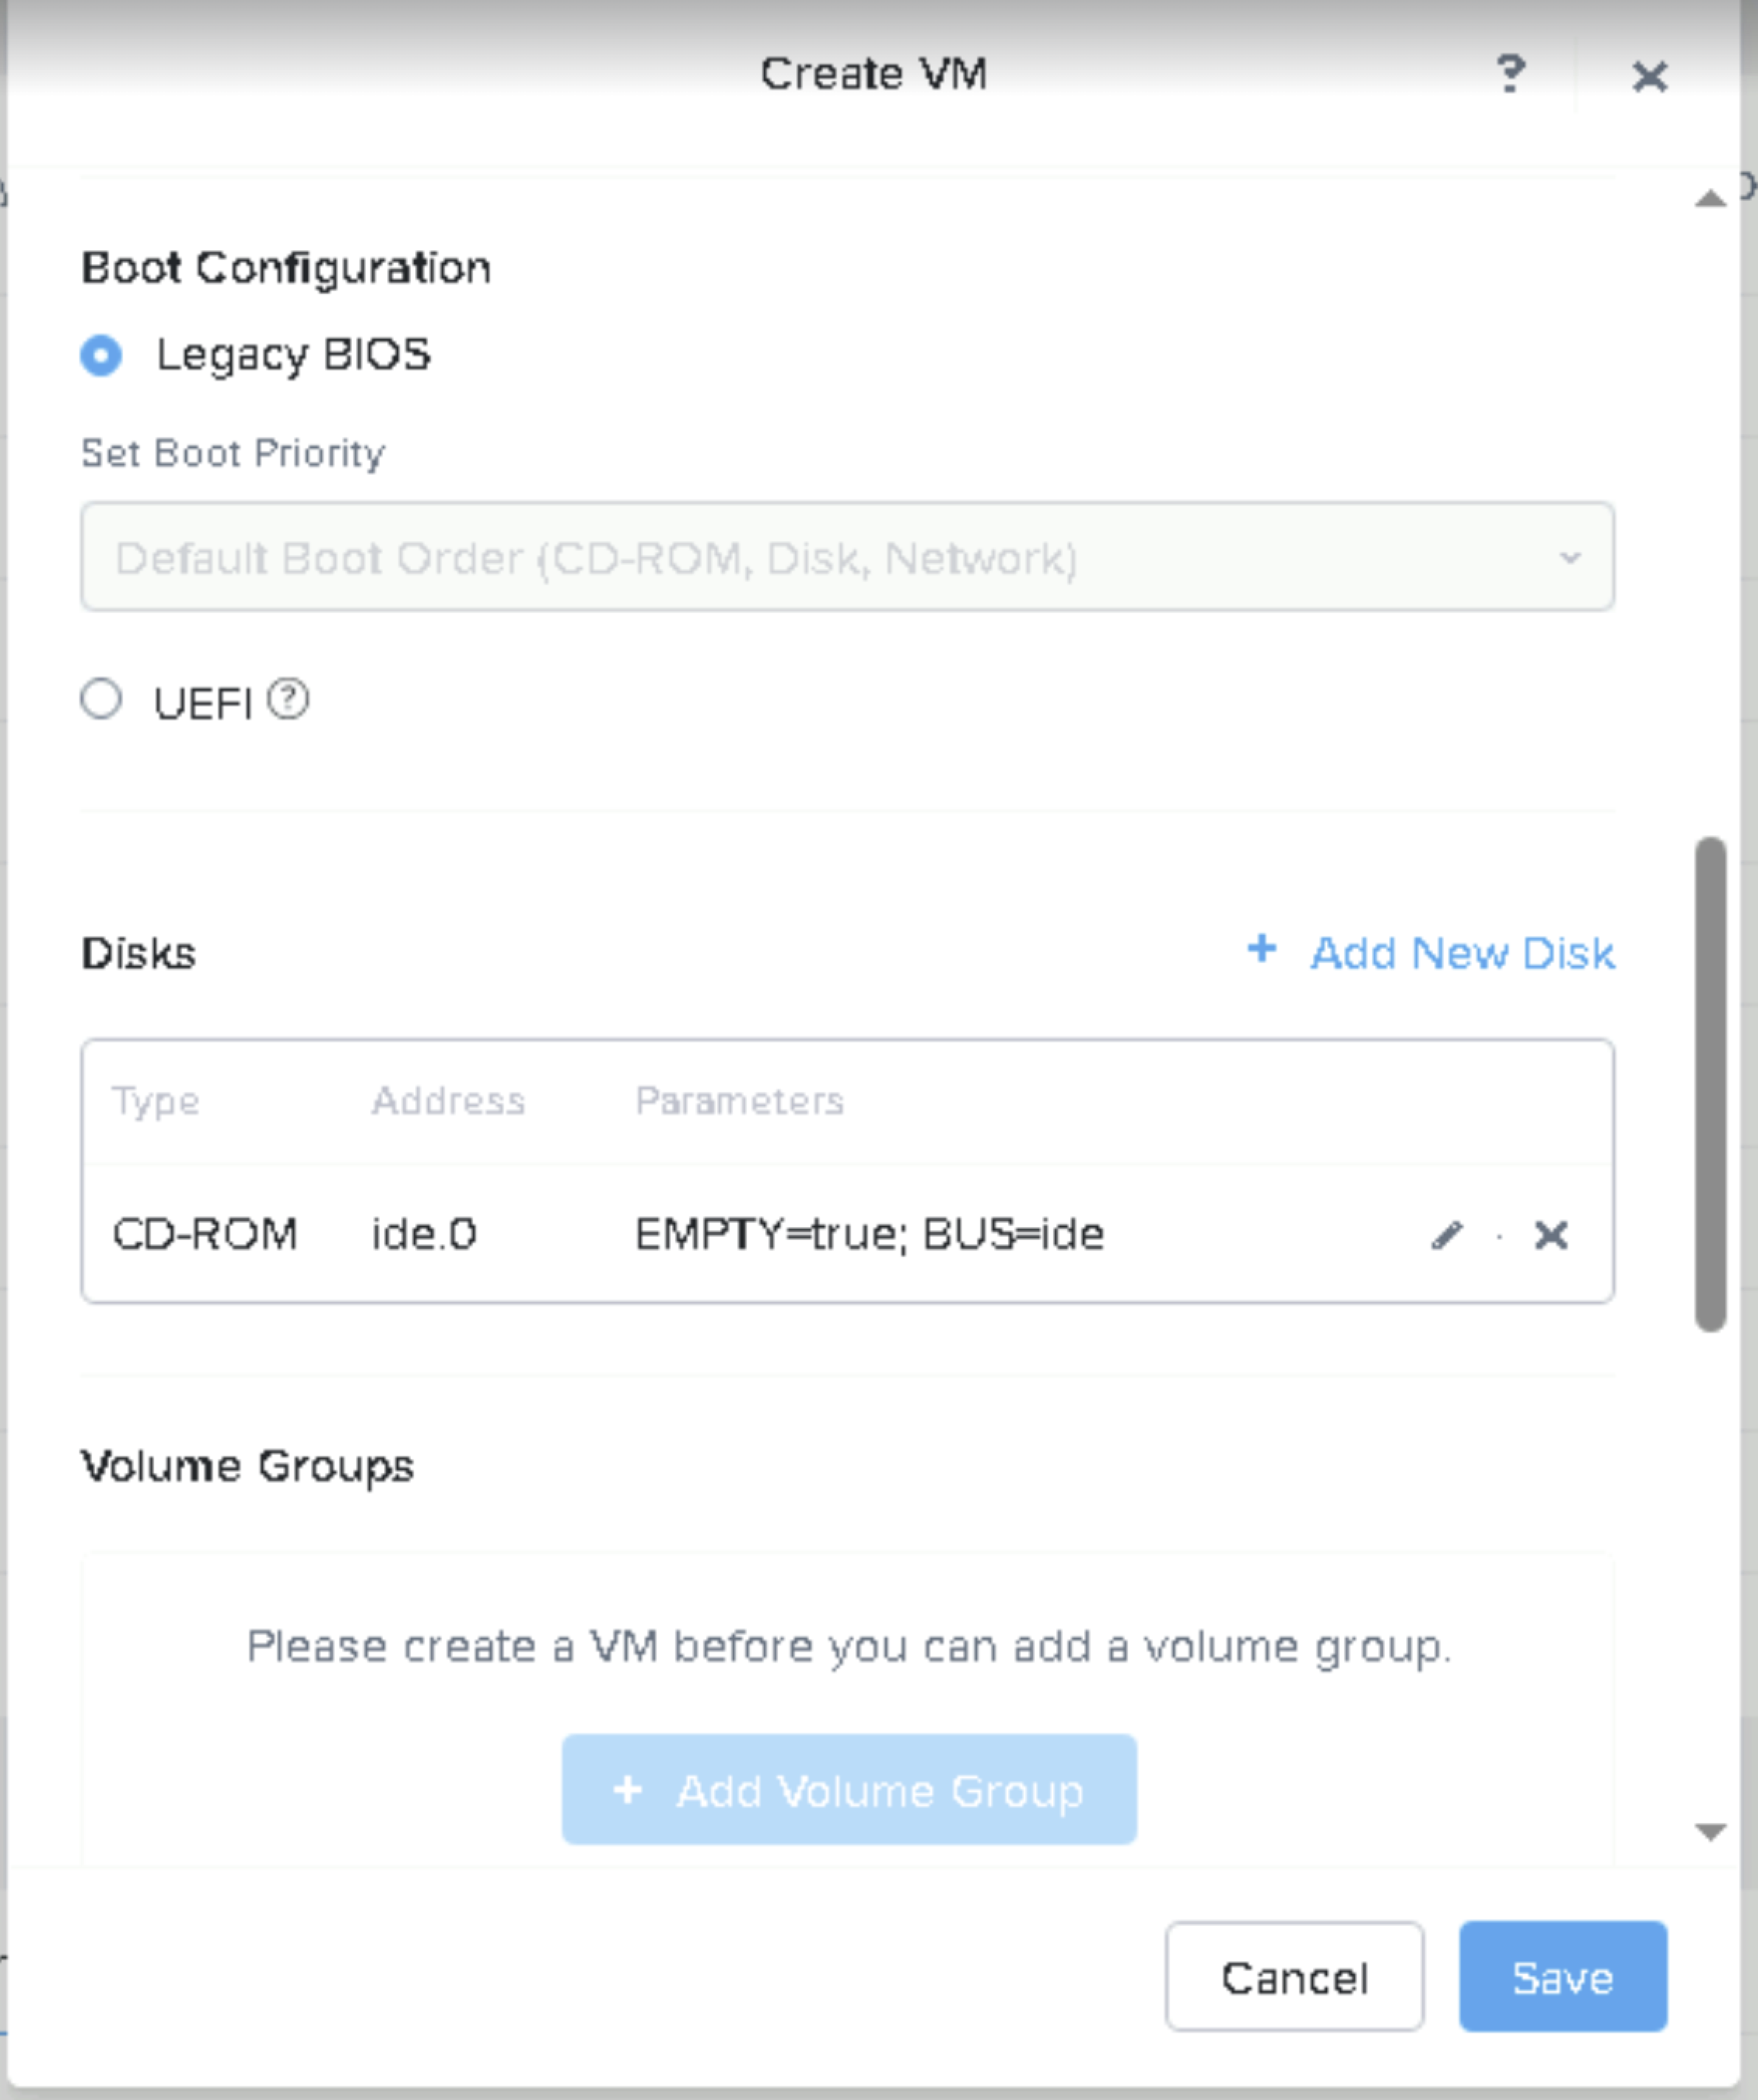
For Boot Configuration – Leave “Legacy BIOS” enabled, and remove the CD-ROM:
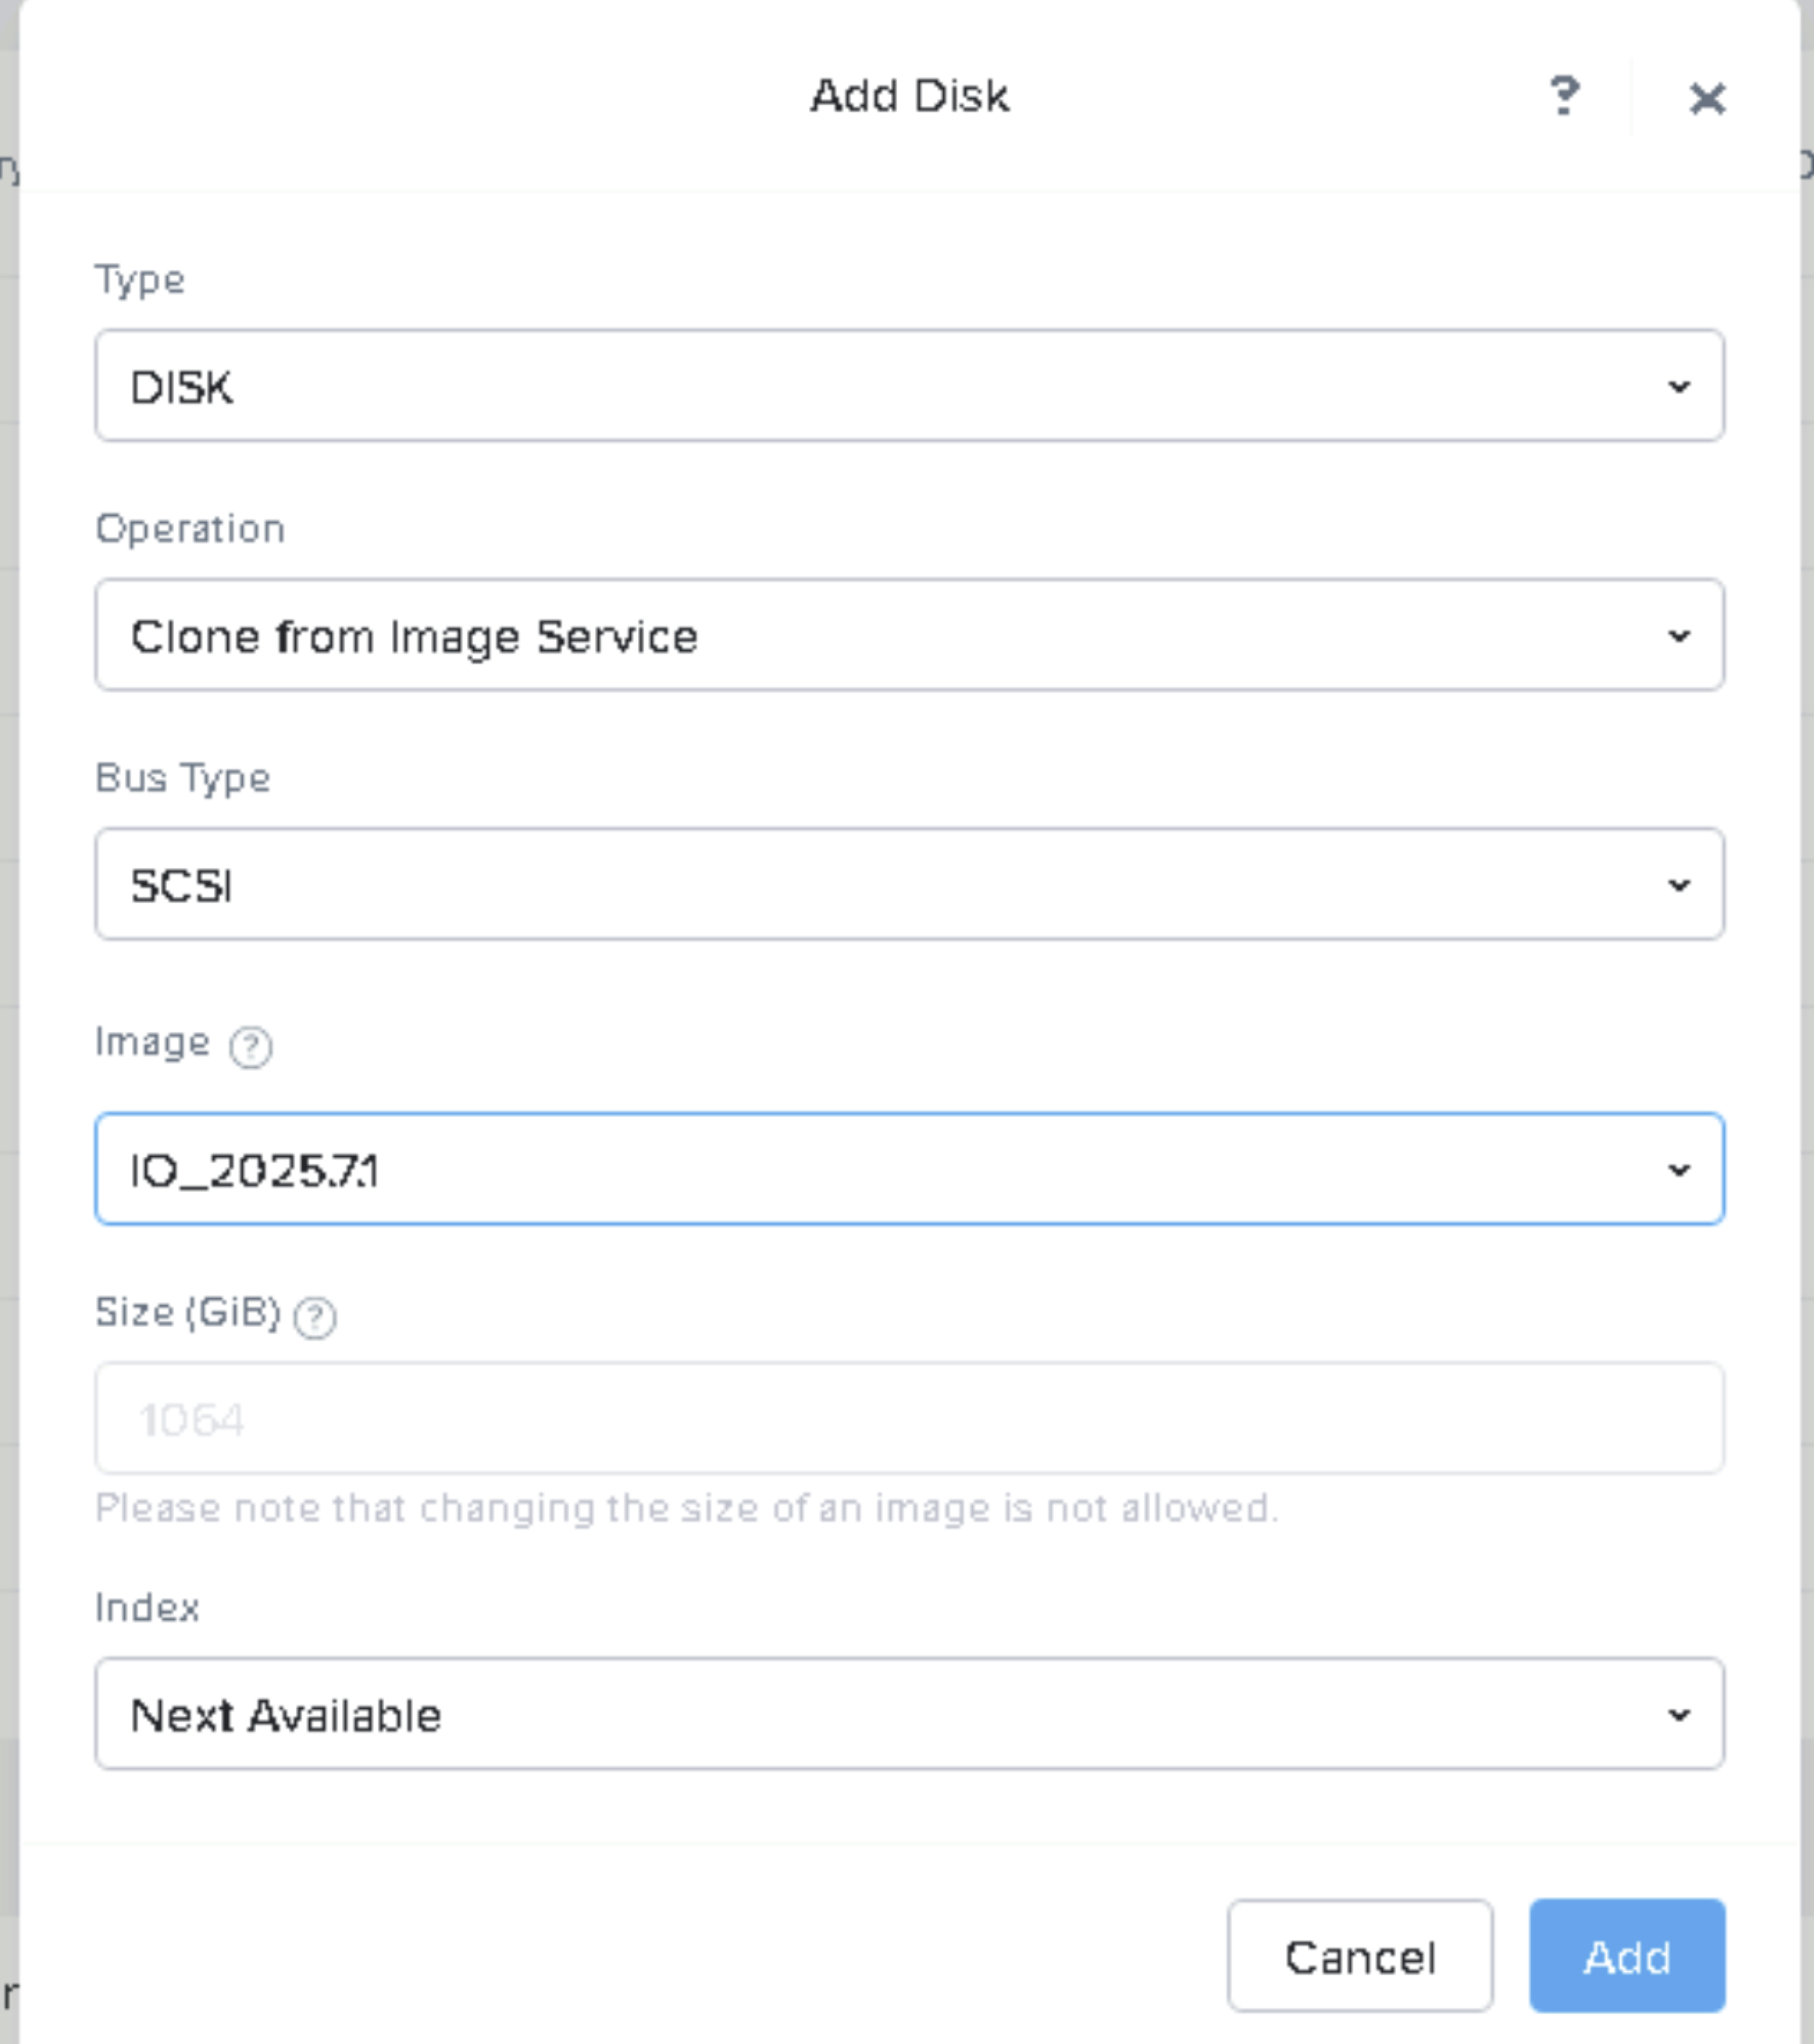
Click on “Add New Disk” and specify the details as follows and also specify the “Image”created earlier and click on “Add”.
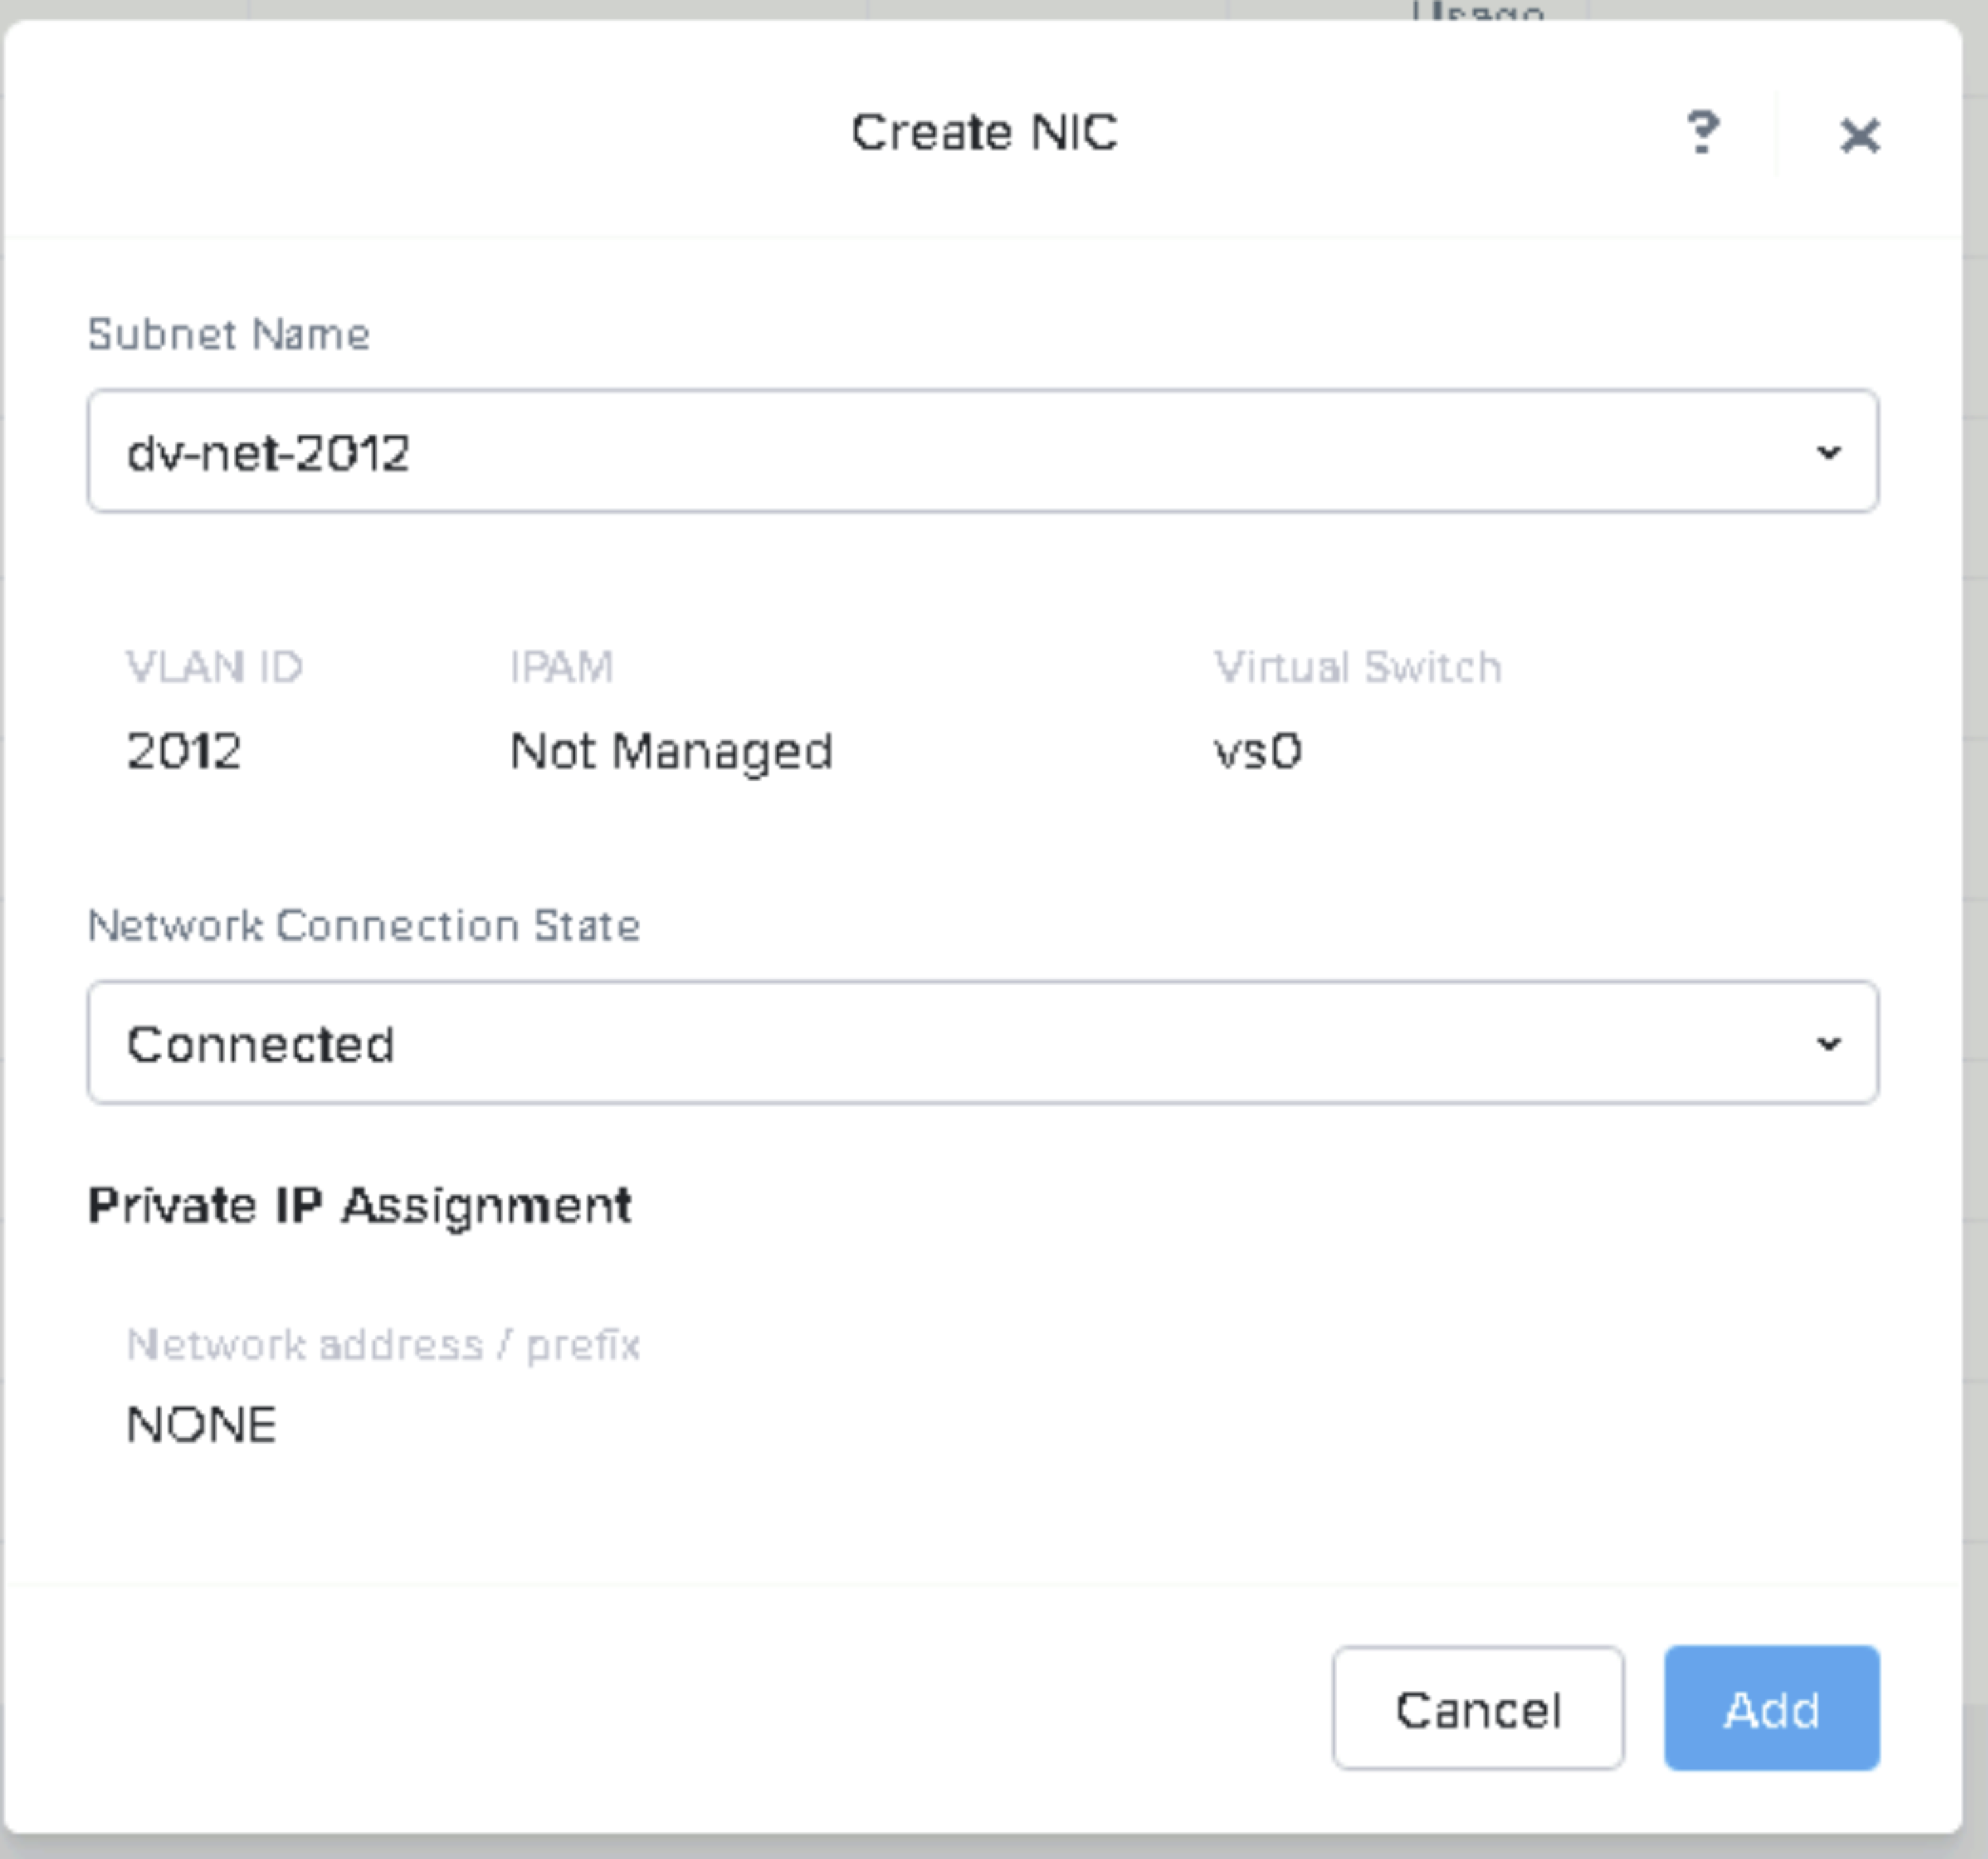
Add up to five network adapters. Configure each as needed and click Add.

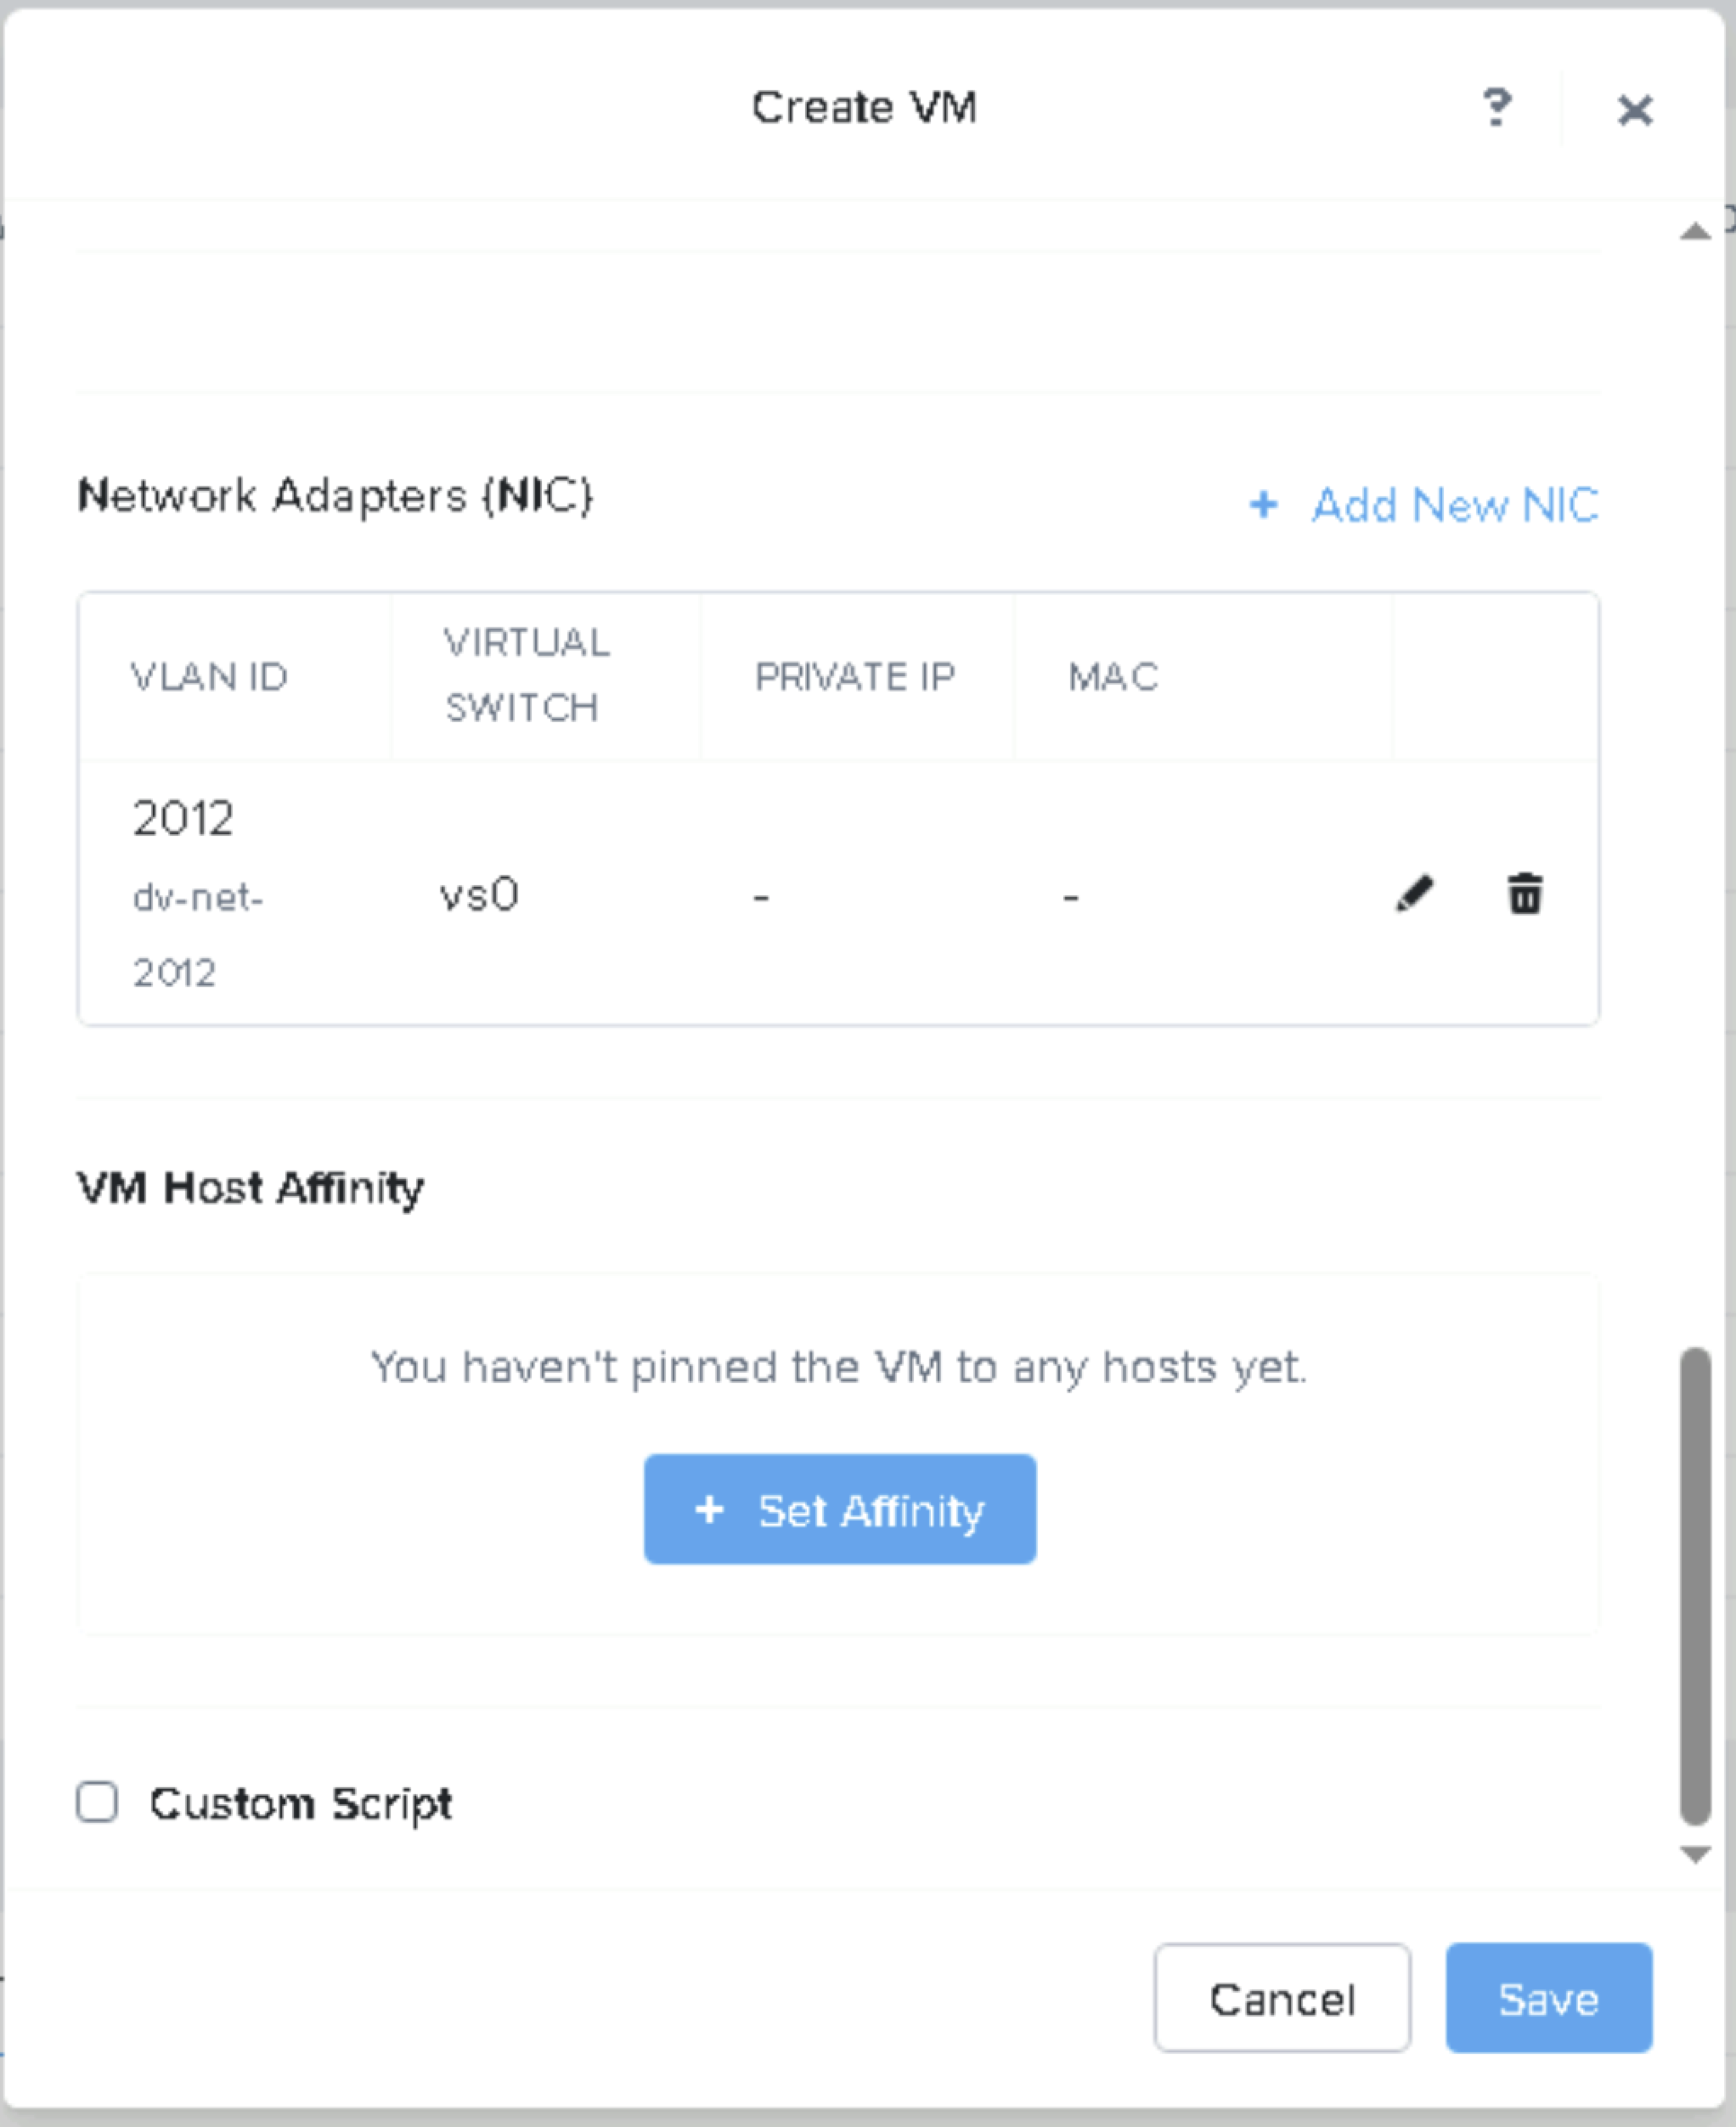
Click Save.
Right click on VM and click “Power On”. (After it powers on you can launch the console ifyou want).

Once boot completes, the VM’s IP address will be displayed in the Nutanix VM Console.

Use the IP address to log in and cnfigure IO and other settings as usual.