Configure Azure AD as IO SAML-Based SSO Provider
To use the Azure Active Directory (AD) as the SSO identity provider (IdP) with Virtana IO, you must add Virtana IO to Azure AD as a managed SaaS application. You then assign users to the application in Azure.
About This Task
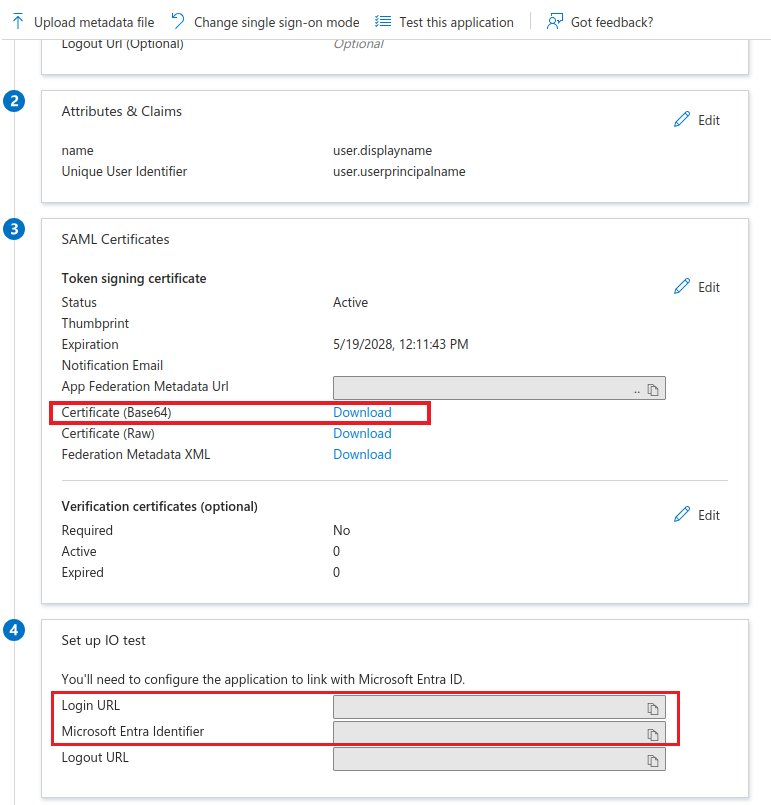
After configuring the IdP, you must copy the Login URL, and Microsoft Entra Identifier, and download Certificate (Base64) which is needed for Virtana IO.
Prerequisites
You need an Administrator role in Microsoft Azure with privileges to create applications and assign users and groups.
You must have set up a SAML 2.0 application with your IdP.
You must have Administrator privileges in both IdP and Virtana IO.
You must have an appropriate Virtana IO license to use SSO.
Steps
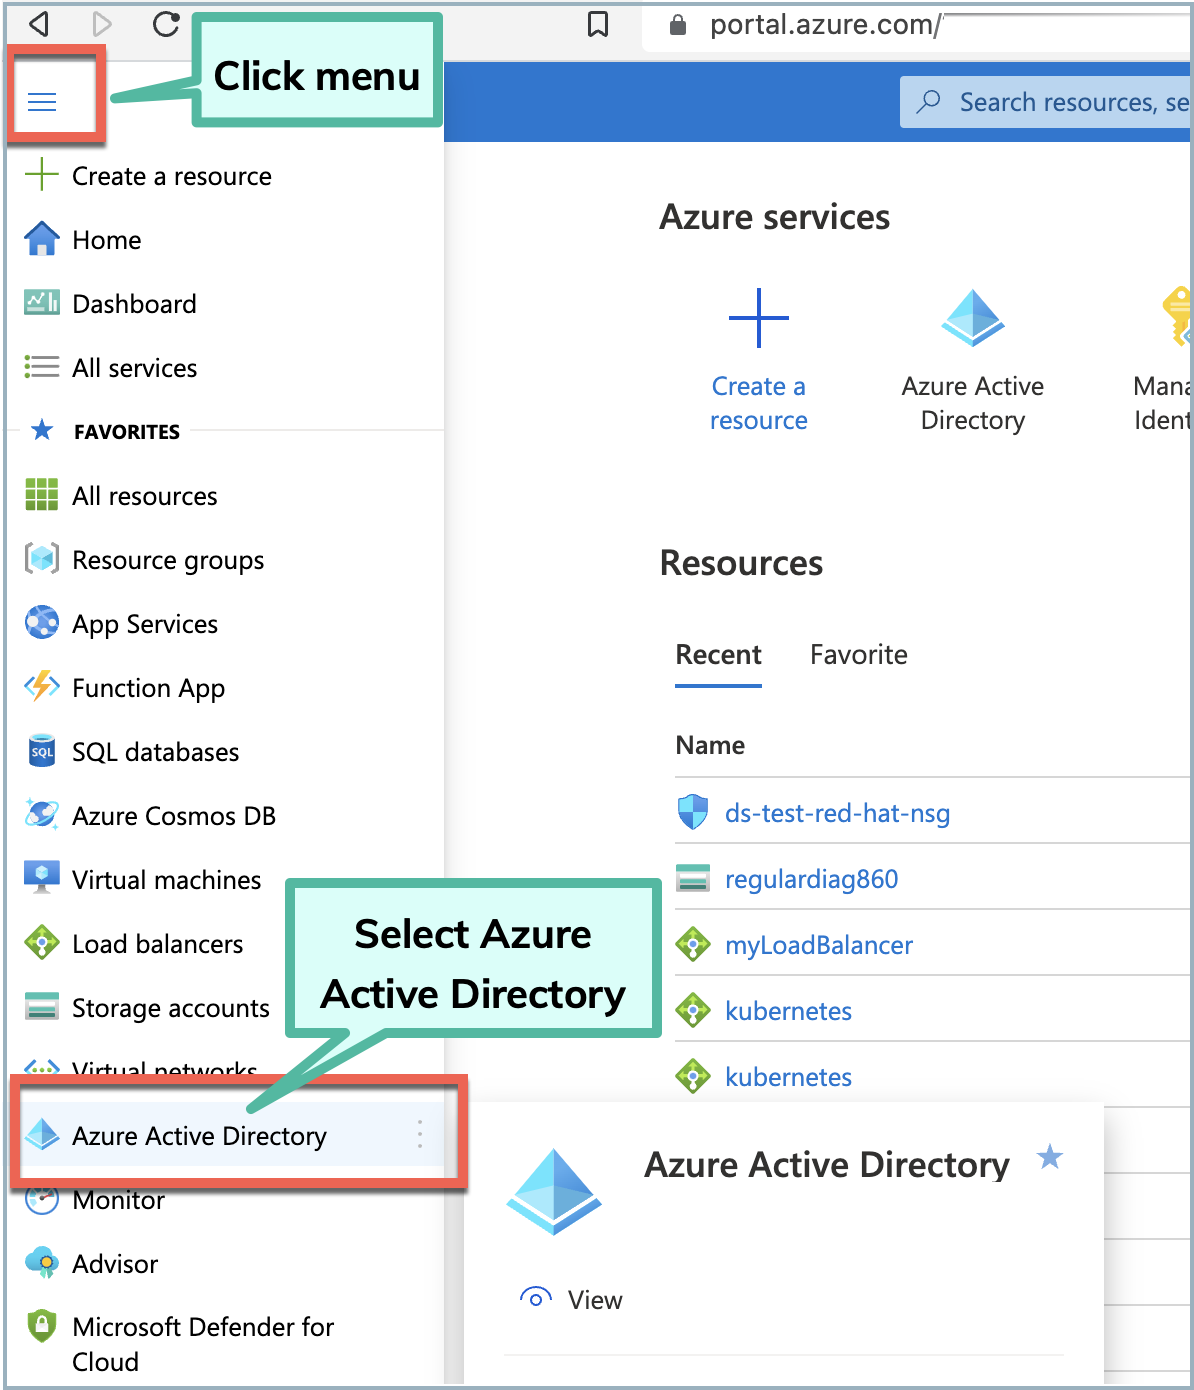
Log in to Microsoft Azure as Administrator.
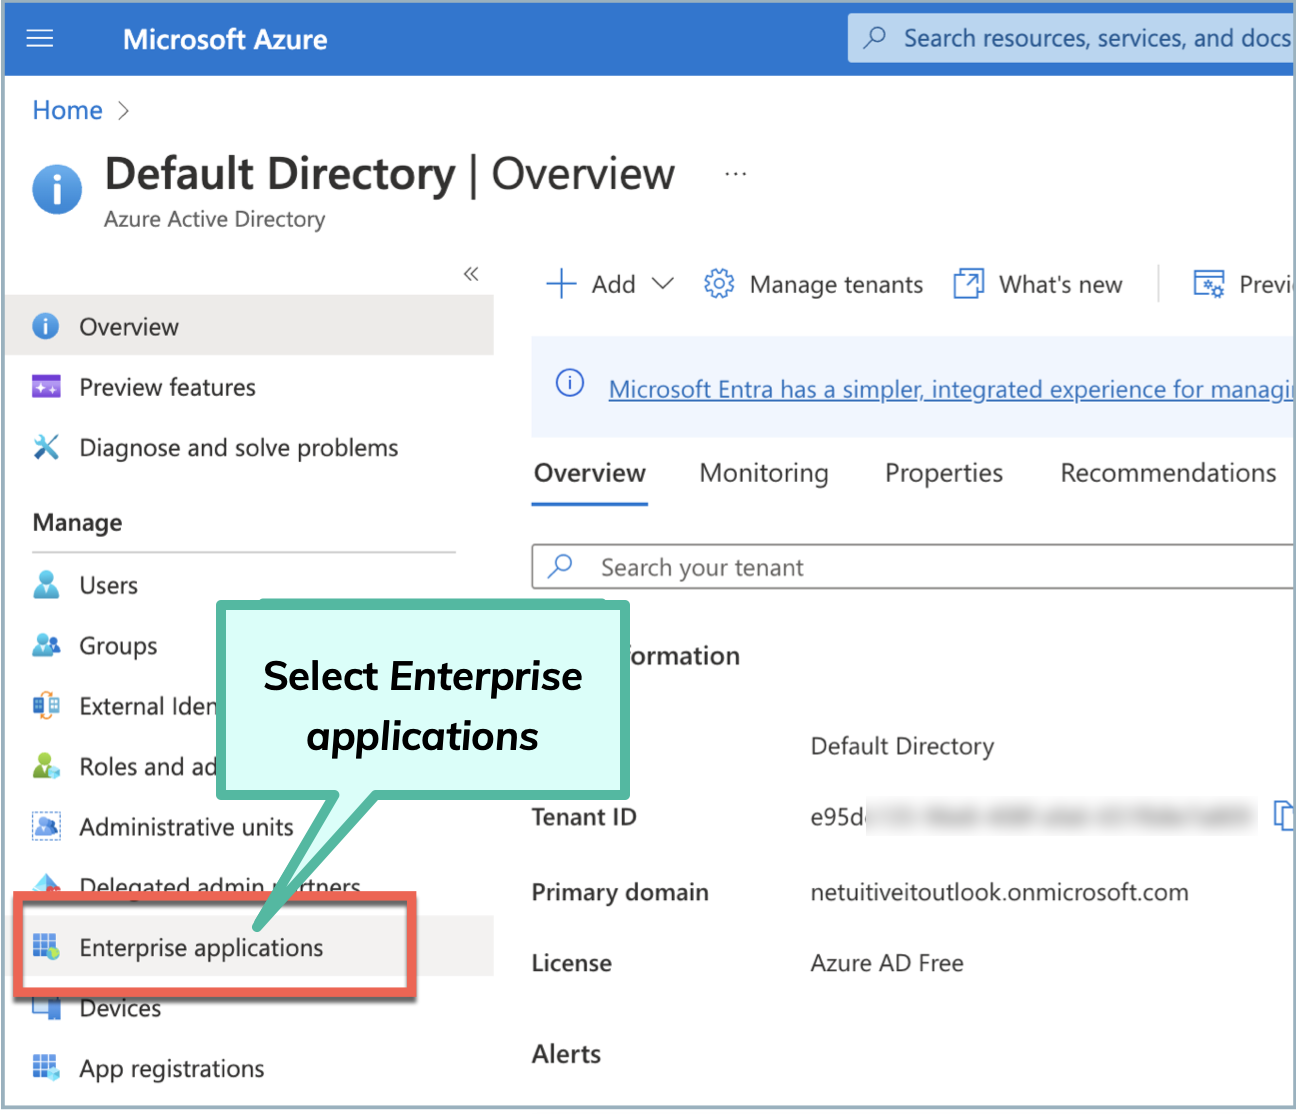
Click the hamburger menu in the navigation pane and select Azure Active Directory>Enterprise applications.
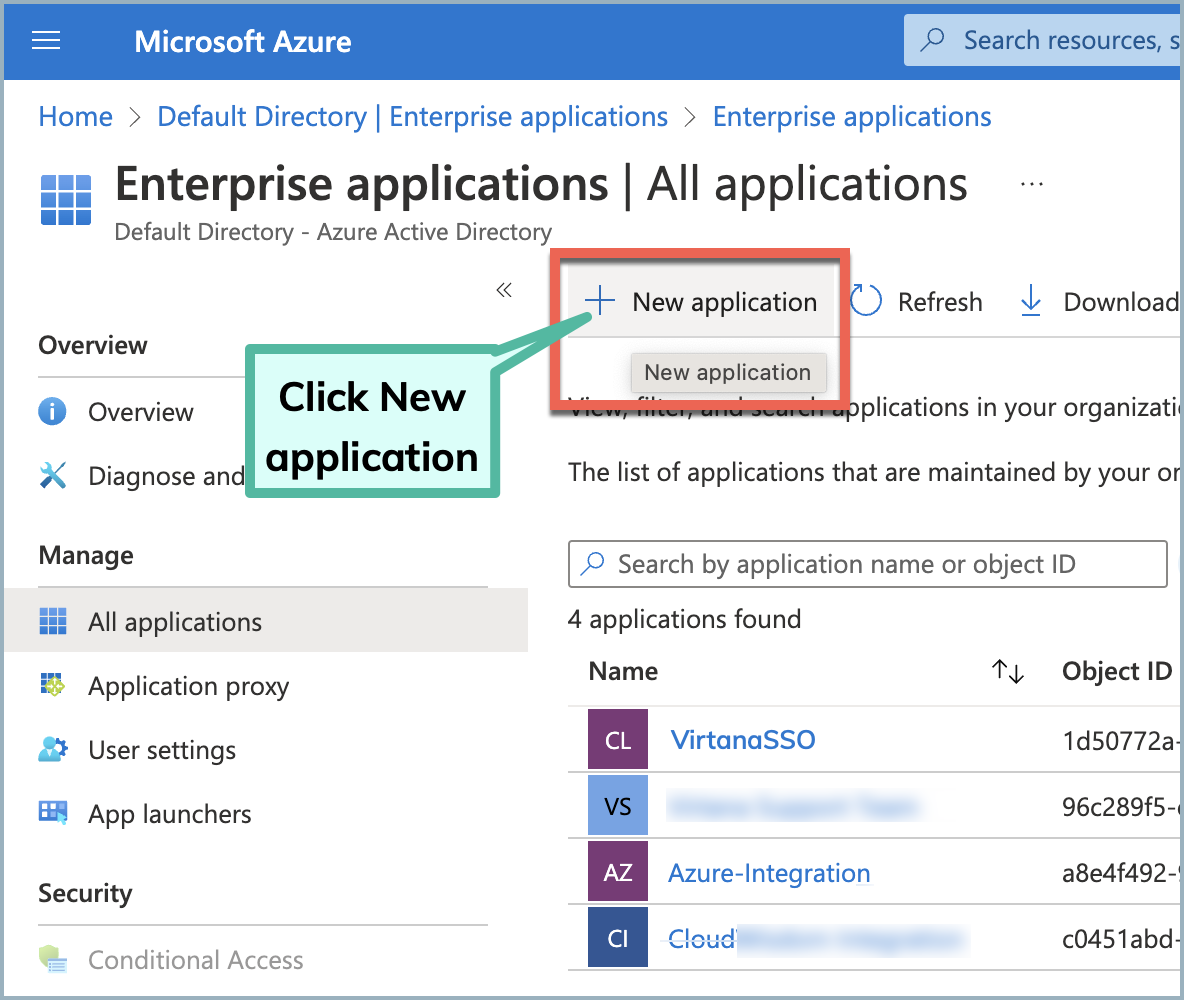
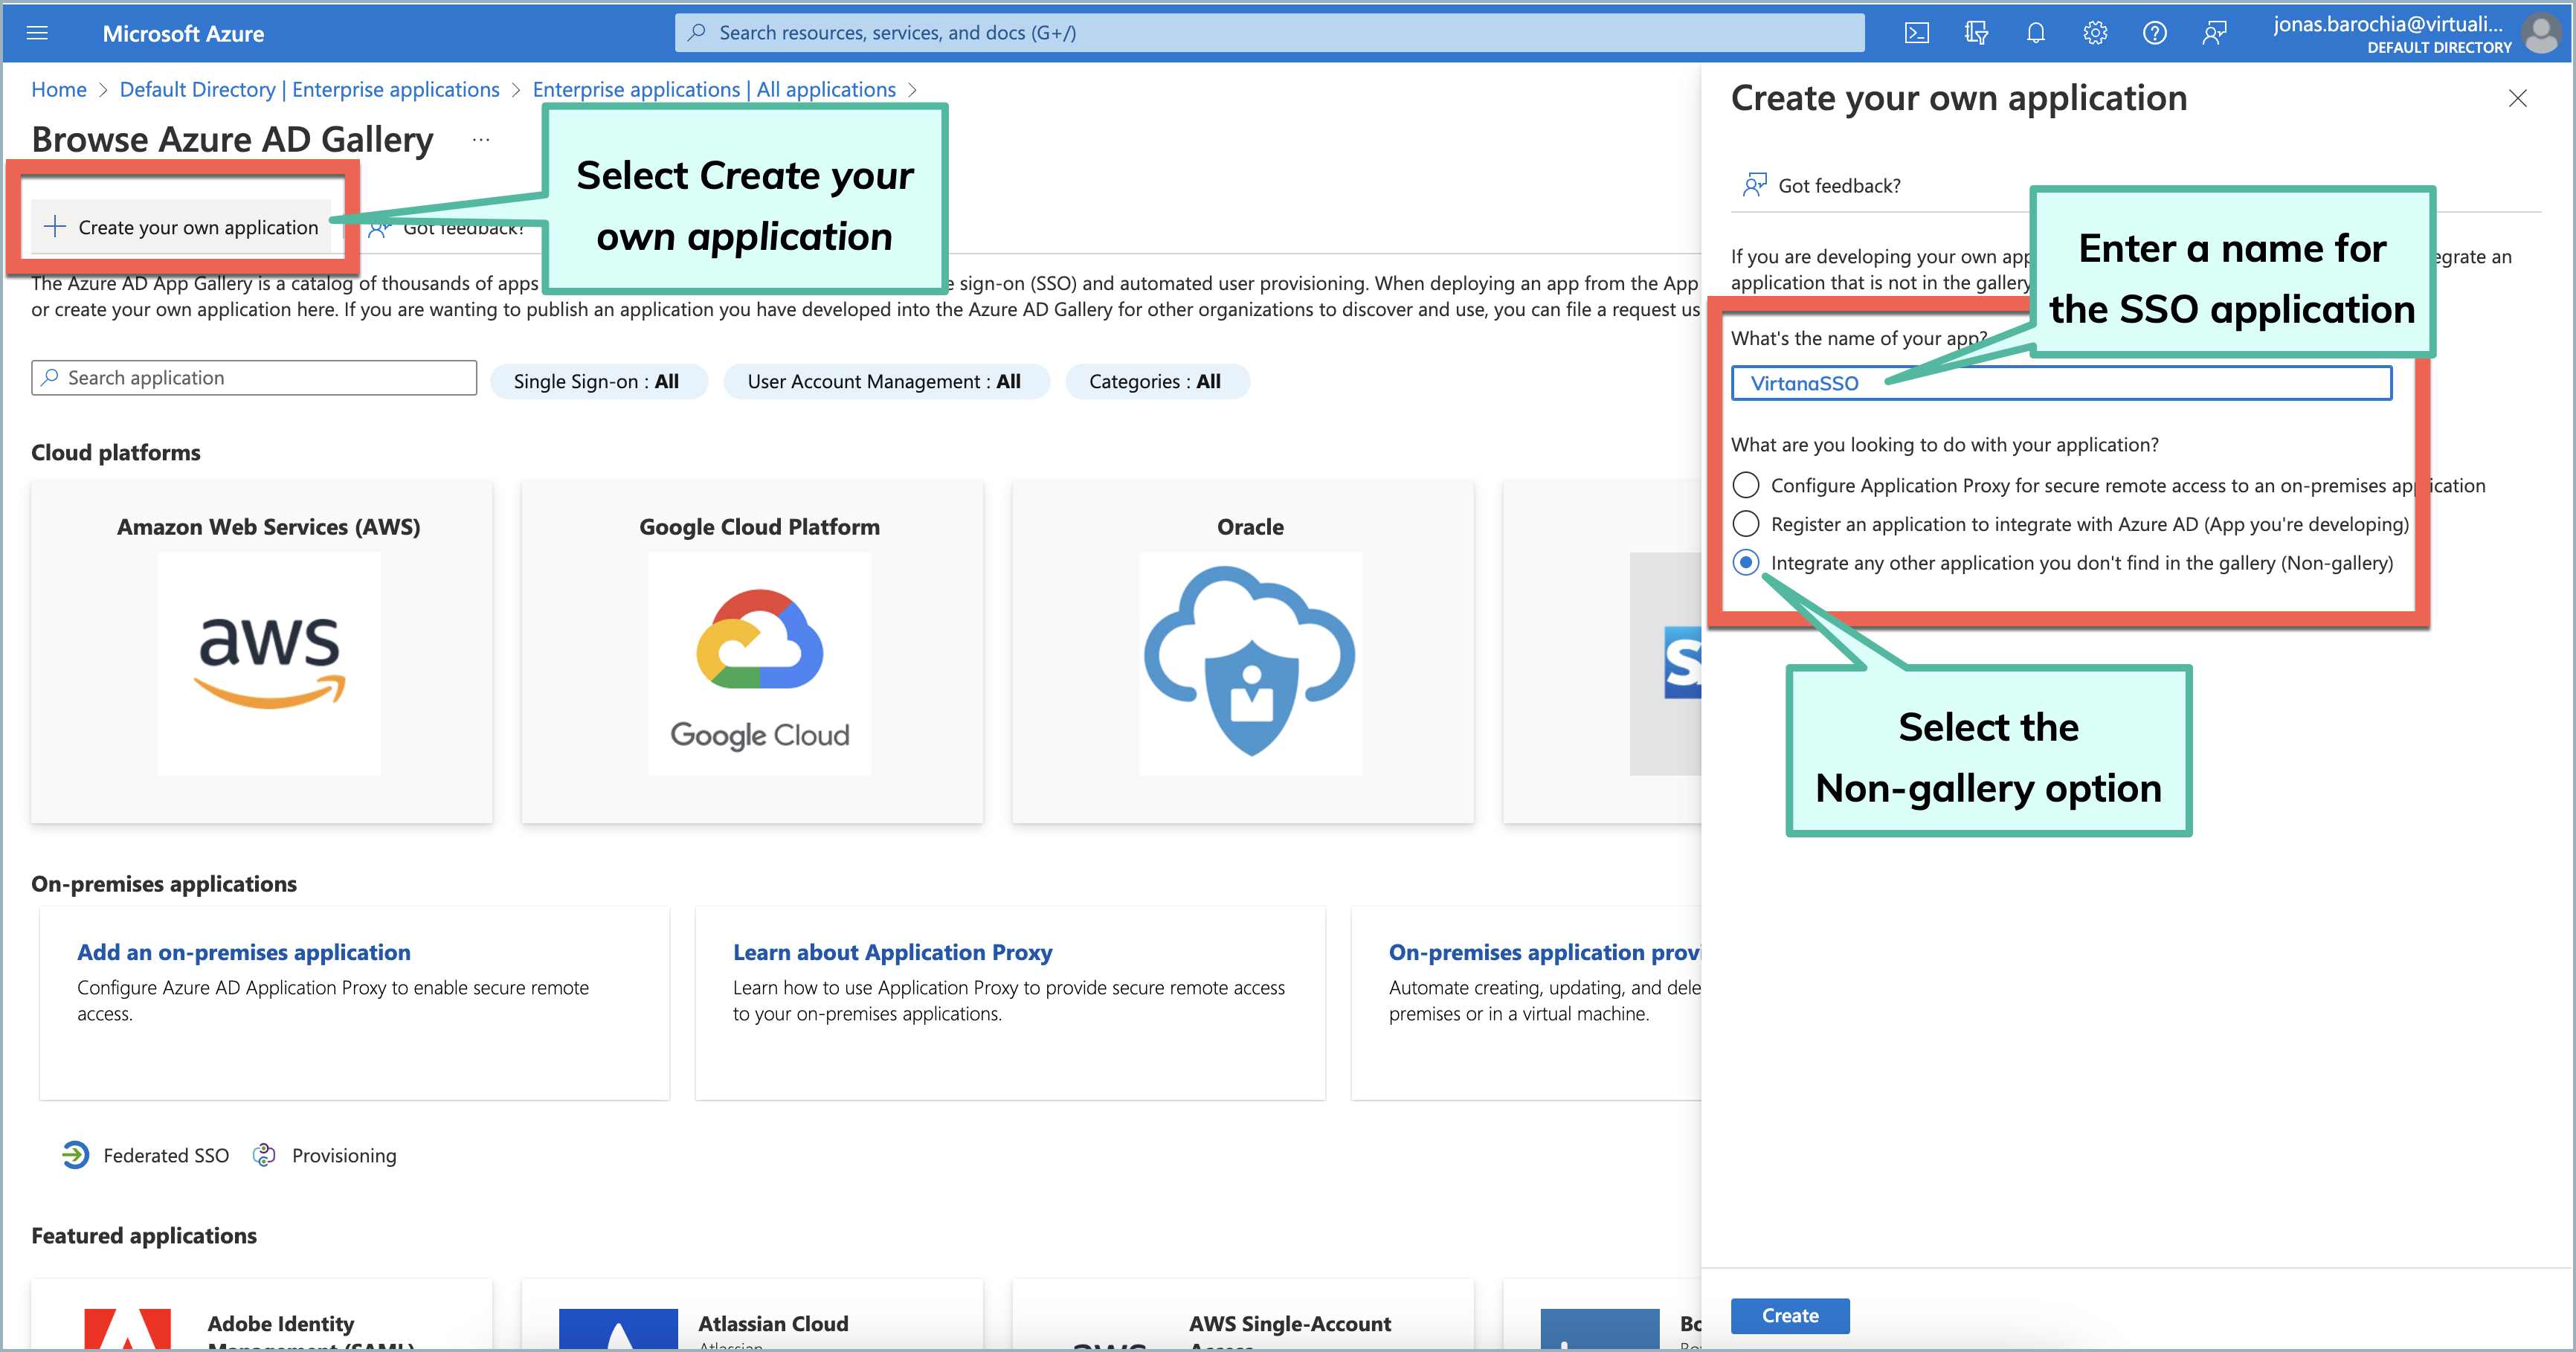
Click New application and Create your own application, then complete the following:
Enter the name of the application.
Select Integrate any other application you don't find in the gallery (Non-gallery).
Click Create.
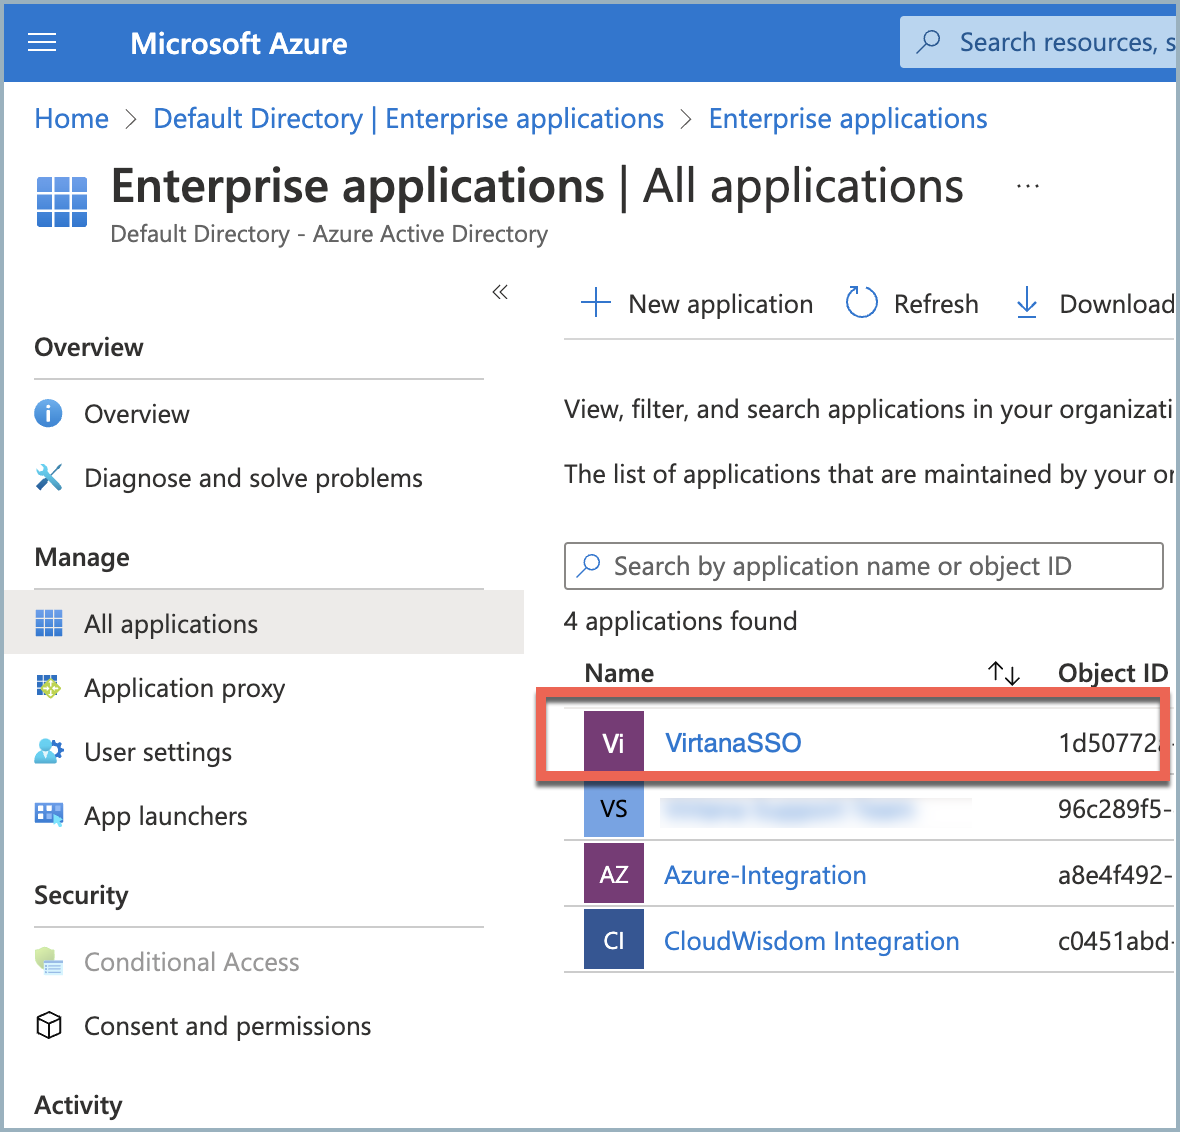
Navigate back to Azure Active Directory>Enterprise applications>All applications and select the application you just created.
It might take a minute before the new application displays.
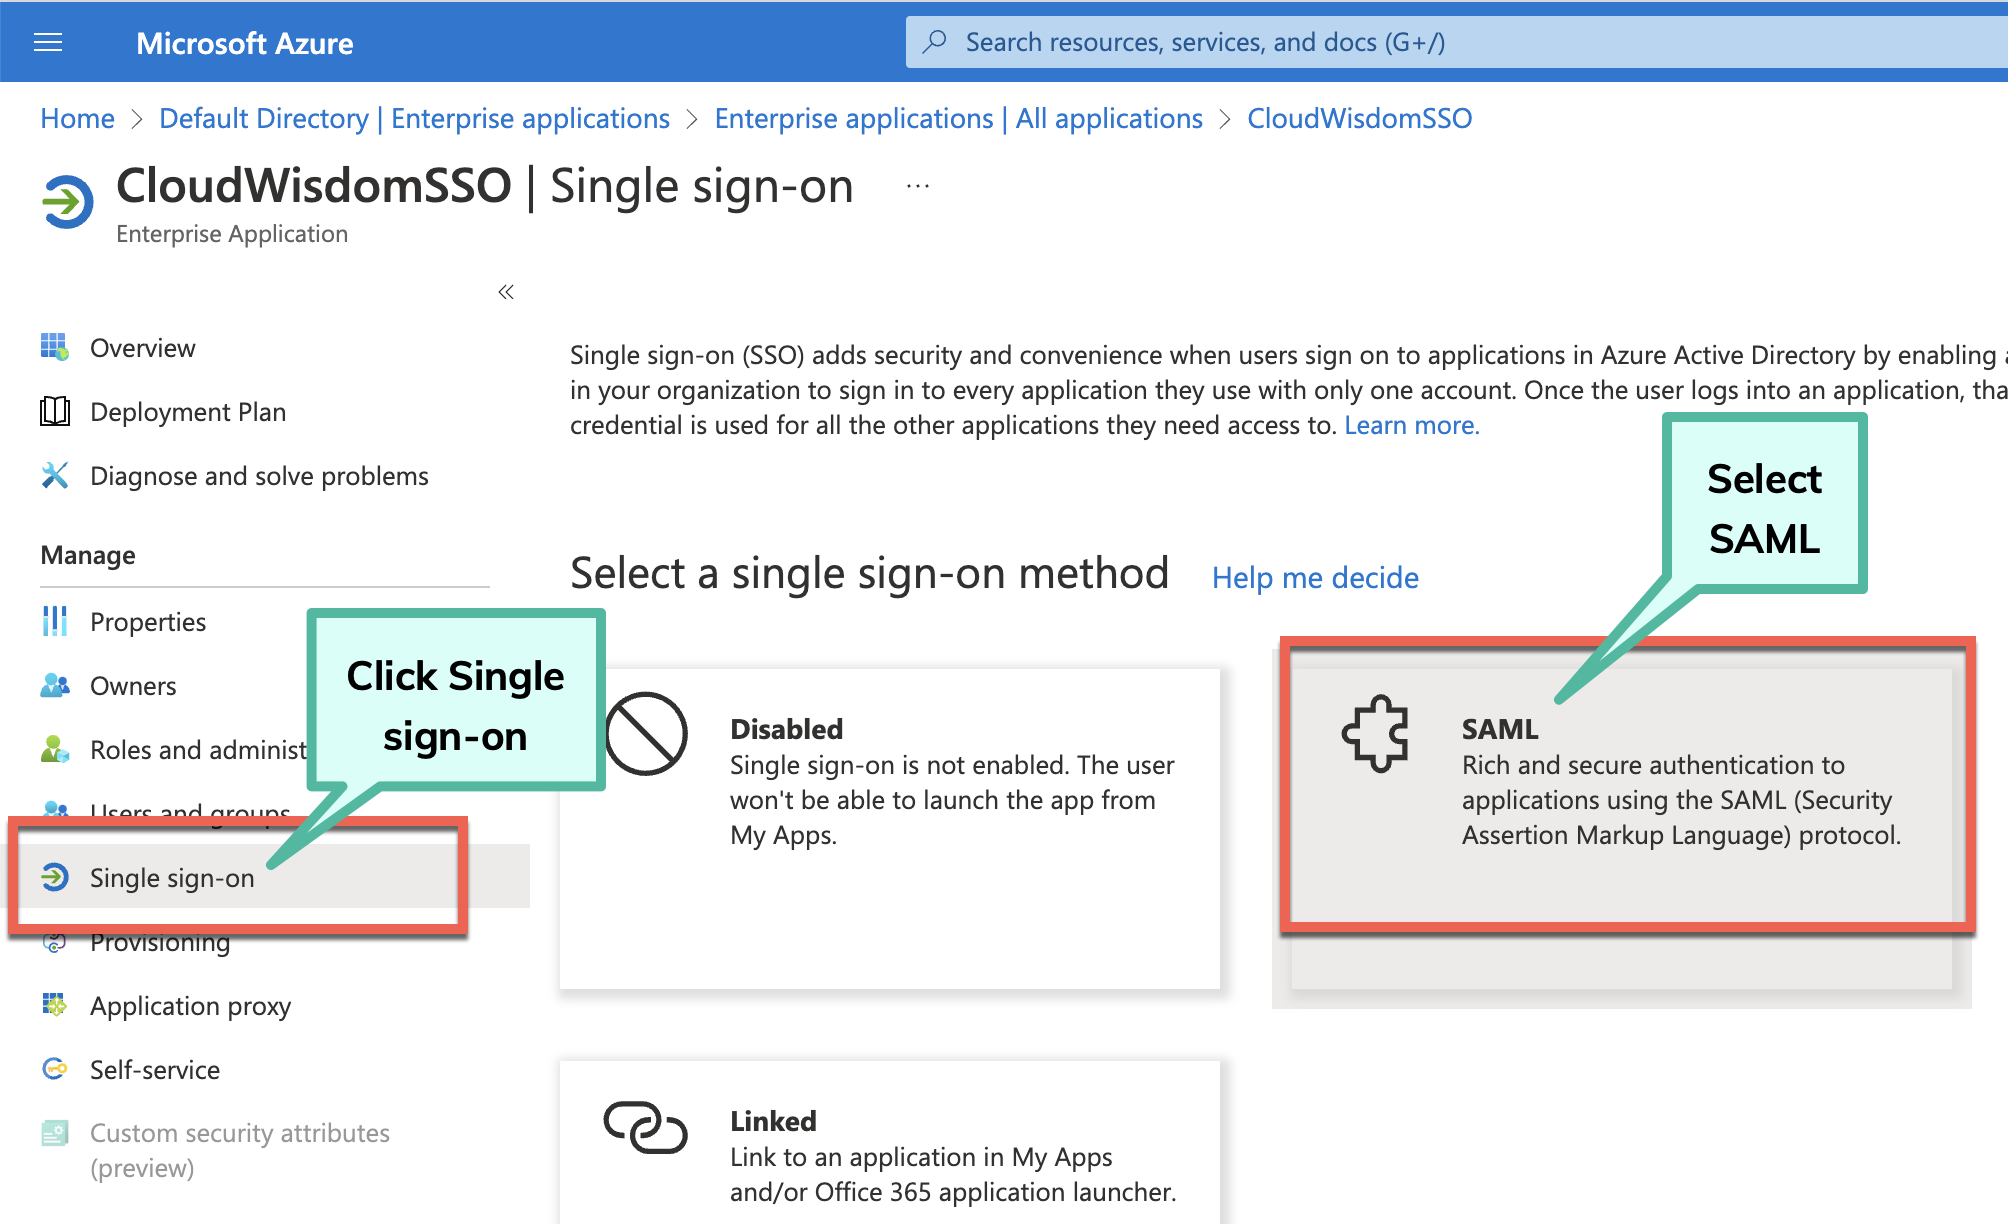
In the left navigation pane, click Single sign-on and select the SAML option.
On the SAML-based Sign-on page, click Edit for Basic SAML Configuration and complete the following:
Set the SSO URL to https://[FQDN]/api/sec/saml/login.
Set the Audience URLto https://[FQDN]/.
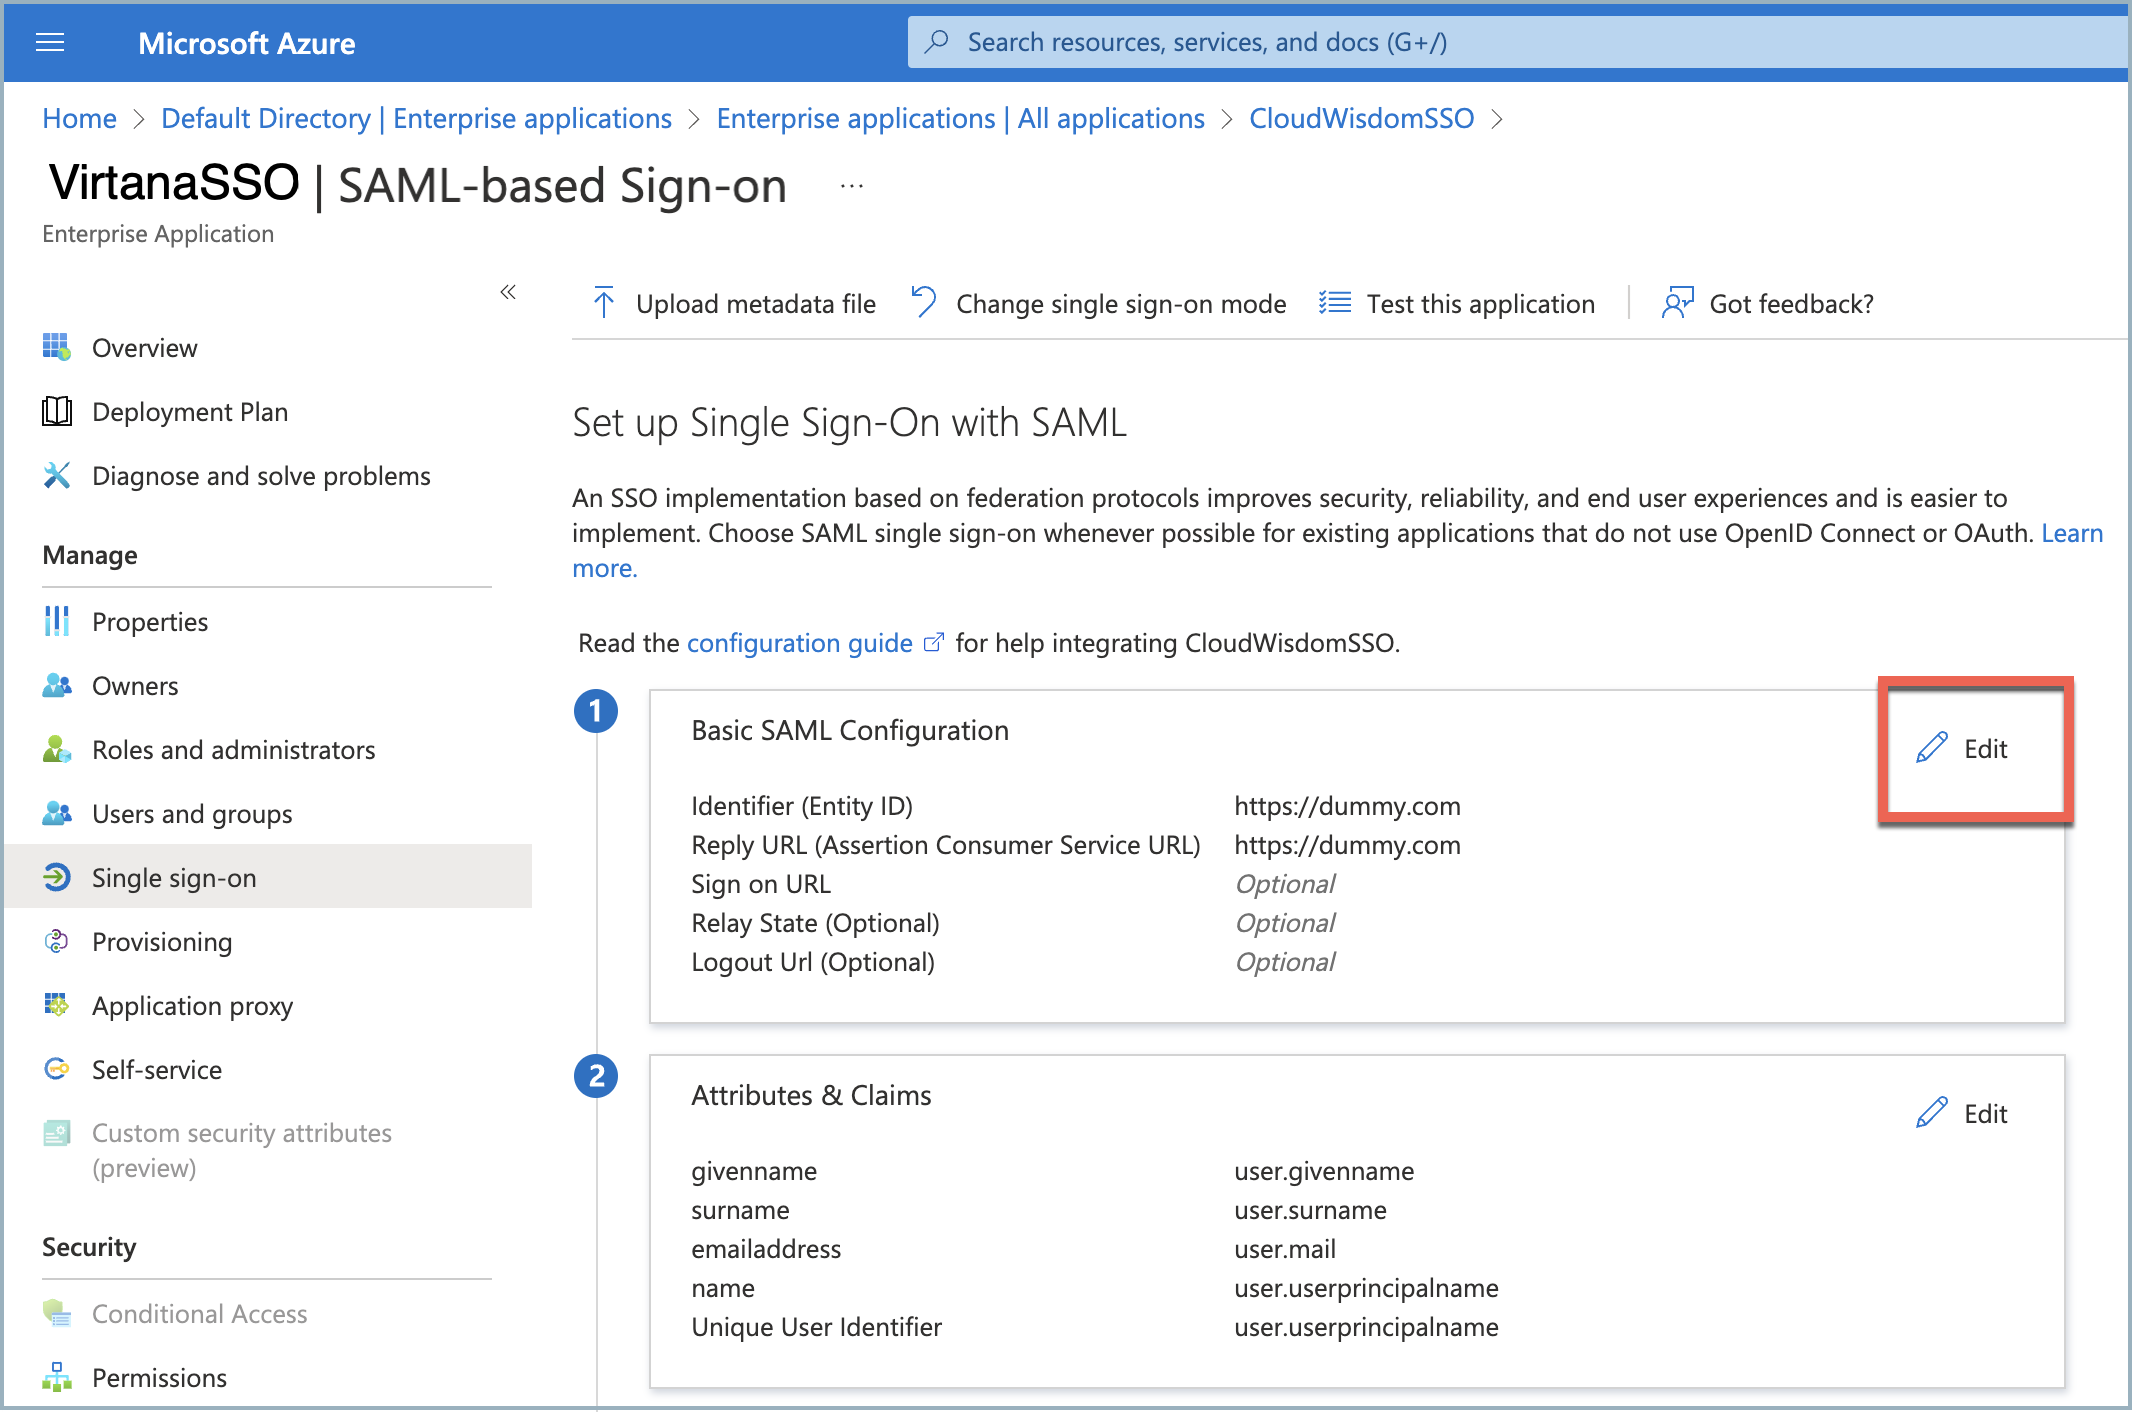
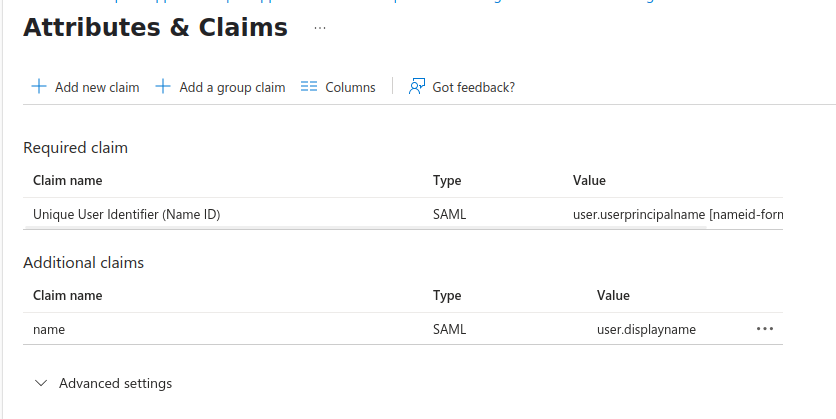
Click Edit for Attributes & Claims and add or update the following fields, which will be used to authenticate the user:
name:
user.displaynamegroups: user.group
Leave Unique User Identifier unchanged.
Important
The Azure AD user profile must have firstName, lastName, and Mail configured. Otherwise, the integration will fail.
Ensure that the claim name is properly configured.
In the SAML Certificates section, copy the values for Login URL and Microsoft Entra Identifier.
You will need to add this URL in Virtana IO when you configure SSO.
Navigate to Users and Groups , click Add user/group and select the users or groups to be added to the SSO application.
If you do not have the required privileges to manage users and groups, contact the administrator at your company with those rights.
This completes the creation and configuration of the SSO application in Azure. You can log in to Virtana IO to proceed with setup.